Category: Main Course

  • Dajaj Mishwi (Lebanese Grilled Chicken)

    Dajaj Mishwi (Lebanese Grilled Chicken)

    Craving juicy, garlicky, perfectly charred grilled chicken with real Lebanese flavors? Then you should try out this dajaj mishwi recipe. Made with a simple but intensely flavorful marinade of lemon, garlic, vinegar, and warm spices, this traditional Lebanese BBQ chicken is absolutely irresistible hot off the grill.

    Dajaj Mishwi recipe

    What Is Dajaj Mishwi?

    Dajaj mishwi (also spelled djej mishwe, djej mishweh, dajaj mashwi or dajaj meshwi) literally means “grilled chicken” in Arabic, and it’s one of the most beloved dishes in Lebanese cuisine. This isn’t just any grilled chicken – it’s chicken that’s been marinated for hours in a tangy, garlicky mixture of lemon juice, vinegar, olive oil, and aromatic spices, then grilled over charcoal until the skin is crispy and golden while the meat stays incredibly juicy.

    What makes Lebanese grilled chicken special is the marinade. It’s intensely acidic from the combination of fresh lemon juice and apple cider vinegar, which not only flavors the meat but also tenderizes it beautifully. The generous amount of garlic (we’re talking a whole head) gives it that signature Lebanese punch, while the blend of seven spices and cinnamon adds warmth and complexity without overpowering the bright citrus notes.

    The traditional way to serve dajaj mishwi is with generous dollops of toum (Lebanese garlic sauce), warm pita bread, and simple sides like grilled vegetables, fattoush salad, or French fries.

    What’s interesting about this recipe is how it bridges Lebanese and Portuguese flavors. If you’ve ever tried Nando’s peri-peri chicken, you’ll notice similarities-both have citrus-like marinades with garlic and grilling over high heat. The Lebanese version uses seven spices and cinnamon where Nando’s uses African bird’s eye chili, but the spirit is the same.

    If you love this dajaj mishwi recipe, you’ll probably also enjoy Chicken Shish Tawook (yogurt-marinated chicken skewers), Chicken Shawarma, Grilled Kafta (ground meat kebabs), Toum (to serve alongside), and Fattoush Salad to round out your Lebanese BBQ feast.

    Why You’ll Love This Dajaj Mishwi Recipe

    Incredibly flavorful marinade – The combination of lemon, vinegar, and garlic creates layers of delicious flavor that penetrate deep into the meat

    Simple but impressive – Just a handful of ingredients and basic grilling technique produces restaurant-quality results

    Perfect for gatherings – This is the kind of dish that brings people together around the grill

    Lebanese Grilled Chicken (or Dajaj Mashwi) Recipe Ingredients

    Chicken

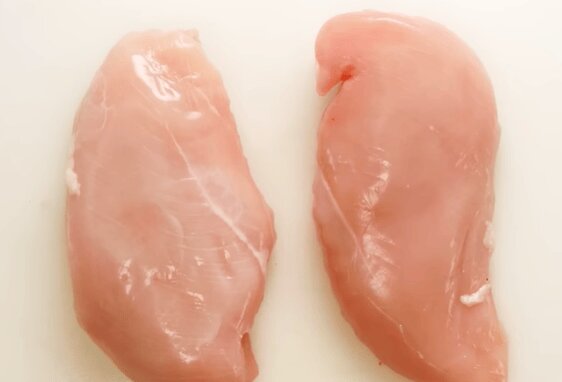
    6 pieces chicken (breast or leg quarters with skin) – Keeping the skin on is crucial! It protects the meat from drying out and gets beautifully crispy on the grill. Leg quarters (thighs and drumsticks) are traditional and stay juicier than breasts, but chicken breasts work too if that’s your preference. You can also use a whole chicken cut into pieces. Bone-in, skin-on pieces are essential for the best texture and flavor.
    Marinade Ingredients

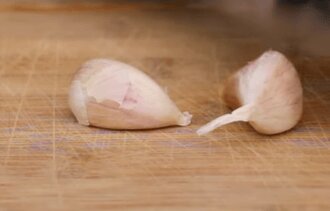
    1 head garlic, peeled – Yes, an entire head. This is about 10-12 cloves. Lebanese cooking doesn’t hold back on garlic, and that’s what makes this chicken so aromatic and flavorful. You’ll crush or mince all these cloves into the marinade.
    two full garlic

    1/2 cup fresh lemon juice – Freshly squeezed is best. You’ll need about 3-4 lemons. The lemon juice provides bright acidity that tenderizes the chicken and balances the richness of the olive oil. This is one of the signature flavors of Lebanese grilled chicken.

    1 cup apple cider vinegar (or red wine vinegar) – The vinegar does two things: it tenderizes the meat and makes it a little tart. Apple cider vinegar is milder and slightly sweet, while red wine vinegar is sharper. Either works beautifully. You’ll use half for an initial rinse and half in the marinade.

    3/4 cup extra virgin olive oil – Good quality olive oil adds richness, helps the marinade coat the chicken evenly, and prevents sticking on the grill. It also helps carry the fat-soluble flavors from the spices into the meat.

    Spices and Seasonings

    1/2 teaspoon Lebanese seven spices (baharat) – This is a traditional Lebanese spice blend typically containing black pepper, allspice, cinnamon, coriander, clove, nutmeg, and ginger. It adds warmth and complexity without being spicy-hot. You can find it at Middle Eastern stores or make your own blend.

    1/2 teaspoon ground cinnamon – Cinnamon is used in both the initial rub and often in the marinade. It adds subtle warmth and sweetness that complements the acidic marinade beautifully. Lebanese cooking frequently uses cinnamon in savory dishes.

    1 teaspoon salt – Essential for seasoning and helping the flavors penetrate the meat. Adjust to taste based on your preference.

    How to Make Dajaj Mishwi (Lebanese Grilled Chicken)

    Step 1: Prepare and clean the chicken

    Start by preparing your chicken pieces. In a large bowl, sprinkle and rub the 1/2 teaspoon ground cinnamon all over the raw chicken pieces. Then pour 1/2 cup of the vinegar over the chicken and rub it vigorously for a couple of minutes. This might seem unusual, but it’s a traditional Lebanese technique that helps remove any unpleasant smells from the chicken and begins the tenderizing process. Rinse the chicken well with cold water and pat dry with paper towels.

    Step 2: Score the chicken

    Using a sharp knife, make several deep cuts (slashes) in each chicken piece, cutting through the skin and about 1/2 inch into the meat. This is crucial! These cuts allow the marinade to penetrate deep into the chicken rather than just coating the surface. Make 3-4 cuts per piece, especially in the thicker parts.

    Step 3: Prepare the marinade

    Peel and crush or finely mince the entire head of garlic (10-12 cloves). In a large bowl or baking dish, combine the crushed garlic with the 1/2 cup lemon juice, the remaining 1/2 cup vinegar, 3/4 cup olive oil, 1 teaspoon salt, 1/2 teaspoon Lebanese seven spices, and an additional pinch of cinnamon if desired.

    Step 4: Marinate the chicken

    Add the prepared chicken pieces to the marinade. Using your hands (wear gloves if you prefer), rub the spices and salt thoroughly into the chicken, working them into the cuts you made. Make sure every piece is well coated. Then add the lemon juice and remaining vinegar, rubbing and massaging everything into the meat. Finally, add the olive oil and give it all one more thorough rub, ensuring the chicken is completely coated in marinade.

    Step 5: Refrigerate and wait

    Place the chicken and all the marinade in a sealed container or zip-top bag. Refrigerate for at least 4 hours, but overnight (8-12 hours) is even better for maximum flavor. Turn the chicken pieces occasionally if you remember, to ensure even marination.

    Step 6: Save the marinade

    When you’re ready to grill, remove the chicken from the refrigerator about 30 minutes before cooking to take the chill off. IMPORTANT: Save all the leftover marinade—you’ll use it to baste the chicken on the grill, which keeps it moist and adds incredible flavor.

    Step 7: Prepare your grill

    Preheat your grill to medium heat (around 375-400°F). If using charcoal, let the coals burn until they’re covered with gray ash. If you can hold your hand 5 inches above the grill grate for 5-6 seconds, the heat is perfect. For the most authentic flavor, use mesquite charcoal.

    Step 8: Grill the chicken

    Place the chicken pieces on the grill, skin-side up initially. This allows the fat to render and keeps the meat moist. Arrange the pieces strategically: put thighs, drumsticks, and wings (which are fattier and take longer) closer to the hottest part of the grill, and breasts (which cook faster) in slightly cooler zones.

    Step 9: Flip and baste

    Grill for about 12-15 minutes total, flipping the chicken pieces every 2-3 minutes for even cooking and to prevent burning. Each time you flip, baste the chicken generously with the reserved marinade using a brush or spoon. This keeps the chicken moist, adds layers of flavor, and helps prevent charring.

    Step 10: Check for doneness

    The chicken is done when the internal temperature reaches 165°F (use a meat thermometer inserted into the thickest part without touching bone), the juices run clear when pierced, and the skin is golden and crispy. The exterior should look beautifully charred in spots but not burnt. Be careful not to overcook or the chicken will dry out!

    Step 11: Serve

    Remove the chicken from the grill and let it rest for 5 minutes. This allows the juices to redistribute throughout the meat. Serve hot with generous amounts of toum (Lebanese garlic sauce), warm pita bread, and your favorite sides. Watch it disappear.

    Additions and Substitutions

    Chicken parts substitute: Use a whole chicken cut into 8 pieces, chicken thighs only (the juiciest!), drumsticks, or wings. Boneless chicken can work but won’t be as flavorful or traditional.

    Apple cider vinegar substitute: Red wine vinegar, white wine vinegar, or even regular white vinegar work. Each brings slightly different acidity and flavor.

    Lemon juice substitute: Lime juice works in a pinch, though the flavor will be different. Don’t use bottled lemon juice-fresh is essential for the best flavor.

    Lebanese seven spices substitute: Make your own by combining equal parts ground black pepper, allspice, cinnamon, coriander, cloves, nutmeg, and ginger. Or use a combination of allspice, black pepper, and extra cinnamon.

    Fresh garlic substitute: While fresh is always best, you could use 2-3 tablespoons of jarred minced garlic or garlic paste in a pinch.

    Add heat: Throw in 1/2 teaspoon cayenne pepper or red pepper flakes to the marinade if you like spicy food.

    Make it smoky: Add 1 teaspoon smoked paprika to the marinade for extra smokiness.

    Oven method: Don’t have a grill? Roast the marinated chicken on a baking sheet at 425°F for 35-45 minutes, flipping halfway through and basting occasionally.

    Air fryer method: Cook at 400°F for 25-30 minutes, flipping halfway and basting.

    Yogurt addition: Some cooks add 1/4 cup Greek yogurt to the marinade for extra tenderness and richness, though this isn’t traditional for dajaj mishwi.

    Frequently Asked Questions

    How long should I marinate the chicken?

    Minimum 4 hours, but overnight (8-12 hours) is ideal for maximum flavor and tenderness. The acidic marinade continues to tenderize the meat over time. You can marinate up to 24 hours, but beyond that, the acid can start to make the texture mushy.

    Do I need to boil the chicken before grilling?

    No! Definitely not. Boiling chicken before grilling is unnecessary and will actually make it less flavorful and juicy. The marinade and proper grilling technique are all you need for tender, juicy chicken.

    Should I oil the chicken before grilling?

    The marinade already contains olive oil, so the chicken will be well-coated. You don’t need additional oil. The oil in the marinade prevents sticking and helps achieve that crispy skin.

    What temperature should the grill be?

    Medium heat, around 375-400°F. If it’s too hot, the skin will burn before the inside cooks. If it’s too cool, the chicken will dry out without getting that nice char.

    How do I know when the chicken is done?

    Use a meat thermometer-the internal temperature should reach 165°F in the thickest part of the meat (not touching bone). The juices should run clear, not pink, and the skin should be golden and crispy.

    Can I make this without a grill?

    Yes! Roast in the oven at 425°F for 35-45 minutes, flipping halfway and basting occasionally. You can also use a grill pan on the stovetop, though you won’t get the same smoky flavor. An air fryer also works well at 400°F for 25-30 minutes.

    Why does the recipe require rinsing the chicken with vinegar and cinnamon?

    This is a traditional Lebanese technique to remove any unpleasant odors from the chicken and begin the tenderizing process. The cinnamon adds subtle flavor while the vinegar’s acidity cleans and starts to break down the proteins.

    Can I use boneless, skinless chicken?

    You can, but it won’t be traditional or as flavorful. The bones add flavor during grilling, and the skin protects the meat from drying out while getting beautifully crispy. If you must use boneless/skinless, reduce the cooking time to 8-10 minutes total and watch carefully to avoid drying it out.

    How do I prevent the chicken from sticking to the grill?

    Make sure your grill grates are clean and well-preheated. The oil in the marinade helps prevent sticking. Don’t try to flip the chicken too soon—it will release naturally when it’s ready.

    Want more delicious Lebanese grilled dishes?

    Chicken Shish Tawook – Yogurt-marinated chicken skewers with garlic and lemon.

    Toum (Lebanese Garlic Sauce) – Essential for serving with dajaj mishwi!

    Chicken Shawarma – Spiced, marinated chicken perfect for wraps.

    Grilled Kafta – Ground meat kebabs with parsley and onions.

    Fattoush Salad – Crispy bread salad with sumac dressing, perfect alongside grilled chicken.

    Lebanese Rice Pilaf – Fragrant rice with vermicelli noodles.

    Grilled Vegetables – Bell peppers, zucchini, and eggplant with olive oil and herbs.

    Dajaj Mishwi recipe

    Lebanese Grilled Chicken Recipe

    Traditional Lebanese grilled chicken marinated in a blend of lemon juice, apple cider vinegar, garlic, and warm spices, then grilled.
    Total Time 4 hours 35 minutes
    Servings: 6
    Course: Appetizer, Breakfast, Dessert, Snack
    Cuisine: lebanese
    Calories: 261

    Ingredients
      

    • 6 pieces chicken breast or leg quarters with skin on and bone in
    • 1 head garlic peeled (10-12 cloves)
    • 1/2 cup fresh lemon juice about 3-4 lemons
    • 1 cup apple cider vinegar or red wine vinegar divided: 1/2 cup for rinsing, 1/2 cup for marinade
    • 3/4 cup extra virgin olive oil
    • 1 teaspoon salt
    • 1/2 teaspoon Lebanese seven spices baharat
    • 1/2 teaspoon ground cinnamon plus extra for initial rub
    For Serving
    • Toum Lebanese garlic sauce
    • Warm pita bread
    • Lemon wedges

    Method
     

    1. Clean the chicken by rubbing with cinnamon and vinegar, then rinse and dry.
    2. Make deep cuts in each piece so the marinade soaks in better.
    3. Prepare a marinade with garlic, lemon juice, vinegar, olive oil, salt, Lebanese seven spices, and cinnamon.
    4. Coat the chicken thoroughly, making sure the marinade gets into the cuts.
    5. Refrigerate for at least 4 hours, ideally overnight.
    6. Before grilling, let chicken sit out for 30 minutes and preheat grill to medium heat.
    7. Grill chicken skin-side up first, placing fattier cuts closer to the heat.
    8. Flip every 2–3 minutes and baste often with leftover marinade to keep it juicy and flavorful.
    9. Cook until internal temperature reaches 165°F and skin is golden with light char.
    10. Leave it for 5 minutes, then serve with toum, pita bread, and lemon wedges.

    Notes

    Equipment

    • Large bowl or baking dish
    • Sharp knife for scoring
    • Grill (charcoal preferred, gas works too)
    • Basting brush
    • Meat thermometer
    Nutrition (per serving):
    • Calories: 261
    • Fat: 27g
    • Carbohydrates: 3g
    • Protein: 1g
    • Rich in protein when served with proper chicken portions
    • Contains beneficial garlic compounds
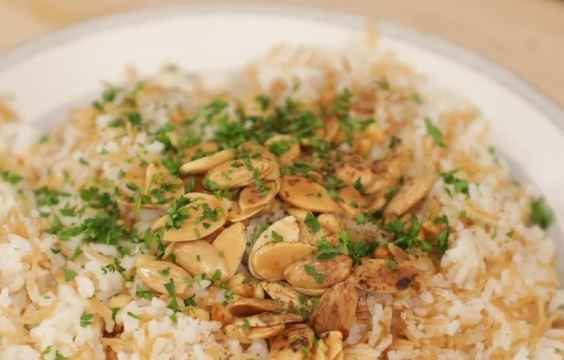
  • Lebanese Almond Rice (Fragrant Rice Pilaf with Toasted Almonds)

    Lebanese Almond Rice (Fragrant Rice Pilaf with Toasted Almonds)

    The Lebanese Almond Rice is a traditional roz bil lauz made with simple ingredients and a perfect side dish for grilled meats, stews, and everything in between.

    Lebanese Almond Rice

    What Is Lebanese Almond Rice?

    Lebanese almond rice (roz bil lauz) is a popular side dish and part of the broader family of Lebanese rice pilaf (roz bi sh’arieh), where rice is cooked with toasted vermicelli noodles in butter or oil. But this version takes it further with the addition of toasted almonds that add both visual appeal and delicious nutty crunch.

    What makes Lebanese rice distinctive from plain steamed rice is the technique of toasting vermicelli noodles (thin pasta broken into small pieces) in butter until golden brown before adding the rice.

    The almonds in this recipe serve multiple purposes. They add visual appeal (making this suitable for special occasions), improves texture by making it crunchy, and contribute a rich, buttery flavor that complements the toasted vermicelli. Some cooks toast the almonds with the vermicelli, while others toast them separately and scatter them on top as garnish – both methods work well.

    If you love this Lebanese almond rice recipe, you’ll probably also enjoy Lebanese Vermicelli Rice (the simpler version without almonds), Hashweh (spiced rice with ground meat and nuts), Mujadara (lentils and rice with caramelized onions), Makloubeh (upside-down rice with vegetables and meat), and of course, serving it alongside Grilled Chicken, Chicken Shawarma, or Kafta Kebabs.

    Why You’ll Love This Lebanese Almond Rice Recipe

    Simple but impressive – Easy enough for weeknight dinners but elegant enough for special occasions

    Perfect texture every time – The technique creates fluffy, separate grains with a beautiful golden color from the toasted vermicelli

    Incredibly versatile – Pairs beautifully with other sources of protein, from grilled meats to vegetarian stews

    Lebanese Almond Rice Ingredients

    Here’s what you will need to make this recipe:

    Rice

    2 cups long-grain white rice – Basmati rice is ideal for Lebanese rice pilaf because it stays fluffy with separate grains. Regular long-grain white rice also works beautifully. Avoid short-grain or sticky rice varieties—you want rice that stays light and fluffy, not clumpy. The rice should be rinsed thoroughly before cooking to remove excess starch.

    Vermicelli

    1/2 cup vermicelli noodles (broken into small pieces) – These thin pasta strands are essential to authentic Lebanese rice. You’ll break them into roughly 1/2 to 1-inch pieces. Look for the thinnest vermicelli you can find (sometimes labeled as angel hair pasta in Western stores). The vermicelli toasts to golden brown in butter, adding beautiful color, toasted flavor, and textural variety to the rice.

    Fat

    4 tablespoons butter (or ghee) – Butter is traditional and adds rich flavor. Some Lebanese cooks use ghee (clarified butter) or a combination of butter and olive oil. The butter is what toasts the vermicelli and almonds to golden perfection and coats each grain of rice with silky richness.

    Almonds

    1/2 cup sliced or slivered almonds – These can be added in two ways: toasted with the vermicelli for integrated flavor throughout, or toasted separately and sprinkled on top as garnish. Sliced almonds are traditional, but you can also use slivered or even whole almonds that you’ve roughly chopped. Make sure they’re unsalted!

    Liquid

    3 cups water or chicken broth – The general ratio is 1.5 cups liquid to 1 cup rice when using the absorption method. Water works perfectly fine, but chicken broth (or vegetable broth) adds extra depth and savory flavor. Some cooks use a combination of both.

    Seasoning

    1 teaspoon salt (or to taste) – Essential for bringing out all the flavors. If using salted broth, reduce the added salt accordingly. Start with less and adjust after tasting.

    Optional additions

    1/4 teaspoon ground cinnamon – A tiny pinch adds warmth and subtle sweetness that complements the almonds beautifully. Very traditional in some Lebanese households.

    1 bay leaf – Adds aromatic depth while the rice cooks. Remove before serving.

    2 tablespoons pine nuts – Some cooks add pine nuts along with (or instead of) almonds for extra richness.

    Additions and Substitutions

    Rice substitute: Jasmine rice works well, as does any long-grain white rice. Brown rice can be used but will require more liquid (4 cups) and longer cooking time (40-45 minutes).

    Vermicelli substitute: You can use angel hair pasta broken into small pieces, or thin spaghetti broken up. Orzo (rice-shaped pasta) can work, but will look different. In a pinch, you can make the rice without vermicelli, though it won’t be traditional.

    Butter substitute: Ghee (clarified butter) is wonderful and very traditional. Olive oil can be used for a dairy-free version, or use a combination of olive oil and butter for the best of both worlds.

    Almonds substitute: Pine nuts are the most traditional alternative (often used in hashweh rice). Cashews, pistachios, or walnuts can also work. Omit nuts entirely for plain vermicelli rice.

    Broth substitute: Water is perfectly fine! For vegetarian/vegan, use vegetable broth. For extra richness, use half broth and half water.

    Add vegetables: Some cooks add frozen peas in the last 5 minutes of cooking for color and nutrition. Diced carrots can be sautéed with the vermicelli.

    Make it fancy (hashweh-style): Add 1/2 lb ground lamb or beef browned with the vermicelli, plus warm spices like cinnamon, allspice, and black pepper.

    Add aromatics: A small diced onion sautéed with the vermicelli adds sweetness and depth.

    Saffron rice: Add a pinch of saffron threads soaked in 2 tablespoons of warm water to the cooking liquid for a beautiful golden color and luxurious flavor.

    Extra crispy topping: Toast extra almonds and vermicelli separately until very crispy and use as garnish on top for added crunch.

    How to Make Lebanese Almond Rice (Roz bil Lauz)

    I learned to make proper Lebanese rice from my friend’s mother during a visit to their family home. I’d been making rice for years—how hard could it be? But when I watched her transform simple rice into something magical by toasting vermicelli in butter until golden brown, I realized I’d been missing out.

    The first lesson was patience. She stressed that the vermicelli needed to be toasted to a deep golden brown, not just lightly colored. “This is where the flavor comes from,” she explained, stirring constantly and watching like a hawk. “Too light and it tastes bland. Too dark and it’s bitter. Just right, and the whole rice becomes fragrant.”

    The second lesson was the importance of good ingredients. She used real butter (not margarine), quality basmati rice that she rinsed three times, and whole almonds she sliced herself that morning. “Cooking is simple,” she said, “but simple means you can’t hide behind complexity. The ingredients have to be good.”

    The third lesson was the technique. Once the liquid was added and brought to a boil, the lid went on and didn’t come off. No peeking, no stirring, no checking. “The steam must stay inside,” she insisted. “Every time you lift the lid, you let out steam and the rice won’t cook evenly.”

    When we finally opened the pot after the resting period, the rice was absolutely perfect—fluffy, with each grain separate, golden vermicelli scattered throughout like little treasures, and toasted almonds adding pops of crunch. We served it alongside grilled kafta kebabs, and I understood why Lebanese rice is never just plain rice.

    Now when I make Lebanese almond rice at home, I hear her voice reminding me to toast until deeply golden, to resist the urge to peek, and to use good butter. These small details make all the difference between ordinary rice and rice that people actually talk about.

    I’ve served this rice at dinner parties where people have asked for the recipe (it’s always a surprise when they learn how simple it is), packed it in lunch boxes where it holds up beautifully even cold, and made it countless times as a weeknight side dish that makes even simple grilled chicken feel special.

    Frequently Asked Questions

    What type of rice is best for Lebanese rice?

    Long-grain rice like basmati or regular long-grain white rice works best. These varieties stay fluffy with separate grains rather than sticky. Basmati is preferred for its aromatic quality and perfect texture, but any quality long-grain rice will work beautifully.

    Do I have to use vermicelli?

    Vermicelli is traditional and essential to authentic Lebanese rice pilaf. It adds toasted flavor, visual appeal, and textural variety. However, if you can’t find vermicelli, you can use broken angel hair pasta or thin spaghetti. You can also make rice without it, though it won’t be traditional roz bi sh’arieh.

    Can I use brown rice?

    Yes, but you’ll need to adjust the liquid and cooking time. Use 4 cups liquid instead of 3, and cook for 40-45 minutes instead of 15-18 minutes. The texture and flavor will be different from traditional Lebanese rice, but it’s a healthy alternative.

    Why do you toast the vermicelli and almonds first?

    Toasting in butter creates deep, nutty, caramelized flavors that simple boiling can’t achieve. It also gives the vermicelli that beautiful golden color that makes Lebanese rice so distinctive. This step is crucial and shouldn’t be skipped!

    Can I make this ahead of time?

    Yes! You can make it several hours ahead and keep it warm in the covered pot on the lowest heat setting. You can also make it a day ahead, refrigerate, and reheat in the microwave or on the stovetop with a splash of water. It freezes well for up to 3 months.

    Why is my rice sticky or mushy?

    This usually means the rice wasn’t rinsed enough (excess starch makes rice sticky), too much liquid was used, or the rice cooked too long. Make sure to rinse until the water runs clear, use the proper 1.5:1 liquid-to-rice ratio, and don’t overcook.

    Can I make this in a rice cooker?

    Yes! Toast the vermicelli, almonds, and rice in butter on the stovetop first, then transfer everything to your rice cooker. Add the liquid and cook on the white rice setting. It works beautifully.

    What should I serve with Lebanese almond rice?

    This rice is incredibly versatile! It pairs beautifully with grilled meats (chicken, lamb, beef kebabs), stews (bazella, fasolia, okra stew), roasted vegetables, or even just with yogurt and a simple salad. It’s the perfect side dish for Middle Eastern meals.

    Can I make this vegan?

    Absolutely! Replace the butter with olive oil or vegan butter, and use vegetable broth instead of chicken broth. It will still be delicious, though the flavor will be slightly different from the traditional butter-based version.

    How do I prevent burning the vermicelli?

    Use medium heat (not high), stir constantly, and watch carefully. The vermicelli can go from golden to burnt very quickly. If it’s browning too fast, reduce the heat. Don’t multitask during this step—give it your full attention for those 3-5 minutes.

    Want more delicious Lebanese rice dishes and sides?

    Lebanese Vermicelli Rice (Roz bi Sh’arieh) – The simpler version without almonds, equally delicious.

    Hashweh – Spiced rice with ground meat, pine nuts, and almonds.

    Mujadara – Lentils and rice with crispy caramelized onions.

    Makloubeh – Upside-down rice with eggplant, cauliflower, and meat.

    Lebanese Rice Pudding – Creamy rice dessert with orange blossom water.

    Fattoush Salad – Crispy bread salad perfect alongside rice.

    Grilled Kafta – Ground meat kebabs that pair perfectly with this rice.

    Lebanese Almond Rice

    Lebanese Almond Rice Recipe

    Fragrant Lebanese rice pilaf with toasted vermicelli noodles and golden almonds. This roz bil lauz is fluffy, buttery, and nutty – the perfect side dish for grilled meats, stews, and special occasions.
    Total Time 30 minutes
    Servings: 6 servings
    Calories: 310

    Ingredients
      

    Main Ingredients
    • 2 cups long-grain white rice preferably basmati
    • 1/2 cup vermicelli noodles broken into small pieces (1/2 to 1-inch pieces)
    • 1/2 cup sliced or slivered almonds unsalted
    • 4 tablespoons butter or ghee
    • 3 cups water or chicken broth
    • 1 teaspoon salt adjust if using salted broth
    Optional Additions
    • 1/4 teaspoon ground cinnamon
    • 1 bay leaf
    • 2 tablespoons pine nuts in addition to or instead of almonds

    Method
     

    1. Rinse the rice under cold water until clear, then drain and set aside.
    2. Break the vermicelli into small pieces and set aside.
    3. Melt the butter in a pot over medium heat, then add the vermicelli and almonds. Stir until golden and fragrant, about 3–5 minutes.
    4. Add the rice and stir to coat well. Cook for 1–2 minutes.
    5. Pour in the water or broth, add salt and any optional spices, and stir once.
    6. Bring to a full boil over medium-high heat.
    7. Reduce heat to low, cover, and cook for 15–18 minutes without lifting the lid.
    8. Turn off the heat and let it sit, covered, for 5 minutes.
    9. Remove the lid, discard the bay leaf if used, and fluff with a fork.
    10. Serve warm, topped with extra almonds if desired.
  • Lebanese Vegan Kibbeh (Kibbeh Aat’aa)

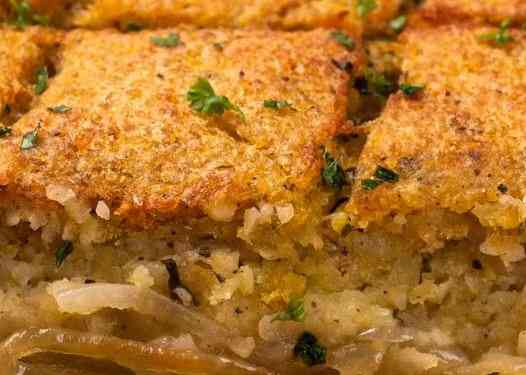
    Craving the beloved flavors of kibbeh without the meat? Then consider this vegan kibbeh aat’aa. Made with mashed potatoes, chickpeas, bulgur, and fresh herbs, then baked until golden, this traditional Lebanese Lent dish is hearty, flavorful, and absolutely satisfying- even for confirmed meat-lovers.

    Lebanese Vegan Kibbeh

    What Is Kibbeh Aat’aa (Lebanese Vegan Kibbeh)?

    Kibbeh aat’aa (also spelled kibbeh ataya or kibbeh ataa) is a traditional Lebanese vegan kibbeh that’s typically made during Lent, when Orthodox Christians abstain from meat and animal products for 40 days before Easter. The name “aat’aa” comes from the Arabic word meaning “to give” or “offering.”

    For those unfamiliar with kibbeh, it’s one of the most popular dishes in Lebanese. Traditional kibbeh is made with ground meat (usually lamb) mixed with bulgur wheat, onions, and spices, then shaped and either baked, fried, or served raw. There are dozens of kibbeh variations across the country. But what makes kibbeh aat’aa special is how similar it is to the traditional kibbeh while being completely plant-based.

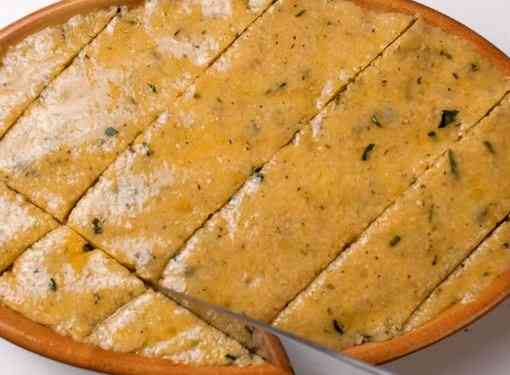
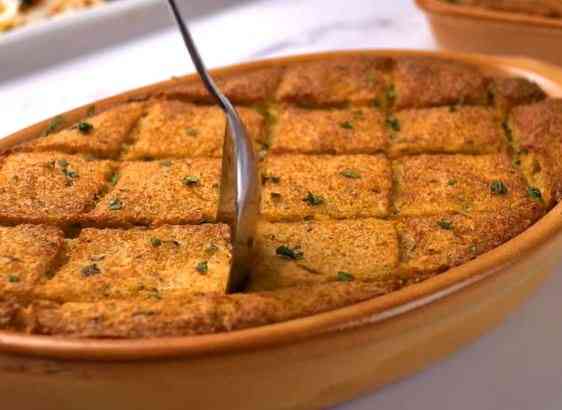
    Instead of meat, this version uses mashed potatoes, combined with skinned chickpea halves, bulgur, fresh herbs (parsley, mint, and green onions), and some spices. The mixture is kneaded into a dough, patted into a baking pan, scored into diamond or square shapes, then generously doused with olive oil before baking. The result is golden, crispy on the outside, tender and flavorful on the inside, with the olive oil creating pockets of richness throughout.

    What I love about kibbeh aat’aa (or lebanese potato kibbeh​) is how it proves that Lebanese cooks never settle for bland, boring Lenten food. Even when avoiding meat, the dish is packed with flavor from fresh herbs, warm spices, and generous olive oil. It’s hearty enough to be a main course, delicious enough that you won’t miss the meat, and versatile enough to serve hot or cold with pita bread and fresh vegetables.

    If you love this Lebanese potato kibbeh​ recipe, you’ll probably also enjoy Lebanese Vegetarian Stuffed Grape Leaves, Mujadara (lentils and rice), Fasolia (white bean stew), and Lebanese pumpkin kibbeh​, which are all vegan-friendly.

    Lebanese Vegan Kibbeh Recipe Ingredients

    Base Ingredients

    2 cups bulgur (cracked wheat/burghul) – Fine or medium bulgur works best. This provides structure and that characteristic kibbeh texture. Rinse well and let it dry for about 30 minutes before using—the bulgur should be slightly moist but not wet, which helps it bind with the other ingredients.

    2 cups dried chickpeas – These need to be skinned and halved, which sounds tedious but is essential for the right texture. Skinned chickpea halves are sometimes available at Middle Eastern stores, which saves significant time! If starting with whole chickpeas, you’ll soak overnight, then skin and halve them (see instructions below). The chickpeas add protein and help bind the mixture.

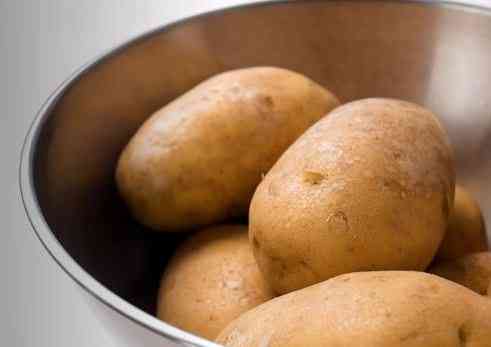
    3 medium potatoes, boiled and mashed – Yukon gold or russet potatoes work beautifully. The mashed potatoe is what holds everything together and provides creaminess. They also make the kibbeh tender.

    potatoes for Lebanese Vegan Kibbeh

    2 cups all-purpose flour – Helps bind the dough and gives structure. It absorbs moisture from the vegetables and creates a cohesive mixture that can be pressed into the pan and hold its shape during baking.

    Fresh Herbs

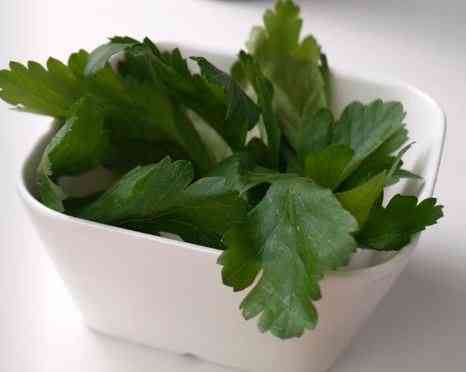
    1/2 bunch fresh parsley – Use only the leaves, finely minced. Parsley adds bright, fresh, peppery flavor that’s essential to Lebanese cooking. You’ll need about 1 cup minced.

    parsley - Lebanese Vegan Kibbeh ingredients

    1/2 bunch fresh mint – Again, leaves only, finely minced. Fresh mint is what gives this kibbeh that distinctive Lebanese flavor—cooling, aromatic, and absolutely essential. About 1/2 cup minced.

    1/2 bunch green onions, finely chopped – Both white and green parts. These add mild onion flavor and freshness without the harsh bite of raw white onions.

    1 medium white onion, finely chopped – Adds depth and savory sweetness. Chop it very finely so it distributes evenly throughout the dough.

    Spices and Oil

    1 teaspoon chili powder (or to taste) – Adds gentle warmth. Adjust based on your heat preference. You can use Aleppo pepper for more authentic Lebanese flavor.

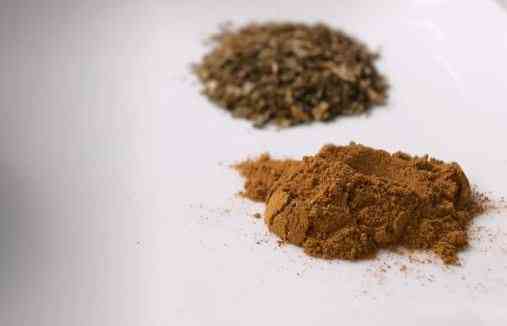
    1/2 teaspoon Lebanese seven spices (baharat) – A blend typically containing black pepper, allspice, cinnamon, coriander, clove, nutmeg, and ginger. This is what gives kibbeh its characteristic warm, complex flavor.

    Lebanese Vegan Kibbeh ingredients

    2/3 teaspoon salt – Essential for bringing out all the other flavors. Adjust to taste.

    2 cups olive oil (about 1 cup per pan) – This seems like a lot, but it’s crucial! The olive oil soaks into the scored kibbeh, creating pockets of flavor, helping it cook through, and giving it that characteristic crispy-tender texture. Don’t skimp on the olive oil—it’s what makes this dish special.

    How to Make Kibbeh Aat’aa (Lebanese Vegan Kibbeh)

    Preparation Steps (these can be done ahead)

    Step 1: Prepare the chickpeas

    This is the most time-consuming step, but essential for proper texture.

    If you can find skinned chickpea halves at a Middle Eastern grocery store, simply soak them overnight, drain, and you’re done!

    If starting with regular whole chickpeas: Soak 2 cups dried chickpeas in plenty of water overnight. The next day, drain and rinse well. Place in a pot, cover with fresh water, and warm on the stove for a few minutes (not boiling, just warm). Drain.

    Spread the warm chickpeas on a clean kitchen towel. Place another towel on top. Using a rolling pin, roll firmly over the chickpeas several times with pressure to crack them open.

    Place the broken chickpeas back in the pot and fill with water. Using your hands, rub the chickpeas vigorously to separate the skins. The skins will float to the top. Pour off the water and skins. Repeat this process several times until all (or most) chickpeas are skinned and halved. Drain well and place in your large mixing bowl.

    Step 2: Prepare the potatoes

    Peel the 3 medium potatoes and cut into chunks. Boil in salted water for 15-20 minutes until very tender when pierced with a fork. Drain and let cool slightly. Mash thoroughly until smooth with no lumps. Add to the mixing bowl with the chickpeas.

    Step 3: Prepare the bulgur

    Rinse the 2 cups bulgur under cold water in a fine-mesh strainer. Drain well, then spread on a clean kitchen towel and let air-dry for about 30 minutes. The bulgur should be moist but not dripping wet. Add to the mixing bowl.

    Step 4: Prepare the herbs and onions

    Wash the parsley and mint thoroughly. Remove and discard the stems, keeping only the tender leaves. Finely mince the leaves until almost paste-like—you want them very fine so they distribute evenly. Add to the mixing bowl.

    Finely chop the green onions (white and green parts). Finely chop the white onion. Add both to the mixing bowl.

    Step 5: Add flour and spices

    Add the 2 cups flour on top of all the ingredients in the mixing bowl. Add the 1 teaspoon chili powder, 1/2 teaspoon Lebanese seven spices, and 2/3 teaspoon salt.

    Step 6: Knead the dough

    Using clean hands, knead everything together for several minutes—at least 5-7 minutes of good kneading. You’re working the ingredients together into a cohesive dough. It should be moist enough to hold together when pressed but not wet or sticky. If it’s too dry and crumbly, add a tablespoon of water at a time. If too wet, add a bit more flour. The final texture should be like a thick, slightly sticky dough.

    Baking

    Step 7: Prepare your pan

    Brush a 9×13 inch Pyrex glass baking pan (or similar size baking dish) generously with olive oil to prevent sticking.

    Step 8: Pat the dough into the pan

    Transfer the kibbeh dough to the prepared pan. Using wet hands (dip them in water to prevent sticking), pat and press the dough evenly into the pan. The layer should be about 1/2 to 2/3 inch thick. Smooth the top as evenly as possible.

    Step 9: Score the kibbeh

    Using a sharp knife, cut deep diagonal lines across the dough to form diamond or square shapes. Cut all the way through to the bottom of the pan. Then make a small cut or poke (like an “X”) in the center of each diamond or square. This scoring serves two purposes: it allows the olive oil to seep deep into the dough, flavoring and cooking it from the inside, and it makes the kibbeh easy to cut and serve once baked.

    scoring kibbeh with a knife

    Step 10: Soak with olive oil

    Here’s the key step: Slowly and gently pour olive oil over the entire surface of the scored kibbeh. Pour it into the cuts and grooves you made. Keep pouring until the kibbeh is fully covered with oil and the oil level is just above the surface of the dough. This should take about 1 cup of olive oil per pan. Don’t skimp—the oil is what makes this dish rich and delicious!

    Step 11: Bake

    Preheat your oven to 400°F (200°C). Bake the kibbeh for 45-60 minutes, or until the top turns light golden brown and slightly crispy around the edges. Poke a piece in the center with a fork to ensure the inside is cooked through—it should be tender and the fork should slide in easily.

    Step 12: Cool slightly and serve

    Let the kibbeh cool for about 10 minutes, then cut along the scored lines. Serve warm or at room temperature with warm pita bread, fresh vegetables, and pickles.

    Additional Notes

    Chickpeas substitute: If you absolutely can’t find or prepare chickpea halves, you can use cooked whole chickpeas that you’ve pulsed briefly in a food processor to break them up, though the texture won’t be quite as traditional.

    Bulgur substitute: Quinoa can work in a pinch, though it’s not traditional. You could also use fine couscous, but again, the texture will be different.

    Potatoes substitute: Sweet potatoes create a sweeter, different-flavored version. You could also try adding mashed white beans for extra protein.

    Flour substitute: Chickpea flour can replace some or all of the all-purpose flour for a gluten-free version.

    Fresh herbs substitute: In a true emergency, you could use 2 tablespoons dried parsley and 1 tablespoon dried mint, but fresh is vastly superior and really essential to the authentic flavor.

    Add vegetables: Some cooks add finely chopped spinach, kale, or Swiss chard to the mixture for extra nutrients and color.

    Make it spicier: Increase the chili powder or add a pinch of cayenne pepper.

    Different shapes: Instead of baking in a pan, you can shape the dough into small patties or balls and bake on a sheet pan (reduce baking time to 30-35 minutes).

    Pine nuts: Some versions include toasted pine nuts in the dough for extra richness.

    Lebanese Potato Kibbeh Recipe Frequently Asked Questions

    What does kibbeh aat’aa mean?

    “Kibbeh” refers to the dish itself (traditionally made with meat and bulgur), and “aat’aa” comes from Arabic meaning “to give” or “offering.” Together, kibbeh aat’aa is the vegan/vegetarian version of kibbeh traditionally made during Lent as a Lenten offering or because of its generous, satisfying nature despite having no meat.

    Can I skip skinning the chickpeas?

    Skinning the chickpeas is traditional and creates the best texture -smooth and cohesive. If you use whole chickpeas with skins, the texture will be grainier and the mixture won’t hold together as well. However, if you’re short on time, you can pulse cooked whole chickpeas in a food processor to break them down.

    Where can I find skinned chickpea halves?

    Middle Eastern grocery stores often carry them in the dried goods section, sometimes labeled as “split chickpeas” or “peeled chickpeas.” Indian grocery stores may have “chana dal,” which is split, skinned chickpeas. If you find these, it saves hours of work.

    Why do I need so much olive oil?

    The generous olive oil is essential! It’s not excessive—it’s traditional. The oil soaks into the scored kibbeh, flavoring it throughout, helping it cook evenly, and creating that characteristic crispy-tender texture. Lebanese Lenten cooking uses olive oil liberally to add richness when animal fats aren’t allowed.

    Can I bake this in a different pan?

    Yes! You can use any baking dish—just adjust the thickness. Thinner kibbeh (1/2 inch) cooks faster (35-40 minutes), while thicker (1 inch) takes longer (55-65 minutes). You can also shape into individual patties.

    How do I know when it’s done?

    The top should be golden brown and slightly crispy. Poke the center with a fork – it should slide in easily and the interior should be fully cooked and tender, not hard or crunchy.

    Can I serve this cold?

    Absolutely. Kibbeh aat’aa is delicious at any temperature – hot, warm, room temperature, or cold. Many Lebanese people prefer it at room temperature. This makes it perfect for packed lunches or picnics.

    How long can it stay?

    Refrigerated in an airtight container, this can stay for up to 3-4 days. The dough (unbaked) or fully baked kibbeh freezes beautifully for up to 3 months.

    What should I serve with kibbeh aat’aa?

    Traditionally served with warm pita bread, fresh vegetables (tomatoes, cucumbers, radishes), pickles, olives, and perhaps some hummus or tahini sauce. It’s often part of a larger Lenten mezze spread.

    Lebanese Potato Kibbeh​

    Lebanese Potato Kibbeh​ Recipe

    Traditional Lebanese vegan kibbeh made with potatoes, chickpeas, bulgur, and fresh herbs, baked until golden and crisp.
    Total Time 1 hour 20 minutes
    Servings: 6 servings
    Course: Main Course
    Cuisine: lebanese

    Ingredients
      

    • 2 cups bulgur rinsed and well drained
    • 2 cups dried chickpeas soaked overnight and skinned (or split chickpeas)
    • 3 medium potatoes boiled and mashed smooth
    • 2 cups all-purpose flour
    • 1 cup finely minced parsley
    • ½ cup finely minced mint
    • ½ bunch green onions finely chopped
    • 1 medium onion finely chopped
    • 1 teaspoon chili powder
    • ½ teaspoon Lebanese seven spices
    • teaspoon salt
    • 2 cups olive oil about 1 cup per pan

    Method
     

    1. Soak chickpeas overnight. Skin and split them, or use pre-skinned split chickpeas.
    2. Boil potatoes until very tender, then mash until completely smooth.
    3. Rinse bulgur, drain well, and let it air-dry until moist but not wet.
    4. In a large bowl, combine chickpeas, mashed potatoes, bulgur, herbs, onions, flour, chili powder, seven spices, and salt. Knead for 5–7 minutes until a firm dough forms. It should hold together without being sticky. Adjust with a little water if too dry or a little flour if too soft.
    5. Preheat oven to 400°F (200°C). Generously oil a 9×13-inch baking dish. Press the dough evenly into the pan, about ½–⅔ inch thick, smoothing the top.
    6. Score into diamonds or squares, cutting all the way through. Slowly pour olive oil evenly over the surface, allowing it to seep into the cuts.
    7. Bake for 45–60 minutes, until golden and slightly crisp on top. Let cool for 10 minutes before cutting and serving.
  • Macaroon bil Toum Pasta Recipe

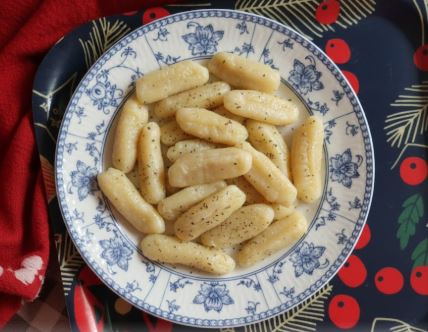
    Macaroon bi toum (also spelt as maacaron) is a traditional Lebanese dish of handmade wheat noodles mixed together with garlic lemon sauce. The name comes from the Italian “maccheroni” (macaroni) and the Arabic “toum” (garlic), reflecting the cross-cultural influences peculiar to Lebanese cuisine.

    a plate of Macaroon bil Toum

    This dish has its origin in the mountain villages of Lebanon, where it was traditionally prepared by farmers and villagers using the most basic pantry staples: flour, garlic, lemon, and olive oil. In these mountain communities, food was about sustenance and making the most of what was available locally. Garlic and lemons grew abundantly, while wheat was milled into flour for daily bread and noodles.

    What Is Toum (Lebanese Garlic Sauce)?

    Before we dive into the recipe, it’s worth understanding toum, the garlic sauce we will be using for the dish. Toum is one of Lebanon’s popular condiments, made from just garlic, salt, lemon juice, and oil. It’s similar to aioli, but traditional toum contains no egg – instead, the garlic itself acts as the emulsifier, creating a thick, white sauce.

    The key to successful toum is patience and technique. The garlic must be crushed very finely, and the oil must be added extremely slowly while blending continuously. When done correctly, the sauce transforms from a wet garlic paste into a light, airy, almost mayonnaise-like consistency.

    For maacaron bi toum, we use a slightly looser version of toum with more lemon juice, creating a sauce that’s more like a thin paste or glaze rather than the thick, spreadable condiment served with grilled meats.

    Macaroon bi Toum Ingredients

    Here are all the ingredients and important notes about them. For amounts, see the full recipe card below. Macaroon bi toum has three components: the handmade noodles, the garlic sauce, and the potatoes that cook alongside the noodles.

    Handmade Noodle Ingredients

    All-purpose flour. You’ll need 1 lb (about 3½ cups) of general-purpose flour. Lebanese mountain cooks would traditionally use locally milled wheat flour, which might be slightly coarser than modern all-purpose flour, but standard all-purpose works perfectly. Don’t use bread flour—the higher protein content will make the noodles too chewy.

    Yeast. Just ¼ teaspoon of active dry yeast is used. Unlike bread, we’re not looking for a significant rise here – the yeast just adds a subtle flavor and helps create a slightly more tender texture in the finished noodles. Some traditional recipes omit yeast entirely, so if you don’t have any, you can skip it.

    Salt. Essential for flavoring the dough. You’ll use about 1 teaspoon in the dough itself, plus more for the cooking water.

    Water. About 200 ml (roughly 1 cup) of water is needed to bring the dough together. The water should be room temperature or slightly warm if using yeast.

    Garlic Sauce (Toum) Ingredients

    Garlic. This is where maacaron bi toum earns its reputation. You’ll need 15 cloves of fresh garlic. Use fresh garlic cloves only; pre-minced garlic from a jar will not work for this recipe. The garlic should be firm and fresh with no green sprouts (which can add bitterness). Don’t even think about reducing the amount of garlic – that would miss the entire point of the dish.

    Fresh lemon juice. Use ½ cup of freshly squeezed lemon juice. Bottled lemon juice is not acceptable here—the fresh, bright acidity is essential to the character of the dish and helps balance the pungent garlic. You’ll need about 3-4 lemons, depending on their juiciness.

    Extra virgin olive oil. Good quality olive oil makes a difference here since it’s a main component of the sauce. You’ll need ½ cup. Lebanese extra virgin olive oil would be ideal, but any high-quality extra virgin olive oil works. The oil should have a good flavor since it’s not being cooked.

    Salt. About ⅔ teaspoon of salt goes into the garlic sauce to season it and help with the emulsification process.

    Additional Ingredients

    Potatoes. Two medium potatoes, peeled and cut into small cubes, are cooked alongside the noodles. This is a traditional addition that makes the dish more substantial and adds another texture. The potatoes also help absorb some of the intense garlic flavor, making the dish slightly more approachable. You can use any starchy potato—russet, Yukon gold, or similar.

    Olive oil for cooking water. A teaspoon of olive oil added to the boiling water helps prevent the noodles from sticking together.

    How to Make the Toum Pasta

    I highly recommend watching a video tutorial if this is your first time making these noodles – seeing the hand motion makes it much easier to understand.

    For the Noodle Dough

    1. If using yeast, dissolve it in a small cup with a tablespoon of warm water. Let it sit for a few minutes until it becomes slightly foamy. This activates the yeast.
    2. In a large mixing bowl, combine the flour and 1 teaspoon of salt. Make a well in the center and add the dissolved yeast (or just plain water if omitting yeast) and about 200 ml (1 cup) of room temperature water.
    3. Mix with your hands or a wooden spoon until the dough starts to come together. Then knead by hand for about 5 minutes until you have a smooth, elastic dough. The dough should be soft but not sticky. If it’s too dry and won’t come together, add water a tablespoon at a time. If too sticky, add a bit more flour.
    4. Cover the dough with a clean kitchen towel and let it rest for 20-30 minutes. This resting period allows the gluten to relax, making the dough easier to work with. In a warm room, 20 minutes is sufficient; in a cooler room, give it 30 minutes.

    Forming the Noodles

    1. After the dough has rested, lightly flour your work surface. Pinch off a portion of dough about the size of a golf ball and roll it between your palms and the counter to form a long “snake” about ½ to ⅔ inch in diameter. The thickness should be consistent along the length.
    2. Using a knife or bench scraper, cut the dough snake into pieces about 2 inches long. Don’t worry about making them perfectly uniform – handmade noodles should look rustic.
    3. Now comes the distinctive shaping technique: Take one piece of cut dough and place it on your work surface. Using your index finger, press down on the center of the dough piece and roll it toward yourself while applying gentle pressure. This creates a wedge or groove running through the middle of the noodle. The motion is kind of like rolling a cigarette or making gnocchi, if you’re familiar with those techniques.
    4. The goal is to create an indentation that goes nearly through the noodle. This wedge serves two purposes: it helps the thick noodles cook evenly all the way through, and it creates a little pocket that will catch the garlic sauce. Continue forming all the noodles in this way and set them aside on a lightly floured surface or tray.

    For the Garlic Sauce

    1. Peel all 15 garlic cloves. For easier peeling, you can smash them lightly with the flat side of a knife, which loosens the skins.
    2. Add the garlic cloves and ⅔ teaspoon of salt to a food processor or high-powered blender. Process until the garlic is very finely minced – almost a paste. Stop and scrape down the sides as needed to ensure even processing.
    3. With the food processor running on medium speed, begin adding the lemon juice and olive oil in a very slow, thin stream, alternating between the two. Start with a small amount of lemon juice, then a small amount of oil, then more lemon juice, then more oil. The key is to add the liquids slowly and steadily while the processor is running continuously. This gradual addition allows the garlic to emulsify the oil and lemon juice into a cohesive sauce.
    4. Continue until all the lemon juice and oil are incorporated. The final sauce should be smooth, creamy, and pale in color – somewhere between a thick liquid and a thin paste. It should pour slowly off a spoon and coat the back of the spoon. If the sauce seems too thick, you can add a tablespoon or two of water to loosen it. If it’s too thin, you can add a bit more oil while blending.

    Cooking the Noodles

    1. Fill a large pot with several cups of water (enough to comfortably cover the noodles and potatoes). Add 1 teaspoon of salt and 1 teaspoon of olive oil. Bring to a full, rolling boil over high heat.
    2. Add the cubed potatoes to the boiling water and cook for about 5 minutes to give them a head start, as they take longer to cook than the noodles.
    3. Lower the heat to maintain a gentle boil (not a violent rolling boil, which could break apart the noodles). Add the handmade noodles one handful at a time, stirring gently after each addition to prevent sticking. Don’t overcrowd the pot—if necessary, cook the noodles in batches.
    4. Cook for 20-25 minutes, stirring occasionally, until the noodles are tender all the way through and the potatoes are fully cooked. The noodles should be soft and cooked through, but still have some structure – they shouldn’t be mushy. To test, remove one noodle and cut it in half; there should be no raw flour taste, and the texture should be uniform throughout.

    Assembly and Serving

    1. When the noodles and potatoes are cooked, drain them thoroughly in a colander. Give them a good shake to remove excess water, but don’t rinse them – you want them to stay hot.
    2. Immediately transfer the hot, drained noodles and potatoes to a large serving bowl. While they’re still very hot, add all of the garlic sauce and toss vigorously to coat every piece. The heat from the noodles will help the sauce become more fluid and distribute evenly. Toss for a good minute or two to ensure everything is well coated.
    3. Serve immediately while hot. Maacaron bi toum is traditionally served as a main course alongside a fresh, acidic salad like fattoush to help balance the richness and intensity of the garlic. The crunchy, tangy salad provides essential contrast to the soft, garlicky noodles.

    Frequently Asked Questions

    What’s the difference between Toum and Aioli?

    While toum and aioli are often compared, they’re not quite the same. Aioli is a Provençal sauce that traditionally contains garlic, salt, and olive oil emulsified with egg yolk. The egg makes aioli more stable and easier to prepare. Toum, on the other hand, relies entirely on the garlic for emulsification- no eggs involved. This makes toum completely vegan, but also more temperamental to prepare. The technique requires more precision, but the result is a lighter sauce with a cleaner, more intense garlic flavor.

    Can I use a mortar and pestle instead of a food processor for the garlic sauce?

    Absolutely! In fact, traditional toum was always made in a mortar and pestle. It takes more time and elbow grease, but many people prefer the texture and flavor of hand-pounded garlic. The technique is the same: crush the garlic with salt until it forms a smooth paste, then gradually add the oil and lemon juice in tiny amounts while continuously pounding and stirring.

    Can I reduce the amount of garlic?

    Technically yes, but I would urge you not to. The entire point of maacaron bi toum is the intensity of the garlic. If you’re not ready for that level of garlic, this might not be the right dish for you. That said, if you absolutely must reduce it, I wouldn’t go below 10 cloves—any less and you’re no longer making authentic maacaron bi toum.

    What if my garlic sauce doesn’t emulsify?

    If your garlic sauce separates or doesn’t come together properly, don’t panic. Start fresh with 2-3 new garlic cloves in a clean food processor. Process them with a pinch of salt until smooth, then very slowly drizzle in your separated sauce while the processor is running. This often rescues the emulsion. The key to preventing this in the first place is adding the oil and lemon juice very slowly—patience is essential.

    Can I make this with store-bought pasta?

    You could, but it wouldn’t really be maacaron bi toum anymore. Part of the dish’s identity is the thick, handmade noodles with their characteristic wedge. If you’re short on time, you could use a thick, short pasta shape like cavatelli or penne, but understand that it’s a different dish. The handmade noodles are worth the effort—they’re easier than you think once you get the motion down.

    What should I serve with maacaron bi toum?

    Traditionally, maacaron bi toum is served with fattoush (Lebanese salad with sumac and pita chips) or another fresh, acidic salad. The crunch and tartness of the salad are essential to balance the rich, garlicky noodles. Other good accompaniments include tabbouleh, a simple tomato and cucumber salad, or pickled vegetables.

    a plate of Macaroon bil Toum

    Macaroon bi Toum Pasta

    Maacaron bi toum is a traditional Lebanese dish of handmade noodles tossed together with garlic lemon sauce.
    Prep Time 45 minutes
    Cook Time 25 minutes
    Total Time 1 hour 10 minutes
    Servings: 4 servings
    Course: Main Course
    Cuisine: lebanese, Middle Eastern

    Ingredients
      

    For the Noodles
    • 1 lb about 3½ cups all-purpose flour
    • ¼ teaspoon active dry yeast
    • 1 teaspoon salt for dough
    • 200 ml about 1 cup water, room temperature or slightly warm
    For the Garlic Sauce (Toum)
    • 15 cloves fresh garlic
    • teaspoon salt
    • ½ cup fresh lemon juice from about 3-4 lemons
    • ½ cup extra virgin olive oil
    Additional Ingredients
    • 2 medium potatoes peeled and cut into small cubes
    • 1 teaspoon salt for cooking water
    • 1 teaspoon olive oil for cooking water
    For Serving
    • Fattoush or fresh salad to serve alongside

    Method
     

    For the Noodle Dough
    1. In a small cup, dissolve the yeast in about 1 tablespoon of warm water. Let it sit for a few minutes until slightly foamy to activate the yeast.
    2. In a large mixing bowl, combine the flour and 1 teaspoon of salt. Make a well in the center and add the dissolved yeast and about 200 ml (1 cup) of room temperature water.
    3. Mix with your hands until the dough starts to come together, then knead by hand for about 5 minutes until you have a smooth, elastic dough. The dough should be soft but not sticky. Adjust with more water or flour as needed.
    4. Cover the dough with a clean kitchen towel and let it rest for 20-30 minutes (20 minutes in a warm room, 30 minutes in a cooler room).
    Forming the Noodles
    1. Lightly flour your work surface. Pinch off a golf ball-sized portion of dough and roll it between your palms and the counter to form a long “snake” about ½ to ⅔ inch in diameter.
    2. Using a knife or bench scraper, cut the dough snake into pieces about 2 inches long.
    3. Take one piece of cut dough and place it on your work surface. Using your index finger, press down on the center of the dough piece and roll it toward yourself while applying gentle pressure.
    4. Continue forming all the noodles in this way and set them aside on a lightly floured surface or tray.
    For the Garlic Sauce
    1. Peel all 15 garlic cloves. (You can lightly smash them with the flat side of a knife to make peeling easier.)
    2. Add the garlic cloves and ⅔ teaspoon of salt to a food processor. Process until the garlic is very finely minced, almost a paste. Scrape down the sides as needed.
    3. With the food processor running on medium speed, begin adding the lemon juice and olive oil in a very slow, thin stream, alternating between the two. Start with a small amount of lemon juice, then a small amount of oil, then more lemon juice, then more oil.
    4. Continue until all the lemon juice and oil are incorporated. The sauce should be smooth, creamy, and pale – somewhere between a thick liquid and a thin paste. If too thick, add 1-2 tablespoons of water. If too thin, add a bit more oil while blending.
    Cooking the Noodles
    1. Fill a large pot with several cups of water. Add 1 teaspoon of salt and 1 teaspoon of olive oil. Bring to a full, rolling boil over high heat.
    2. Add the cubed potatoes to the boiling water and cook for about 5 minutes to give them a head start.
    3. Lower the heat to maintain a gentle boil. Add the handmade noodles one handful at a time, stirring gently after each addition to prevent sticking.
    4. Cook for 20-25 minutes, stirring occasionally, until the noodles are tender all the way through and the potatoes are fully cooked.
    Final Steps
    1. When the noodles and potatoes are cooked, drain them thoroughly in a colander. Shake well to remove excess water but don’t rinse.
    2. Immediately transfer the hot, drained noodles and potatoes to a large serving bowl. While they’re still very hot, add all of the garlic sauce and toss vigorously for 1-2 minutes to coat every piece evenly.
    3. Serve immediately while hot, alongside fattoush or another fresh salad.

    Notes

    Equipment
  • Lebanese Pumpkin Kibbeh

    While fried torpedo-shaped kibbeh stuffed with minced meat has become a staple of Lebanese cuisine worldwide, the kibbeh family is vast and diverse. Pumpkin kibbeh, or kibbet lakteen كبة لقطين, is a nice vegan variation that deserves far more attention. This layered tray kibbeh features a spiced pumpkin-bulgur shell encasing a tangy filling of chickpeas, onions, and leafy greens perfumed with sumac and pomegranate molasses. It’s a dish that sings with the flavors of Lebanese home cooking.

    a plate of lebanese pumpkin kibbeh

    What is Pumpkin Kibbeh and Where Does it Come From?

    Pumpkin kibbeh, known as kibbet lakteen in Arabic, is a traditional Lebanese dish that belongs to the extensive family of kibbeh recipes. Unlike the more commonly known meat-based kibbeh, this is a completely vegan version where pumpkin puree replaces the traditional meat component. The dish consists of two layers of spiced pumpkin-bulgur dough sandwiching a savory filling of chickpeas, caramelized onions, and Swiss chard or spinach, all baked together in a tray until golden.

    Kibbeh itself is considered the national dish of Lebanon, and the word comes from the Arabic word “kubbah,” meaning ball or dome. While most people associate kibbeh with the fried football-shaped versions (kibbeh maqliyeh) or the raw version (kibbeh nayye), there are actually dozens of regional variations throughout Lebanon and the Levant. These include kibbeh bil sanieh (baked in a tray), kibbeh bil laban (cooked in yogurt), kibbeh arnabiyeh (with tahini sauce), and many others.

    Pumpkin kibbeh is particularly popular during the autumn and winter months when pumpkins are in season.

    Regional variations exist throughout Lebanon. In some areas, you might find pumpkin kibbeh made with a thinner shell and more filling, while others prefer a thicker, more substantial dough layer. Some cooks add fresh herbs like mint or cilantro to the filling, while others keep it simple with just the essential components.

    Lebanese Pumpkin Kibbeh Recipe Ingredients

    Here are all the ingredients and important notes about them. For amounts, see the full recipe card below. There are three main components to pumpkin kibbeh: the pumpkin-bulgur shell, the chickpea-onion filling, and the topping.

    Pumpkin-Bulgur Shell Ingredients

    Pumpkin: You’ll need about 3 kg (6 lbs) of whole pumpkin, which yields approximately 4 cups of pumpkin puree after cooking and draining. Use a sugar pumpkin, kabocha squash, or any sweet cooking pumpkin—not the large carving pumpkins, which are too watery and bland. You can substitute canned pumpkin puree in a pinch, but fresh pumpkin has superior flavor and texture. The key is to drain the cooked pumpkin extremely well; excess moisture will make your kibbeh soggy.

    Fine bulgur wheat: Also called bulgur #1, this is the finest grind of bulgur. It’s essential to use fine bulgur for kibbeh recipes as it creates a smooth, cohesive dough. Unlike other kibbeh recipes where you soak the bulgur first, pumpkin kibbeh uses dry bulgur that absorbs moisture directly from the pumpkin puree—this is a traditional technique passed down through generations. You can find fine bulgur at Middle Eastern markets or well-stocked grocery stores.

    Onion: Finely chopped onion adds flavor and moisture to the dough. Make sure to chop it very fine so it integrates smoothly into the mixture.

    Spices: The warming spice blend includes cayenne pepper (optional, for heat), black pepper, ground cinnamon, and allspice (also called Lebanese seven-spice or baharat). These create the signature aromatic profile of Lebanese cuisine.

    Salt: Essential for bringing out all the flavors in the dough.

    All-purpose flour: Added at the end to help bind the dough together and give it structure for spreading in the pan.

    Filling Ingredients

    Chickpeas: Use either dried chickpeas soaked overnight or canned chickpeas. If using dried, you’ll need 1 cup dried (which becomes about 2 cups cooked). If using canned, drain and rinse them well. For the best texture, peel the chickpeas. There’s an easy trick for this: place soaked chickpeas on your counter, press gently with a plate, and the skins slip right off.

    Onions: You’ll need a generous amount—1 kg (about 2 lbs) of red or yellow onions, julienned. When cooked down, these create a sweet, jammy base for the filling. Don’t be tempted to reduce the quantity; the onions are essential to the character of this dish.

    Sumac: This tart, lemony spice is made from ground sumac berries and is a cornerstone of Lebanese cooking. It adds a distinctive tangy flavor that’s impossible to replicate. Find it at Middle Eastern markets or online. No good substitutes exist, though you could add a squeeze of lemon juice as a distant second option.

    Pomegranate molasses: Another essential ingredient that gives the filling its characteristic sweet-tart flavor. This thick, syrupy reduction of pomegranate juice is used extensively in Middle Eastern cooking. Available at Middle Eastern markets, specialty stores, or online. Don’t substitute regular molasses—they’re completely different.

    Olive oil: Used for sautéing the filling. Extra virgin olive oil adds the best flavor.

    Cumin powder: Adds an earthy, warm note to the filling.

    Swiss chard or leafy greens: Traditionally, Swiss chard is used, but spinach or sorrel works well too. Make sure to clean and shred the greens well. They add color, nutrition, and a slight bitterness that balances the sweet pumpkin.

    Salt and cayenne pepper: For seasoning the filling to taste.

    Topping

    Olive oil. You’ll need about ½ cup to drizzle over the top before baking. This creates the golden, crispy surface and keeps the kibbeh moist. You can use pure olive oil or a mix of olive oil and canola oil if you prefer a milder flavor.

    How to Make Lebanese Pumpkin Kibbeh Step-By-Step

    Here’s a bird’s eye view of the process. This is a project recipe that requires several hours of mostly passive time (for draining the pumpkin), so plan accordingly. I highly recommend making the components ahead of time and assembling on the day you want to bake it. See more on advance prep below.

    For the Pumpkin-Bulgur Shell

    1. Peel the pumpkin and cut it into medium-sized pieces. Transfer to a large pot and cover with water. Bring to a boil over high heat, then reduce the temperature, cover, and cook for about 40 minutes or until the pumpkin is completely tender and easily pierced with a fork.
    2. Drain the cooked pumpkin in a colander. This is the crucial step: you must squeeze and press the pumpkin to remove as much water as possible. Then leave it in the colander for a minimum of 4-5 hours, preferably longer, to continue draining. The drier your pumpkin, the better your kibbeh will turn out. You can even leave it overnight in the refrigerator to drain.
    3. Once the pumpkin is thoroughly drained, transfer it to a large bowl or measuring cup. Use an immersion blender to blend it into a smooth puree. You should have about 4 cups of puree.
    4. In a large mixing bowl, combine the dry fine bulgur with the pumpkin puree. Add the finely chopped onion, cayenne pepper (if using), salt, black pepper, cinnamon, and allspice. Mix everything together thoroughly and set aside for 20 minutes to allow the bulgur to absorb the moisture from the pumpkin.
    5. After the resting period, add the flour to the mixture and knead it into a smooth, cohesive dough. The texture should be moist but not sticky, and it should hold together well when pressed. If it feels too wet, add a tablespoon or two more flour. If too dry, add a tiny bit of water.
    6. Set the dough aside while you prepare the filling.

    For the Chickpea-Onion Filling

    1. If using dried chickpeas, place the soaked chickpeas on a countertop and position a dinner plate over them. Press gently, then remove the plate—you’ll see the skins have loosened and separated from the chickpeas. Repeat as necessary until most chickpeas are peeled. Place the peeled chickpeas in a pan, cover with water, and boil for about 5 minutes until just tender. Drain and set aside. (If using canned chickpeas, simply drain, rinse, and peel them using the same plate method if desired.)
    2. In a large skillet, heat the olive oil over high heat. Add the julienned onions and sauté, stirring frequently, until they become translucent and start to caramelize. This will take about 10-15 minutes. The onions should be soft and golden, not browned or crispy.
    3. Add the chickpeas and shredded Swiss chard (or other greens) to the onions. Cook for an additional 2 minutes, stirring to combine and allowing the greens to wilt.
    4. Add the sumac, pomegranate molasses, cayenne pepper (if using), salt, and cumin powder. Stir well and cook for one more minute to let all the flavors meld together. Transfer the filling to a bowl and let it cool completely before assembling. This is important—warm filling will make the dough difficult to work with.
    pumkin kibbeh before the oven

    Assembly and Baking

    1. Divide the pumpkin-bulgur dough into two equal portions.
    2. Generously grease a 33 cm (13-inch) round shallow baking tray with olive oil or cooking spray.
    3. Take the first half of the dough and press it firmly into the bottom of the greased pan, spreading it evenly to cover the entire surface. Use wet hands to smooth the surface and press it into the corners. The layer should be even and compact with no gaps.
    4. Evenly spread the cooled filling over the bottom layer of dough, making sure to distribute it all the way to the edges.
    5. Take the second portion of dough and carefully spread it over the filling to create the top layer. This can be a bit tricky—wet your palms frequently and work gently, pressing and patting the dough to cover the filling completely. Take your time to ensure the entire surface is covered and the top is smooth and even.
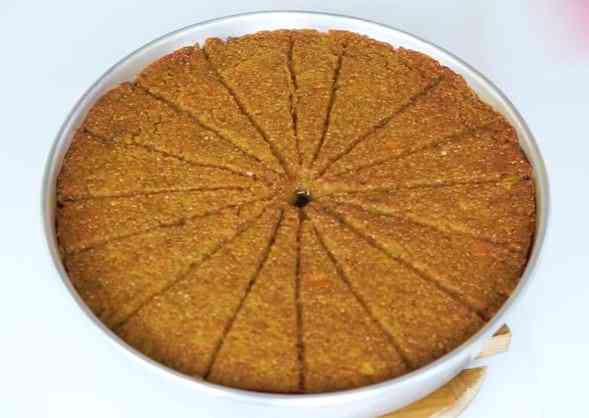
    6. Using a sharp paring knife, score the top of the kibbeh in a traditional diamond pattern. Make diagonal cuts in one direction, then diagonal cuts in the opposite direction to create diamonds. Don’t cut all the way through—just score the top layer about halfway through.
    1. Pour the ½ cup of olive oil evenly over the entire surface of the kibbeh, making sure it pools in the scored lines and covers all the exposed dough.
    2. Bake in a preheated 200°C (400°F) oven for about 30 minutes, or until the kibbeh is cooked through and the top is golden brown. For an extra-golden finish, broil for the final 5 minutes, watching carefully to prevent burning.
    3. Remove from the oven and let it rest for 10 minutes before cutting along the scored lines. Serve warm or at room temperature.

    Preparing In Advance

    Pumpkin kibbeh is an involved recipe with multiple components, making it ideal for advance preparation. Here’s how to break up the work:

    Cook and drain the pumpkin ahead of time. This is the most time-consuming step due to the long draining time. You can cook the pumpkin up to 2 days in advance, drain it overnight in the refrigerator, then store the drained, pureed pumpkin in an airtight container in the fridge until ready to use.

    Make the bulgur-pumpkin dough in advance. The dough can be made a day ahead and refrigerated. Just bring it to room temperature before assembling so it’s easier to spread.

    Prepare the filling ahead. The filling actually tastes better when made in advance, as the flavors have time to meld. Make it up to 2 days ahead and store it in the refrigerator. Make sure it’s completely cool before assembling the kibbeh.

    Assemble but don’t bake. You can fully assemble the kibbeh in the pan, cover it tightly with plastic wrap, and refrigerate for up to 24 hours before baking. When ready to bake, bring it to room temperature for 30 minutes, then pour the oil on top and bake as directed.

    Bake and reheat. Baked pumpkin kibbeh keeps well in the refrigerator for up to 5 days. Reheat portions in a 180°C (350°F) oven until warmed through. It’s also delicious at room temperature.

    Freeze for later. Pumpkin kibbeh freezes beautifully. You can freeze it unbaked (wrap very well) or already baked (cool completely first). Frozen unbaked kibbeh can go straight from freezer to oven—just add 10-15 minutes to the baking time. Frozen baked kibbeh can be thawed overnight in the refrigerator and reheated in the oven.

    Lebanese Pumpkin Kibbeh Frequently Asked Questions

    Can I use canned pumpkin puree instead of fresh pumpkin?

    Yes, you can substitute canned pumpkin puree to save time. You’ll need about 4 cups of canned pumpkin puree. However, canned puree tends to be wetter than well-drained fresh pumpkin, so you may need to add extra bulgur (start with an additional ¼ cup) or flour (an extra 2-3 tablespoons) to achieve the right consistency. The dough should be moist but shapeable, not soupy.

    Do I really need to peel the chickpeas?

    While it’s not absolutely necessary, peeling the chickpeas makes a noticeable difference in the texture and appearance of the filling. Peeled chickpeas are smoother and more refined, and they absorb the flavors of the sumac and pomegranate molasses better. That said, if you’re short on time, unpeeled chickpeas will still work fine.

    Can I make this gluten-free?

    Bulgur is made from wheat, so traditional pumpkin kibbeh is not gluten-free. Some cooks have experimented with substituting quinoa or millet for the bulgur, but the texture and flavor will be quite different. If you try this, cook the grain first, then mix it with the pumpkin puree and you’ll likely need to add more flour (use a gluten-free blend) to bind everything together.

    What can I substitute for pomegranate molasses?

    Pomegranate molasses is really unique and difficult to substitute perfectly. In a pinch, you could mix equal parts honey and lemon juice, or use a combination of balsamic vinegar and a touch of sugar, but the flavor won’t be the same. I strongly recommend seeking out pomegranate molasses—it’s used in so many Middle Eastern recipes that it’s a worthwhile pantry staple.

    Can I add meat to this recipe?

    While pumpkin kibbeh is traditionally vegan, you could certainly add some cooked ground lamb or beef to the filling if you like. Brown the meat with the onions, then proceed with the recipe as written. This would make it more similar to traditional meat kibbeh bil sanieh.

    Why is my dough too wet or too dry?

    Pumpkins vary in water content, which can affect the dough consistency. If your dough is too wet, add more flour a tablespoon at a time until it reaches the right consistency. If it’s too dry and crumbly, add a tiny bit of water or oil and knead until it comes together. The key is in the draining step—the more thoroughly you drain your pumpkin, the easier it will be to work with.

    Can I make individual portions instead of one large tray?

    Absolutely! You can shape pumpkin kibbeh into individual portions, similar to potato kibbeh or kibbeh maqliyeh. Form small patties with a portion of dough, add a spoonful of filling in the center, then top with more dough and seal the edges. Bake on a greased sheet pan following the same temperature and time guidelines.

    a plate of lebanese pumpkin kibbeh

    Lebanese Pumpkin Kibbeh Recipe (Kibbet lakteen)

    Kibbet lakteen is a traditional Lebanese vegan kibbeh made with layers of spiced pumpkin-bulgur dough as a sandwich with a filling of chickpeas, caramelized onions, and Swiss chard. The use of sumac and pomegranate molasses adds a unique aroma. 
    Prep Time 4 hours
    Cook Time 1 hour 10 minutes
    Total Time 5 hours 10 minutes
    Course: Appetizer
    Cuisine: lebanese

    Ingredients
      

    For the Pumpkin-Bulgur Shell

    • 1 pumpkin about 3 kg/6 lbs, yields approximately 4 cups pumpkin puree
    • 2 cups fine bulgur wheat bulgur #1
    • 1 large onion finely chopped
    • 1 teaspoon cayenne pepper optional
    • ½ teaspoon black pepper
    • ½ teaspoon ground cinnamon
    • ½ teaspoon allspice or Lebanese seven-spice
    • teaspoons salt
    • ½ cup all-purpose flour

    For the Filling

    • 1 cup dried chickpeas soaked overnight (or 2 cups canned chickpeas, drained)
    • 1 kg/2 lbs red or yellow onions julienned
    • 2 tablespoons sumac
    • 4 tablespoons pomegranate molasses
    • 1 tablespoon salt
    • 1 teaspoon cayenne pepper optional
    • cup olive oil
    • ½ teaspoon cumin powder
    • 2 cups Swiss chard spinach, or sorrel, cleaned and shredded

    For the Topping

    • ½ cup olive oil or a mix of olive oil and canola oil

    Method
     

    For the Pumpkin-Bulgur Shell

    1. Peel the pumpkin and cut into medium-sized pieces. Transfer to a large pot, cover with water, and bring to a boil over high heat. Reduce temperature, cover, and cook for about 40 minutes or until the pumpkin is fork-tender and completely cooked through.
    2. Drain the pumpkin in a colander and squeeze/press to remove as much water as possible. This is crucial: Leave the pumpkin in the colander for a minimum of 4-5 hours (or preferably overnight in the refrigerator) to drain thoroughly. The drier your pumpkin, the better the final result.
    3. Transfer the thoroughly drained pumpkin to a large bowl. Use an immersion blender to blend into a smooth puree. You should have approximately 4 cups of puree.
    4. In a large mixing bowl, combine the dry fine bulgur with the pumpkin puree. Add the finely chopped onion, cayenne pepper (if using), salt, black pepper, cinnamon, and allspice. Mix thoroughly and let sit for 20 minutes to allow the bulgur to absorb moisture from the pumpkin.
    5. Add the flour and knead the mixture into a smooth, cohesive dough. The texture should be moist but not sticky, holding together well when pressed. Adjust with more flour if too wet, or a small amount of water if too dry. Set aside.

    For the Chickpea-Onion Filling

    1. If using dried chickpeas: Place soaked chickpeas on a countertop, position a dinner plate over them, and press gently to loosen the skins. Remove the plate and separate the peeled chickpeas from their skins. Place peeled chickpeas in a pan, cover with water, and boil for 5 minutes until just tender. Drain and set aside. (If using canned chickpeas, simply drain, rinse, and optionally peel using the same method.)
    2. In a large skillet, heat the olive oil over high heat. Add the julienned onions and sauté, stirring frequently, until translucent and beginning to caramelize (about 10-15 minutes). The onions should be soft and golden.
    3. Add the chickpeas and shredded Swiss chard (or other greens) to the onions. Cook for 2 additional minutes, stirring to combine and allowing the greens to wilt completely.
    4. Add the sumac, pomegranate molasses, cayenne pepper (if using), salt, and cumin powder. Stir well and cook for 1 more minute to meld the flavors. Transfer to a bowl and allow to cool completely before assembly.

    Assembly and Baking

    1. Divide the pumpkin-bulgur dough into two equal portions.
    2. Generously grease a 33 cm (13-inch) round shallow baking tray with olive oil or cooking spray.
    3. Take the first portion of dough and press it firmly and evenly into the bottom of the greased pan, covering the entire surface. Use wet hands to smooth the surface and ensure it’s compact with no gaps.
    4. Evenly spread the cooled filling over the bottom layer of dough, distributing it all the way to the edges.
    5. Carefully spread the second portion of dough over the filling to create the top layer. Wet your palms frequently as you work, gently pressing and patting the dough to cover the filling completely and create a smooth, even surface.
    6. Using a sharp paring knife, score the top in a traditional diamond pattern: make diagonal cuts in one direction, then diagonal cuts in the opposite direction. Score about halfway through the top layer—don’t cut all the way through to the filling.
    7. Pour the ½ cup of olive oil evenly over the entire surface, making sure it pools in the scored lines and covers all exposed dough.
    8. Bake in a preheated 200°C (400°F) oven for about 30 minutes, or until cooked through and golden brown on top.
    9. For an extra-golden finish, broil for 5 minutes at the end, watching carefully to prevent burning.
    10. Remove from oven and let it rest for 10 minutes before cutting along the scored lines. Serve warm or at room temperature.

    Notes

    Draining is important: The most important step in this recipe is thoroughly draining the cooked pumpkin. Excess moisture will result the kibbeh not holding together properly. So, don’t rush this step.
    Fresh vs. canned pumpkin: Fresh pumpkin has superior flavor, but canned pumpkin puree can be used to save time. You may need to adjust the amount of bulgur or flour to compensate for different moisture levels.
    Storage: Refrigerate leftovers for up to 5 days, or freeze for up to 3 months. Reheat in the oven at 180°C (350°F) until warmed through.
    Equipment List
    More kibbeh recipes:
    • Kamounit Banadoura (Tomato Kibbeh)
    • Kibbet Batata (Potato Kibbeh)
    • Kibbeh Mishwieh (Grilled Kibbeh)
    • Fried Kibbeh Balls