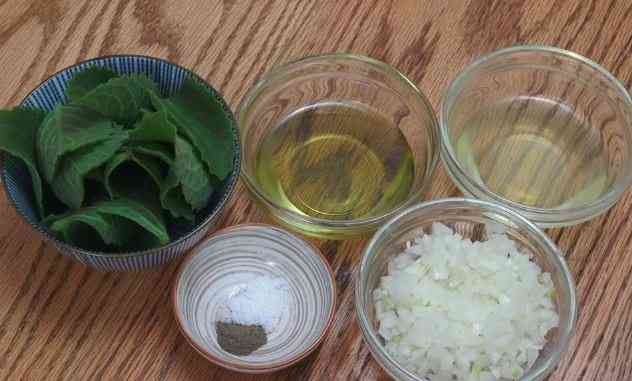
Author: Rania Farah

  • Lebanese Bulgur Cheese: Keshek el Fouqara

    Lebanese Bulgur Cheese: Keshek el Fouqara

    Fermented foods have been a cornerstone of Lebanese cuisine for centuries, but some traditions have quietly slipped away. Keshek el Fouqara (literally “poor man’s cheese”) is one such tradition – an ancient bulgur cheese that was once a staple in Lebanese households until about 50 years ago. This remarkable recipe transforms bulgur wheat into a delicacy through fermentation.
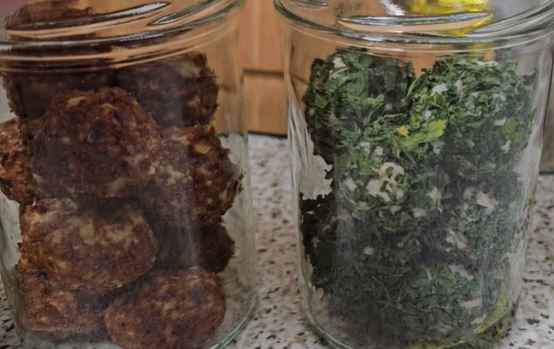
    Lebanese Bulgur Cheese

    What is Keshek el Fouqara and Where Did it Come From?

    Keshek el Fouqara is a fermented bulgur cheese that originated in the mountains of Lebanon, developed by resourceful farmers who couldn’t afford to keep dairy animals. The name itself tells the story: “keshek” refers to a type of preserved food, while “el fouqara” means “of the poor.” This wasn’t just a clever name – it was literal. When you’re too poor to own a goat for making cheese, you get creative.

    These ingenious farmers discovered that by soaking and fermenting bulgur wheat over several weeks, they could coax out complex, cheese-like flavours that could satisfy the same cravings as dairy cheese. The fermented bulgur would be shaped into balls, preserved in olive oil, and used throughout the year as a powerful flavour enhancer – spread on bread, crumbled into stews, or eaten simply with olive oil and black pepper.

    How Does It Taste?

    If you’ve never tasted fermented grain, the flavour profile of keshek el fouqara might surprise you. It’s known as “poor man’s cheese” not just because of its origins, but because of its genuine cheese-like qualities. The fermentation creates tangy, funky notes reminiscent of aged goat cheese, with an earthy, slightly sour complexity that develops over time.

    I’ll be honest – it’s an acquired taste for some people. The first bite might make you pause, especially if you’re not accustomed to fermented foods. But give it a chance. Like many fermented foods (think kimchi, natto, or blue cheese), what seems strange at first can become utterly craveable. The umami depth is remarkable, and the way it melts into warm dishes or enriches a simple piece of bread is truly special.

    The flavour also varies depending on fermentation time and the ambient temperature in your kitchen. A shorter fermentation (4 weeks) yields a milder, slightly tangy result, while a longer fermentation (6+ weeks) produces something much funkier and more complex.

    Keshek el Fouqara Ingredients

    The beauty of this recipe is its simplicity – you need just three essential ingredients, plus olive oil for storage. The optional herbs and spices for coating are where you can get creative. For exact amounts, see the full recipe card below.

    Essential Ingredients

    Bulgur wheat (500g): Use medium or coarse bulgur wheat, not fine bulgur. The coarser grain holds up better during the long fermentation process. You can find bulgur at Middle Eastern markets, health food stores, or online. Make sure it’s plain bulgur wheat with nothing added.

    Salt (28g): This precise amount of salt is important – it’s about 2% of the weight of the bulgur, which creates the right environment for beneficial fermentation while preventing harmful bacteria from taking over. Use fine sea salt or kosher salt.

    Water (1400ml): Use filtered or spring water if possible. Chlorinated tap water can inhibit fermentation, though if that’s all you have, you can let it sit out overnight to allow the chlorine to evaporate.

    Extra virgin olive oil (1 liter): This is for preserving the finished cheese balls. Don’t skimp on quality here – a good, fruity olive oil not only preserves the cheese but becomes part of the final flavour. The oil itself becomes infused with the cheese and can be used for cooking or drizzling.

    Optional Coating Ingredients

    This is where you can personalize your keshek el fouqara. Traditional coatings include:

    • Za’atar: The classic choice, adding herbal, tangy notes
    • Dried mint: Provides a fresh, aromatic quality
    • Aleppo pepper or red chili flakes: For a spicy kick
    • Sesame seeds: Adds nuttiness and texture
    • Nigella seeds (black cumin): Provides a subtle, peppery flavor
    • Sumac: Adds extra tanginess and a beautiful color

    You can use one coating or mix and match. Some people like to make different varieties with different coatings, so they have options.

    How to Make Keshek el Fouqara

    This recipe unfolds over two main phases: the fermentation phase (4-6 weeks) and the aging phase (another 4-6 weeks). While this sounds daunting, the actual hands-on time is minimal – just a few minutes of stirring each day during fermentation, then a couple hours of work to drain, shape, and jar the cheese.

    What You Need

    • 2-liter mason jar
    • Cheesecloth
    • Butcher’s string
    • Colander
    • Clean glass jars for storage

    Step 1:

    In a clean 2-liter mason jar, combine the bulgur, salt, and water. Stir well to dissolve the salt and distribute the bulgur evenly. The mixture will look quite watery at this stage – that’s normal.
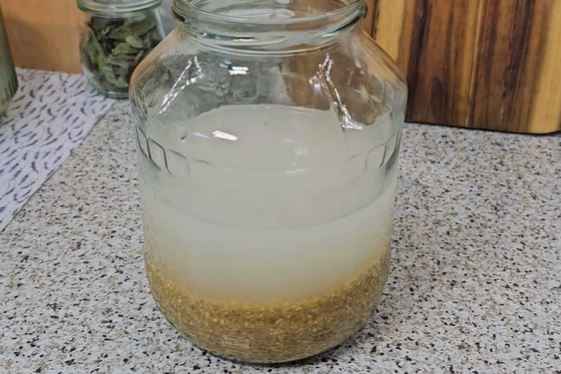
    LEebanese bulgur cheese recipe

    Step 2:

    Let the mixture sit for about 1 hour to allow the bulgur to absorb water and swell. After an hour, give it another good stir. You’ll notice the bulgur has expanded and the water level has dropped.

    Step 3:

    Cover the jar with cheesecloth (secured with a rubber band or the jar’s ring without the lid) to allow air circulation while keeping out dust and insects. Place the jar in a dark cupboard or pantry where the temperature is relatively stable.
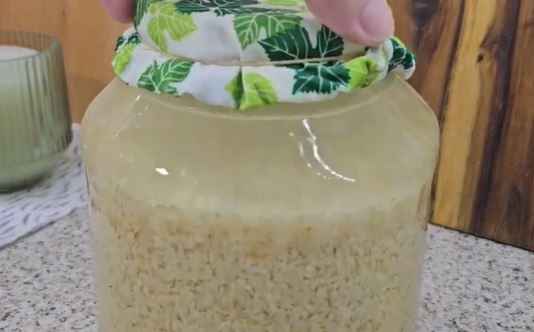
    LEebanese bulgur cheese ingredients

    Step 4:

    For the next 4-6 weeks, stir the bulgur once daily with a clean spoon. This daily stirring is crucial – it prevents mold from forming on the surface and ensures even fermentation throughout the mixture.

    Step 5:

    In the first few days, you’ll notice the bulgur rises to the top. Press it down gently with your spoon after stirring. There should be a thin layer of water covering the bulgur. If the bulgur looks dry or exposed, add a little more water (a few tablespoons at a time).

    Step 6:

    After 3-5 days, you’ll start seeing bubbles rise to the surface when you shake the jar or stir the bulgur. This is exciting – it means fermentation has begun! The mixture might smell slightly sour or yeasty. This is exactly what you want.

    Step 7:

    As the days progress, the bulgur will begin breaking down into a paste-like consistency when you stir it. A white layer of yeast may develop on the surface – this is completely normal and safe. Just stir it back in. By week 2-3, the mixture should taste slightly cheesy.

    Step 8:

    Continue fermenting until the flavour develops to your liking. The timeline depends on your kitchen temperature (warmer = faster fermentation) and personal preference. Taste it weekly after the first two weeks. When it has the flavor you want, it’s ready for the next phase.

    Step 9:

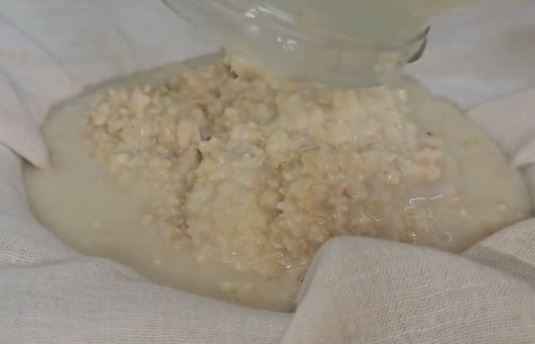
    Line a colander with several layers of cheesecloth. Pour the fermented bulgur into the cloth. Gather the edges of the cheesecloth and tie them tightly with butcher’s string to create a bundle.
    Step 10:

    Hang the bundle from a height (you can tie it to a cabinet handle, wooden spoon balanced over a pot, or even your kitchen faucet) with a bowl underneath to catch the liquid that drains out. Let it drain overnight, or for at least 12 hours.

    Step 11:

    The next day, squeeze the bundle to extract as much moisture as possible. You want the bulgur paste to be fairly dry and moldable. Transfer the paste to a clean bowl and knead it with your hands for several minutes until smooth and cohesive.

    Step 12:

    Shape the mixture into small balls, about the size of a walnut (2-3cm in diameter). If desired, roll the balls in your chosen coating of dried herbs, spices, or seeds, pressing gently so the coating adheres.

    Step 13:

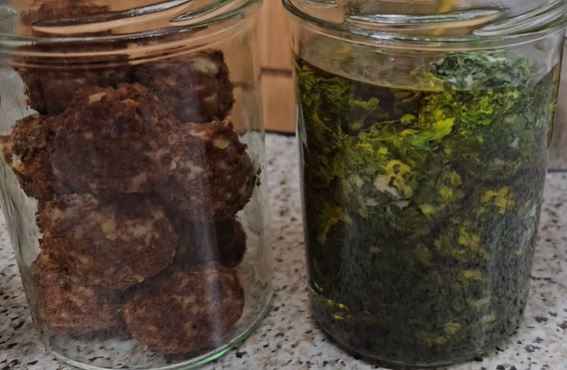
    Pack the balls into clean, dry mason jars, leaving about 1 inch of space at the top.

    Step 14:

    Pour extra virgin olive oil over the balls until they are completely submerged, with at least 1cm of oil covering the top layer. This is important – any exposure to air can cause spoilage.
    Step 15:

    Seal the jars and store them in a cool, dark place. You can eat the keshek el fouqara immediately, but it will develop more complex flavours if you let it age for another 4-6 weeks.

    Step 16:

    As you use the cheese balls, always make sure the remaining balls are covered with oil. You can top up with more olive oil as needed.

    The Benefits of Fermenting Bulgur Wheat

    Beyond the incredible flavour transformation, fermenting bulgur wheat brings significant nutritional benefits that make this ancient recipe relevant to modern healthy eating:

    Improved Nutrition

    Fermentation increases the bioavailability of nutrients in grains. The process breaks down phytic acid, an anti-nutrient that can bind to minerals like iron and zinc, making these minerals more available for absorption. Studies have shown that fermented grains can have significantly higher levels of accessible B vitamins as well.

    Probiotic Boost

    Like other fermented foods such as yogurt, kimchi, and sauerkraut, keshek el fouqara is rich in beneficial bacteria. These probiotics support gut health, which is increasingly recognized as central to overall health – affecting everything from digestion and immune function to mood and mental clarity.

    Improved Digestion

    The enzymes produced during fermentation pre-digest the starches in the bulgur, making the final product easier to digest than raw grain. This is particularly helpful for people who struggle with bloating or gas when eating whole grains.

    Umami Flavor

    The fermentation process creates glutamic acid, the compound responsible for umami flavor – that savory, deeply satisfying taste that makes food irresistible. This transforms bulgur from a mild, neutral grain into a flavor powerhouse that can elevate any dish.

    How to Use Keshek el Fouqara

    Once you’ve made this incredible ingredient, you’ll want to use it in as many ways as possible. Here are some traditional and modern serving suggestions:

    The Classic: Smear a cheese ball on warm, crusty bread, drizzle with the infused olive oil from the jar, and finish with a crack of black pepper. This simple preparation lets the complex flavour shine.

    As a Condiment: Crumble it over fattoush, tabbouleh, or other Lebanese salads for a tangy, umami boost.

    In Cooking: Add crumbled keshek el fouqara to soups, stews, or grain dishes during the last few minutes of cooking. It melts into the dish, adding incredible depth.

    With Vegetables: Toss roasted vegetables with crumbled keshek el fouqara and a drizzle of its olive oil.

    On Pizza or Flatbread: Use it like you would use feta or goat cheese as a topping.

    In Dips: Blend it with tahini, lemon juice, and garlic for a unique twist on traditional mezze.

    Advance Prep and Storage Tips

    Making in Batches: This recipe is easily doubled or tripled. Since you’re investing weeks into the process, many people prefer to make a large batch. Just make sure your fermentation vessel is large enough to accommodate the bulgur’s expansion, with plenty of headroom.

    Storage Duration: As long as the cheese balls remain completely submerged in olive oil and stored in a dark place, they will keep for several months – some say up to a year. Always use a clean, dry spoon when removing balls from the jar to prevent introducing moisture or contaminants.

    The Oil: Don’t throw away that infused olive oil! As you use the cheese balls, the oil becomes increasingly flavourful. Use it for dressing salads, drizzling over dishes, or as a cooking oil for extra flavor.

    Identifying Issues with Fermentation: If you notice pink or black mold (as opposed to white yeast), the batch has gone bad and should be discarded. This is rare if you’re stirring daily, but it can happen. If the mixture develops an off-putting smell (beyond the normal sour, fermented smell), trust your instincts and start over.

    Frequently Asked Questions

    Do I need any special equipment for this recipe?

    No special equipment is needed beyond a 2-liter mason jar, cheesecloth, and butcher’s string. A colander for draining is helpful, but you could improvise with a strainer. The most important thing is cleanliness – make sure all your equipment is thoroughly cleaned before starting.

    Can I speed up the fermentation process?

    You can place the jar in a warmer location (like on top of your refrigerator or near a heating vent) to speed up fermentation, but I don’t recommend rushing it too much. The slow fermentation allows for more complex flavor development. You might cut the time down to 3-4 weeks in a warm environment, but going shorter than that won’t give you the full flavour.

    What if I can’t stir it every single day?

    While daily stirring is ideal, missing a day here and there won’t ruin your batch. If you know you’ll be away for a few days, make sure to press the bulgur down very well before you leave and give it an extra-thorough stir when you return.

    Can I make this with other grains?

    Traditionally, this is made with bulgur, which is parboiled cracked wheat. The parboiling process makes bulgur particularly suitable for this fermentation. Other grains might ferment, but they would create a different product with different flavours and textures.

    Is it safe to ferment at room temperature for so long?

    Yes, when done correctly. The salt content and daily stirring create an environment where beneficial bacteria thrive while harmful bacteria cannot. Fermentation has been used as a food preservation technique for thousands of years. That said, always use your senses – if something looks, smells, or tastes wrong, don’t eat it.

    Can I use this if I’m vegan?

    Absolutely! Keshek el fouqara is completely plant-based, making it a great option for vegans looking for complex, cheese-like flavors without dairy.

    Keshek el Fouqara Recipe (Lebanese Bulgur Cheese)

    Keshek el Fouqara is a traditional Lebanese fermented bulgur cheese that delivers a cheese-like flavour through a simple but patient fermentation process. 
    Servings: 24 cheese balls

    Ingredients
      

    • 500 g medium or coarse bulgur wheat
    • 28 g fine sea salt or kosher salt
    • 1400 ml filtered water
    • 1 liter extra virgin olive oil
    • Optional coatings: za’atar dried mint, sesame seeds, nigella seeds, Aleppo pepper or chili flakes, and sumac.

    Method
     

    1. Combine the bulgur, salt, and water in a clean jar, let sit for 1 hour, then stir again.
    2. Cover with cheesecloth and keep in a dark place for 4–6 weeks, stirring daily and keeping the bulgur slightly submerged in water.
    3. After a few days, fermentation will begin with bubbles and a sour aroma; continue fermenting until it develops a tangy, cheese-like flavor.
    4. Drain the fermented bulgur in cheesecloth overnight, then squeeze out excess moisture.
    5. Knead the paste until smooth and shape into small balls. Roll in optional herbs, spices, or seeds if desired.
    6. Pack the balls into clean jars and fully cover them with olive oil.
    7. Seal and store in a cool, dark place. Eat immediately or age for another 4–6 weeks for deeper flavor.
    8. Keep the cheese balls submerged in oil at all times during storage.

    Notes

    • The fermentation time will vary based on ambient temperature. Warmer kitchens (75-80°F/24-27°C) will ferment faster than cooler ones.
    • Always use a clean, dry spoon when removing cheese balls from the jar to prevent introducing moisture or contaminants.
    • The added olive oil becomes increases in falvor  over time and can be used in cooking or for dressing salads.
  • Kishk el Foukara (Lebanese Muhallabia)

    Kishk el Foukara (Lebanese Muhallabia)

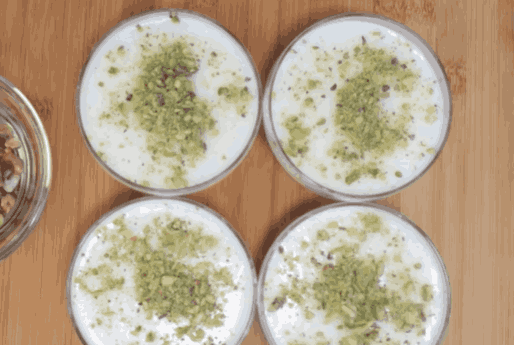
    Kishk el foukara is a creamy Lebanese dessert made with milk pudding flavored with orange blossom water and layered with toasted nuts.

    Kishk el Foukara

    What Is Kishk el Foukara?

    Kishk el foukara (also spelled kishik el fukara) is a common Lebanese dessert with a name that translates to “kiosk of the poor”. The name likely refers to how simple and affordable the ingredients are, yet the result is very delicious and rich in flavor.

    In different regions of Lebanon, this same dessert is known by other names. Many call it “muhallabiyeh” or “muhallabia,” which is the broader Arabic term for milk pudding desserts found throughout the Middle East.

    What makes kishk el foukara special is the beautiful layering technique – the pudding and nuts aren’t just mixed together, but carefully alternated in layers. When you scoop through the layers, you discover pockets of walnuts, pistachios, and almonds nestled between the milk pudding.

    The secret ingredient that transforms this from ordinary pudding into something distinctly Lebanese is orange blossom water (mazaher or ma ward). This floral water, distilled from orange blossoms, adds a delicate, aromatic quality that’s absolutely essential to the authentic flavor. Without it, you just have plain vanilla pudding.

    If you love this kishk el foukara recipe, you’ll probably also enjoy Lebanese Rice Pudding (Riz bi Haleeb), Ashta (clotted cream), Knafeh (shredded phyllo with sweet cheese), Baklava, and Ma’amoul (stuffed date cookies)—all wonderful Lebanese sweets.

    Why You’ll Love This Kishk el Foukara Recipe

    Incredibly easy – Just five main ingredients and about 30 minutes of cooking time for an impressive dessert

    Nice aroma – The orange blossom water creates a delicate floral flavor that’s distinctly Middle Eastern

    Perfect dessert – Actually needs to be made ahead, so it’s ideal for entertaining

    Kishk el Foukara Recipe Ingredients

    Pudding Base

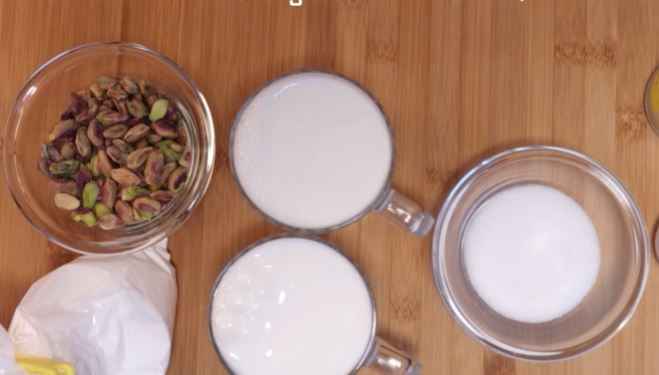
    5 cups whole milk – Whole milk is essential for the richest, creamiest texture. Don’t use low-fat or skim milk—you’ll end up with a thin, watery pudding. The fat content in whole milk creates that luxurious, velvety mouthfeel that makes this dessert so satisfying.

    5 tablespoons sugar – Just enough sweetness to balance the milk without being cloying. Lebanese desserts tend to be less aggressively sweet than Western desserts, letting the delicate flavors shine through. You can adjust this to taste, but start with 5 tablespoons.

    5 tablespoons cornstarch – This is what thickens the milk into pudding. Cornstarch creates a smooth, silky texture without the eggy flavor you’d get from custard. Make sure to mix it thoroughly with the cold milk before heating to prevent lumps.

    Lebanese Muhallabia recipe ingredients

    Flavoring

    2 tablespoons orange blossom water (mazaher) – This is absolutely essential! Orange blossom water is what makes this dessert authentically Lebanese. It adds a subtle, delicate floral aroma and taste that’s completely unique. You can find it at Middle Eastern grocery stores, Mediterranean markets, or online. Don’t skip this or substitute with vanilla—it won’t be the same dish.

    Nuts

    1 cup dried whole almonds – Almonds add buttery richness and crunch. Use whole almonds that you’ll mince yourself—pre-chopped almonds are often too fine or stale.

    1 cup raw or roasted unsalted pistachios – Pistachios add beautiful green color and a distinctive, slightly sweet nutty flavor. Make sure they’re unsalted! Use raw or roasted, but avoid the red-dyed pistachios.

    1 cup walnuts – Walnuts add earthy depth and a slightly bitter note that balances the sweetness perfectly. They’re also the most affordable of the three nuts.

    How to Make Kishk el Foukara (Milk Pudding With Nuts)

    Step 1: Prepare the nuts

    Add the 1 cup almonds, 1 cup pistachios, and 1 cup walnuts to a food processor. Pulse for 15-20 seconds until the nuts are coarsely chopped into small pieces-you want a rough mince, not a fine powder. Don’t over-process or you’ll end up with nut butter. The nuts should be in small, distinct pieces that will provide crunch. Set aside in a bowl.

    Step 2: Mix the pudding base

    In a medium bowl, combine the 5 cups of whole milk, 5 tablespoons of sugar, and 5 tablespoons of cornstarch. Whisk thoroughly until all the cornstarch has completely dissolved and there are no lumps. This is important-if the cornstarch isn’t fully mixed in before heating, you’ll get a lumpy pudding.

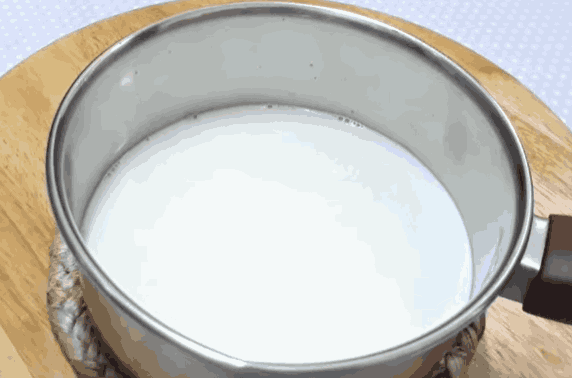
    milk pudding base

    Step 3: Heat and thicken the pudding

    Pour the milk mixture into a medium saucepan. Place over medium to medium-low heat. Stir continuously with a wooden spoon or whisk-this is crucial! You must keep stirring to prevent the bottom from scorching and to ensure the pudding thickens evenly. As the mixture heats, it will gradually begin to thicken. Continue stirring constantly for about 10-15 minutes.

    Step 4: Add the orange blossom water

    When the pudding is near boiling and has noticeably thickened (it should coat the back of your spoon), remove from heat and immediately stir in the 2 tablespoons orange blossom water. Mix thoroughly for about 3 more minutes. The pudding should be thick, smooth, and creamy-similar to the consistency of thick pancake batter or melted ice cream.

    Step 5: Layer the pudding and nuts

    Work quickly while the pudding is still very hot—it will start setting as it cools. Pour half of the hot pudding into your serving tray (a 9×13-inch Pyrex glass dish or similar 2-inch deep tray works perfectly). Spread it evenly across the bottom.

    Sprinkle half of the minced nuts evenly over the pudding layer, creating a complete layer of nuts.

    Pour the remaining half of the pudding over the nut layer, spreading it evenly to cover.

    Finish by sprinkling the remaining nuts on top in an even layer. You should now have four layers total: pudding, nuts, pudding, nuts.

    Step 6: Cool and set

    Let the tray rest at room temperature for about 30 minutes. This allows the pudding to begin setting without condensation forming on top (which happens if you refrigerate while still very hot).

    Step 7: Refrigerate

    After the initial cooling, cover the tray with plastic wrap and refrigerate for at least 1 hour, though 2-3 hours or overnight is even better. The pudding needs this time to fully set into a firm, sliceable consistency and for the flavors to meld together.

    Step 8: Serve

    Scoop generous portions into individual bowls or cut into squares and serve on dessert plates. The pudding should be cool, creamy, and set but not rubbery. Each serving should have visible layers of pudding and nuts.

    Additions and Substitutions

    Milk substitute: You can use 2% milk if you must, but the pudding will be less rich and creamy. For a dairy-free version, use full-fat coconut milk (though the flavor will be different) or cashew milk (the creamiest non-dairy option).

    Cornstarch substitute: You can use an equal amount of rice flour or potato starch, though cornstarch gives the smoothest texture. Don’t use regular flour—it will make the pudding taste pasty.

    Orange blossom water substitute: If you absolutely cannot find orange blossom water, you can use rose water (ma ward), though it will taste different. Vanilla extract doesn’t work here—it’s not the same flavor profile at all. Really, the orange blossom water is essential.

    Nuts substitute: Use any combination of nuts you prefer! Cashews, hazelnuts, or pecans all work beautifully. You could even use all of one type of nut if that’s what you have. Some people add shredded coconut to the nut mixture.

    Make it richer: Some cooks add 1-2 tablespoons of butter to the pudding while it’s cooking for extra richness.

    Add more texture: Layer some shredded coconut along with the nuts.

    Make it fancy: Garnish with whole pistachios arranged in a decorative pattern on top, or drizzle with a little honey or simple syrup before serving.

    Individual servings: Instead of one large tray, portion into individual glass cups or ramekins for elegant individual servings.

    Reduce sugar: If you prefer less sweet desserts, reduce the sugar to 3-4 tablespoons. Lebanese desserts are traditionally sweet, but adjust to your taste.

    Behind the Kishk el Foukara Recipe

    My first taste of kishk el foukara was at a Lebanese friend’s house during Ramadan. After breaking the fast with dates and savory dishes, her mother brought out this beautiful layered milk pudding topped with pistachios, and I was immediately enchanted by the delicate orange blossom aroma that wafted up as she served it.

    I asked what made it smell so wonderful, and she smiled and said, “Mazaher-orange blossom water. It’s what makes Lebanese sweets special.” She explained that this particular dessert was called “kishk el foukara,” which meant “kiosk of the poor.” I thought it was such a poetic name for something that tasted so elegant.

    When I asked why it had that name, she laughed and said it was because the ingredients were so simple and affordable-just milk, sugar, cornstarch, and nuts-that even the poorest families could make it. But despite its humble origins, it was delicious enough to serve at celebrations and special occasions. “The poor man’s dessert that tastes rich,” she said.

    What struck me most was how the orange blossom water transformed such basic ingredients into something that felt exotic and special. Without it, this would just be plain pudding. With it, it became unmistakably Lebanese-aromatic, delicate, and utterly delicious.

    When I made it at home for the first time, I learned the importance of constant stirring. I got distracted for just a minute, and the bottom scorched slightly, giving the whole pudding a burnt undertone. The second time, I stayed vigilant, stirring continuously, and the result was perfect.

    I also discovered that the layering technique isn’t just for show. Having the nuts in layers rather than all on top means every bite gets that perfect combination of creamy pudding and crunchy nuts.

    Now I make kishk el foukara whenever I want something sweet that’s easy to prepare but still feels special. It’s become my go-to dessert for dinner parties because I can make it hours ahead and just pull it from the fridge when it’s time for dessert. The look on people’s faces when they taste that first bite and get the orange blossom aroma-it never gets old.

    Frequently Asked Questions

    What is pudding made of?

    This Lebanese milk pudding (kishk el foukara) is made of whole milk, sugar, cornstarch for thickening, orange blossom water for flavoring, and a mixture of minced nuts (almonds, pistachios, and walnuts) for texture and richness.

    Is kishk el foukara easy to make?

    Yes. This is one of the easiest Lebanese desserts to make. It requires just five main ingredients and about 30 minutes of active time. The only technique you need to master is stirring constantly while the pudding thickens. It’s beginner-friendly and almost foolproof.

    Where can I find orange blossom water?

    You can find orange blossom water at Middle Eastern grocery stores, Mediterranean markets, specialty spice shops, or online (Amazon carries several brands). Look for brands like Cortas, Al Wadi, or Mymouné. A little goes a long way-one bottle will last you many desserts.

    Can I make this dairy-free?

    You can try using full-fat coconut milk or cashew milk, though the flavor and texture will be different from traditional kishk el foukara. Make sure whatever milk you use has some fat content-low-fat milk substitutes won’t give you the creamy texture you want.

    How do I know when the pudding is thick enough?

    The pudding is ready when it noticeably coats the back of your spoon and is approaching a boil (you’ll see steam and small bubbles forming around the edges). It should be thick like melted ice cream or pancake batter-pourable but definitely thick.

    What if my pudding is lumpy?

    If you get lumps from the cornstarch not being fully mixed in, you can strain the hot pudding through a fine-mesh sieve before layering it in the tray. Better yet, prevent lumps by whisking the cornstarch thoroughly into the cold milk before heating.

    Can I use salted nuts?

    It’s not recommended—salted nuts will make the dessert taste savory-sweet in an unpleasant way. Stick to unsalted nuts. If you only have salted nuts, rinse them and dry them thoroughly before using.

    Want more delicious Lebanese desserts?

    Lebanese Rice Pudding (Riz bi Haleeb) – Creamy rice pudding with orange blossom water and cinnamon.

    Knafeh – Shredded phyllo pastry with sweet cheese and syrup.

    Baklava – Layers of phyllo, nuts, and honey syrup.

    Ma’amoul – Buttery cookies filled with dates, pistachios, or walnuts.

    Ashta – Lebanese clotted cream often served with fresh fruit.

    Halawet el Jibn – Sweet cheese rolls filled with cream.

    Atayef – Stuffed pancakes typically served during Ramadan.

    Kishk el Foukara

    Kishk el Foukara (Milk Pudding With Nuts)

    A delicious Lebanese milk pudding delicately flavored with orange blossom water and layered with crunchy minced nuts.
    Total Time 30 minutes
    Servings: 8 servings
    Course: Dessert
    Calories: 426

    Ingredients
      

    Pudding
    • 5 cups whole milk
    • 5 tablespoons sugar
    • 5 tablespoons cornstarch
    • 2 tablespoons orange blossom water mazaher
    Nuts
    • 1 cup whole almonds dried
    • 1 cup pistachios unsalted, raw or roasted
    • 1 cup walnuts

    Method
     

    1. Pulse the almonds, pistachios, and walnuts in a food processor until coarsely chopped.
    2. Whisk together the milk, sugar, and cornstarch until smooth.
    3. Cook the mixture over medium-low heat, stirring constantly until thickened.
    4. Remove from heat and stir in the orange blossom water.
    5. Layer half the pudding in a serving dish, add half the nuts, then repeat with the remaining pudding and nuts.
    6. Let it cool at room temperature for 30 minutes.
    7. Refrigerate until fully set and chilled.
    8. Serve cold and enjoy.

    Notes

    Nutrition (per serving):
    • Calories: 426
    • Fat: 30g
    • Carbohydrates: 29g
    • Fiber: 5g
    • Sugar: 17g
    • Protein: 14g
    • Calcium: 250mg
    • Rich in healthy fats from nuts
    • Good source of protein

  • Easy Lebanese Garlic Sauce (Toum)

    Easy Lebanese Garlic Sauce (Toum)

    Craving for an intense Lebanese garlic sauce? This authentic toum recipe is what you need. Made with just garlic, oil, lemon juice, and salt, this traditional Lebanese garlic paste is creamy with grilled meats, shawarma, and everything in between.

    What Is Toum?

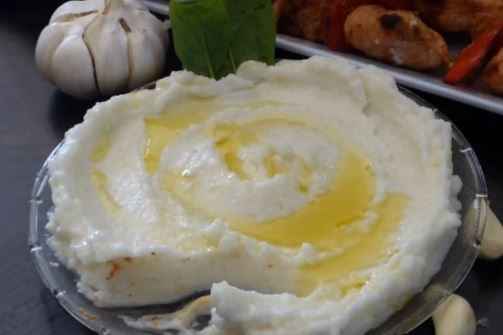
    Toum (also spelled toom) is the Arabic word for “garlic,” but it isn’t just any garlic sauce; it’s a thick paste with the texture of whipped cream or mayonnaise and an intoxicating aroma of lemon and garlic.

    What makes toum so special is how simple it is to make. It is made with only four ingredients – garlic, oil, lemon juice, and salt. No eggs, no dairy, no thickeners – just pure garlic.

    Toum has variations across the Mediterranean and the Middle East. Egyptians call it “tooma,” Greeks have “skordalia,” and Spaniards make “aioli.” But the Lebanese version stands out for having a bright white color and an intense garlic flavor. It also uses neutral vegetable oil instead of the more traditional olive oil.

    If you love this toum recipe, you’ll probably also enjoy Muthawama (garlic sauce with egg white), Tahini Sauce, Chicken Shawarma, Chicken Shish Tawook, Lebanese Grilled Chicken, and of course, serving it alongside Grilled Kafta or Lebanese-Style BBQ.

    Toum Recipe Ingredients

    Garlic

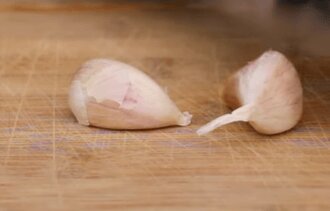
    3 heads of garlic, peeled – This is approximately 30-40 cloves of fresh garlic. Yes, that’s a lot! Use the freshest, firmest garlic you can find. Remove any green sprouts from the center of the cloves as they add bitterness. This is the star ingredient, so quality matters. If using a large food processor, you need at least 3 heads of garlic for the blades to reach and process properly. Smaller quantities won’t work well in large processors.

    Oil

    4 cups vegetable oil – This is crucial: use a neutral oil like canola, sunflower, avocado, or peanut oil. Do NOT use olive oil, especially extra virgin – it’s too strong, becomes bitter when over-processed, and will overpower the garlic. The neutral oil is what gives toum its brilliant white color and allows the garlic flavor to shine. Traditional recipes used olive oil, but modern Lebanese cooks prefer vegetable oil for a lighter, less biting flavor.

    Acid

    1/2 cup fresh lemon juice – Freshly squeezed is essential. You’ll need about 4-5 lemons.

    Seasoning

    1 teaspoon salt (or to taste) – Salt helps break down the garlic and enhances all the flavors. It’s also part of what creates the paste texture when you first process the garlic. Use kosher salt or sea salt for best results.

    How to Make Toum (Lebanese Garlic Sauce)

    Step 1: Prepare your kitchen and ingredients

    Make sure all ingredients are at room temperature. Have everything measured and ready. Peel all the garlic cloves (3 heads worth) and remove any green sprouts from the centers. This is tedious but important.

    Step 2: Process the garlic and salt

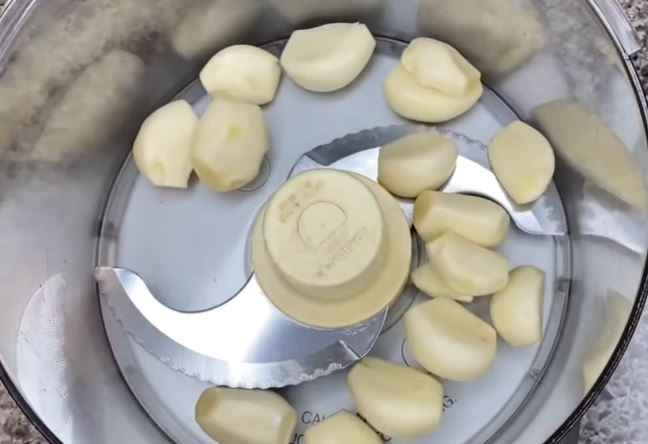
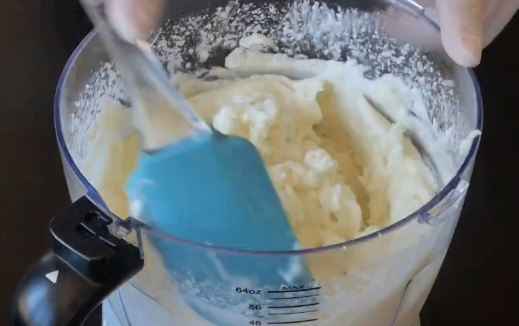
    Add the peeled garlic cloves and 1 teaspoon salt to your food processor. Run the processor for 10-20 seconds. Stop, scrape down the sides with a rubber spatula, then process again for another 10-20 seconds. Repeat this process 3-4 times until the garlic starts to turn pasty and smooth. You want it completely broken down with no large chunks remaining.

    Step 3: Use the Processor

    From this point forward, turn the processor on and KEEP IT RUNNING until the very end. You’ll be adding ingredients while it runs continuously.

    Step 4: Start adding oil very slowly

    With the processor running, begin adding the 4 cups of oil in an extremely thin, slow stream-almost drop by drop at first. This is the most critical step. After adding the first half cup of oil, you should start seeing the garlic turn into a shiny, white paste.

    Step 5: Alternate with lemon juice

    While the processor is still running continuously, add 1/2 teaspoon of lemon juice in a very slow, thin stream. Wait a few seconds for it to be well absorbed into the paste. The paste should remain thick and creamy.

    Step 6: Continue the oil-lemon cycle

    Keep alternating: add 1/2 cup of oil in a thin stream, wait a few seconds, then add 1/2 teaspoon of lemon juice, wait a few seconds. Repeat this cycle until you’ve used all 4 cups of oil and all 1/2 cup of lemon juice. This entire process should take 8-10 minutes. Patience is key. Don’t rush.

    Step 7: Check the consistency

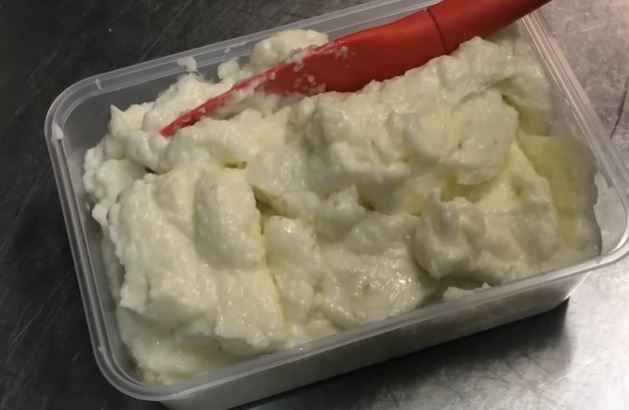
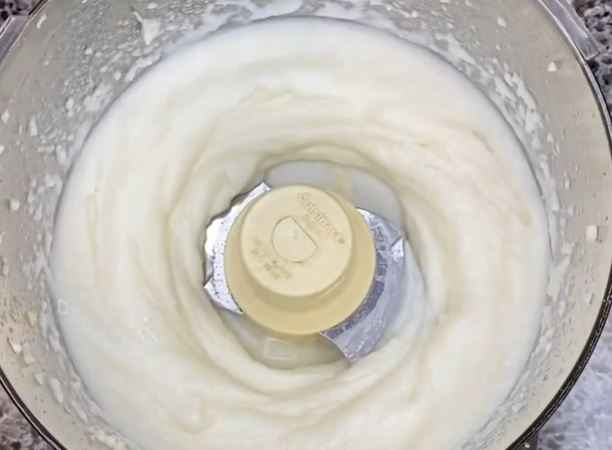
    Once all the oil and lemon juice are incorporated, you should have a thick, fluffy, white paste that looks like whipped cream or soft-serve ice cream. It should hold soft peaks when you lift the processor blade or a spoon through it.

    Step 8: Taste and adjust

    Taste your toum and adjust seasoning if needed. You might want a tiny bit more salt or a squeeze more lemon juice. Pulse briefly if you make any additions.

    Step 9: Transfer and store

    Transfer the toum to an airtight container. Let it rest in the refrigerator for at least 1 hour before serving-this allows the flavors to meld and the texture to set slightly. The garlic flavor will actually mellow a bit over the next day or two.

    Step 10: Serve

    Serve your beautiful, fluffy toum alongside grilled chicken, shawarma, kebabs, roasted vegetables, or with pita bread. Watch it disappear.

    Additions and Substitutions

    Oil substitute: Any neutral oil works-canola, sunflower, safflower, avocado, grapeseed, or peanut oil. Never use olive oil in the full amount, though some traditional cooks use a small amount (1/4 cup) mixed with vegetable oil for subtle flavor.

    Lemon juice substitute: Some cooks use water to blend everything together and add lemon juice only at the end. This can actually help prevent breaking. White vinegar can work, but lemon is traditional and best.

    Add egg white: While not traditional, you can add 1 egg white at the beginning. However, some people (including many Lebanese cooks) feel it leaves a subtle aftertaste. Alternatively, you can use 1/2 teaspoon of soy lecithin powder, it won’t affect the taste.

    For milder garlic: Blanch the peeled garlic cloves in boiling water for 2-3 minutes before using. This mellows the intensity significantly while keeping the garlic flavor.

    Make it creamier: Some cooks add 2-3 tablespoons of Greek yogurt or labneh at the end for extra richness and tang.

    Add herbs: A handful of fresh parsley or cilantro creates a beautiful green-tinted herbed version.

    If using a small food processor: Reduce the recipe to 1-2 heads of garlic and adjust other ingredients proportionally. Large batches work better in large processors.

    If it breaks: Don’t panic. Start fresh with 1 tablespoon of the broken mixture in a clean processor, then very slowly drizzle in the rest of the broken sauce. Alternatively, start with a new head of garlic processed with salt, then slowly add the broken sauce.

    Toum Recipe FAQs

    Why did my toum break or separate?

    The most common reason is adding oil too quickly. The oil must be added in an extremely slow, thin stream-almost drop by drop at the beginning. Other reasons include: wrong oil temperature (ingredients should be room temperature), using too much or too little lemon juice relative to oil, stopping the processor during the process, or using a processor that’s too large for the amount of garlic.

    Can I fix broken toum?

    Yes! Start fresh with 1 tablespoon of the broken mixture in a clean food processor. Process it, then very slowly drizzle in the rest of the broken sauce. Alternatively, process a fresh head of garlic with salt, then slowly add the broken sauce to it.

    Why can’t I use olive oil?

    Olive oil, especially extra virgin, has a strong flavor that becomes bitter when over-processed in a food processor. It also overpowers the garlic flavor. Traditional recipes used olive oil because that’s what was available, but modern Lebanese cooks prefer neutral vegetable oils for a lighter, fluffier, whiter toum that lets the garlic shine.

    Do I need to use eggs in toum?

    No. Traditional toum uses no eggs — just garlic, which has enough natural lecithin to hold everything together. Some Lebanese cooks feel egg white leaves a subtle aftertaste, while others don’t notice it at all due to the strong garlic flavor.

    Can I use a blender instead of a food processor?

    It’s much more difficult. Food processors work best because they keep the ingredients moving and allow for better control. Immersion blenders can work, but are less reliable. With a regular blender, the oil just sinks to the bottom and never fully comes together.

    How long does toum last?

    Store in an airtight container in the refrigerator for 2-3 weeks. Some sources say up to a month, but fresher is always better. The garlic flavor actually mellows slightly after a few days in the fridge.

    Can I freeze toum?

    You can freeze toum for up to 3 months, though the texture may become slightly grainy when thawed. Thaw in the refrigerator overnight and stir well before using.

    Want more bold Lebanese sauces and accompaniments?

    Muthawama – Lebanese garlic sauce made with egg white or potato.

    Tahini Sauce – Creamy sesame sauce perfect for falafel and shawarma.

    Chicken Shawarma – The perfect pairing for toum!

    Chicken Shish Tawook – Grilled marinated chicken skewers traditionally served with toum.

    Dajaj Mishwi – Lebanese grilled chicken that’s incomplete without toum.

    Grilled Kafta – Ground meat kebabs that love a dollop of garlic sauce.

    Labneh – A cooling yogurt dip that provides a nice contrast to intense toum.

    toum recipe

    Toum Recipe (Lebanese Garlic Sauce)

    The authentic Lebanese garlic sauce made with just garlic, oil, lemon juice, and salt is perfect with grilled chicken, shawarma or BBQ.
    Total Time 10 minutes
    Servings: 4 cups
    Course: Preserve
    Cuisine: lebanese
    Calories: 393

    Ingredients
      

    • 3 heads garlic peeled (approximately 30-40 cloves)
    • 1 teaspoon salt or to taste
    • 4 cups vegetable oil canola, sunflower, avocado, or peanut oil, NOT olive oil
    • 1/2 cup fresh lemon juice

    Method
     

    1. Bring all ingredients to room temperature and peel the garlic, removing any green sprouts.
    2. Process the garlic with salt in a food processor until completely smooth and pasty.
    3. Keep the processor running continuously while making the emulsion.
    4. Slowly drizzle in the oil, starting almost drop by drop, until the mixture begins turning white and creamy.
    5. Add a small amount of lemon juice slowly, then continue alternating between oil and lemon juice until all are used.
    6. Continue processing slowly and steadily for about 8–10 minutes until the toum becomes thick, fluffy, and smooth.
    7. Taste and adjust salt if needed.
    8. Refrigerate for at least 1 hour before serving with meats, shawarma, vegetables, or pita bread.

    Notes

    Storage
    • Refrigerate in airtight container for 2-3 weeks
    • Can be frozen for up to 3 months (texture may change slightly)
    • Store in multiple small containers rather than one large one
    Nutrition (per 2 tablespoons):
    • Calories: 393
    • Fat: 44g
    • Carbohydrates: 2g
    • Protein: 1g
    • Note: Contains beneficial garlic compounds including allicin
  • Muthawama Recipe (Lebanese Garlic Dip)

    Muthawama Recipe (Lebanese Garlic Dip)

    Muthawama (sometimes spelled mutawama or moutawama) is a traditional Lebanese garlic sauce that’s similar to the more widely known toum. The name comes from the Arabic word meaning “twins” or “coupled,” possibly referring to the emulsified partnership of oil and garlic, or the way the sauce is traditionally served alongside grilled meats.

    Muthawama Recipe

    Muthawama has been a staple in Lebanese households and restaurants for generations. In Lebanon, you’ll find it served alongside rotisserie chicken (djej mishwe), grilled meats, shawarma, kebabs, and as a dip for fresh vegetables and pita bread.

    What makes muthawama special is its texture, which has a consistency somewhere between mayonnaise and whipped cream.

    Muthawama vs Toum

    The key difference between muthawama and toum is that muthawama sometimes includes an egg white or a small amount of potato, which helps to achieve that perfect creamy texture at home. Traditional toum uses only garlic, oil, lemon juice, and salt, which requires a very precise technique to achieve the required texture.

    If you love this muthawama recipe, you’ll probably also enjoy Classic Toum (the pure garlic sauce version), Tahini Sauce (nutty sesame sauce), Tzatziki (Greek garlic cucumber sauce), Tarator (tahini-based sauce), and of course, serving it alongside Chicken Shawarma or Grilled Kafta.

    Muthawama Recipe Ingredients

    Garlic Base

    1 cup (about 20-25 cloves) fresh garlic, peeled – Fresh is absolutely essential! The garlic is the star here, so use the freshest, firmest cloves you can find. Avoid pre-minced garlic or garlic that’s been sitting around—it won’t have the right flavor or texture. Remove any green sprouts from the center of the cloves as they can add bitterness.

    1 teaspoon salt – Helps break down the garlic and enhances all the flavors. Kosher salt or sea salt works best.

    For Texture

    1 egg white – This is the secret to a stable texture that won’t break. The egg white helps bind the oil and garlic together, creating that fluffy, cloud-like texture. If you’re concerned about raw egg, you can use pasteurized egg whites from a carton.

    OR 1 small potato (about 1/2 cup when mashed) – An alternative to egg white for those who prefer or need to avoid raw egg. Boil a small peeled potato until very soft, mash it completely smooth, and let it cool before using. This creates a different but equally delicious texture.

    Liquid Ingredients

    2 cups neutral vegetable oil – Canola, sunflower, or safflower oil work perfectly. You want a flavorless oil that won’t compete with the garlic. Do NOT use olive oil, especially extra virgin—it’s too strong and will make the sauce bitter when over-processed.

    1/4 cup fresh lemon juice – Freshly squeezed is best! The acid is essential for the emulsion and balances the richness of the oil with bright, tangy flavor. You’ll need about 2 lemons.

    2-4 tablespoons ice-cold water – Helps achieve the perfect consistency and aids in emulsification. The cold temperature is important for keeping the emulsion stable.

    How to Make Muthawama (Lebanese Garlic Dip)

    Step 1: Prepare your ingredients

    Make sure all your ingredients are ready and measured. Your egg white (or mashed potato) should be at room temperature, but have your ice-cold water ready. Peel all the garlic cloves and remove any green sprouts from the centers.

    Step 2: Blend the garlic and salt

    Add the 1 cup of peeled garlic cloves and 1 teaspoon salt to a food processor or high-powered blender. Process for about 1 minute until the garlic is very finely minced and starts to form a paste. Scrape down the sides of the bowl with a spatula.

    Muthawama Recipe in a blender

    Step 3: Add the egg white (or potato)

    Add the 1 egg white (or 1/2 cup smooth mashed potato) to the garlic paste. Blend for another 30-45 seconds until everything is well combined and creamy.

    Step 4: Begin forming the texture with oil

    With the food processor running, start adding the 2 cups of oil in a very slow, steady stream-almost drop by drop at first. This is crucial. If you add the oil too fast, the texture will not hold, and you’ll end up with a separated, oily mess. It should take you 3-5 minutes to add the first cup of oil. You’ll notice the mixture starting to thicken and turn white.

    Step 5: Alternate with lemon juice

    Once you’ve added about half the oil and the mixture is thick and creamy, add about 1 tablespoon of the lemon juice while the processor is running. This helps stabilize the emulsion. Continue adding the remaining oil slowly, alternating with the remaining lemon juice in 2-3 additions.

    Step 6: Adjust consistency with water

    Once all the oil and lemon juice are incorporated, the muthawama should be thick, white, and fluffy. If it’s too thick, add the ice-cold water 1 tablespoon at a time while processing until you reach your desired consistency. It should be spreadable but hold soft peaks, similar to whipped cream or soft meringue.

    Step 7: Taste and adjust

    Taste your muthawama (it will be VERY garlicky!) and adjust seasoning. You might want a bit more salt or lemon juice. Process briefly after any additions.

    Step 8: Rest and serve

    Transfer the muthawama to an airtight container. Let it rest in the refrigerator for at least 30 minutes before serving—this allows the flavors to meld and the texture to set. The garlic flavor will actually mellow slightly after a day or two in the fridge.

    Step 9: Serve

    Serve in a small bowl, drizzled with a tiny bit of olive oil if desired, alongside grilled meats, shawarma, falafel, roasted vegetables, or with pita bread and fresh vegetables for dipping.

    Additions and Substitutions

    Egg white substitute: Use 1/2 cup smooth, cooled mashed potato for an egg-free version, or try 2 tablespoons aquafaba (chickpea liquid), though it may be less stable.

    Oil substitute: Any neutral oil works-canola, sunflower, safflower, grapeseed, or vegetable oil. Avoid olive oil as it becomes bitter when over-processed and has too strong a flavor.

    Lemon juice substitute: White vinegar or a combination of lemon and lime juice works, but fresh lemon is traditional and best.

    Garlic substitute: There is no substitute for fresh garlic in this recipe. Pre-minced or jarred garlic will not work and will result in an inferior sauce.

    For a milder garlic flavor: Blanch the peeled garlic cloves in boiling water for 1-2 minutes before using. This mellows the intensity while keeping the garlic flavor.

    Add herbs: Some people like to add a handful of fresh parsley or cilantro for a green-tinted, herby version.

    Add heat: A pinch of cayenne pepper or a small amount of fresh chili can add warmth.

    For extra stability: Some cooks add 1 teaspoon of cornstarch mixed with the water to ensure the emulsion stays stable.

    Make it richer: Add 1-2 tablespoons of Greek yogurt or labneh for tang and extra creaminess.

    Behind the Muthawama Recipe

    My obsession with muthawama started at a tiny Lebanese rotisserie chicken shop where the owner would serve massive scoops of this cloud-white garlic sauce with every order. I watched people dip everything into it-chicken, fries, vegetables, even their pita bread. The sauce was so popular that customers would buy extra containers to take home.

    I finally worked up the courage to ask the owner how to make it, and he laughed and said, “Garlic, oil, lemon. But the secret is patience!” He explained that traditional toum requires perfect technique and timing, but muthawama with egg white or potato is more forgiving and easier for home cooks.

    My first attempts were disasters. The sauce broke every time, leaving me with a bowl of oily garlic soup. I’d add the oil too fast, or use the wrong kind of oil, or process it too long. But eventually, I learned the rhythm—that slow, steady drizzle of oil, the importance of alternating with lemon juice, the magic of ice-cold water to adjust the consistency.

    The first time I achieved that perfect texture, I literally squealed with excitement. I immediately made grilled chicken just so I could slather it with my homemade muthawama. And you know what? It tasted just like the restaurant version.

    What I love most about muthawama is how it transforms simple grilled meats or vegetables into something special. A plain grilled chicken breast becomes a flavor bomb. Roasted potatoes become addictive. Even raw carrots and cucumbers become irresistible when you have muthawama to dip them in.

    Fair warning: this sauce has an intense garlic flavor. Notwithstanding, I hope this muthawama becomes your new favorite condiment!

    Frequently Asked Questions

    Can I use olive oil for muthawama?

    No! Olive oil, especially extra virgin, becomes bitter when processed extensively in a blender or food processor. It also has too strong a flavor that competes with the garlic. Always use a neutral oil like canola, sunflower, safflower, or vegetable oil.

    Why did my muthawama break or separate?

    The most common reason is adding the oil too quickly. The oil must be added in a very slow, steady stream-almost drop by drop at first. Other reasons include: using the wrong type of oil, or ingredients not at the right temperature.

    Is it safe to eat raw egg white?

    There is a small risk with raw eggs. Use pasteurized egg whites from a carton if you’re concerned, or use the potato method instead. Keep the sauce refrigerated and consume within a week.

    How long does muthawama last?

    Store in an airtight container in the refrigerator for up to 1 week. Some sources say it can last up to 2 weeks, but because of the raw garlic and egg (if using), 1 week is safest for food safety.

    Can I freeze muthawama?

    Freezing can cause the emulsion to break when thawed. It’s better to make fresh batches or keep it refrigerated for up to a week.

    Why is my muthawama too thick or too thin?

    Too thick: Add ice-cold water 1 tablespoon at a time while processing. Too thin: You may have added the oil too quickly, preventing proper emulsification, or you may need to process it longer.

    How do I tone down the garlic intensity?

    Blanch the peeled garlic cloves in boiling water for 1-2 minutes before using to mellow the flavor. Or, let the sauce sit in the fridge for 2-3 days—the garlic flavor actually mellows over time.

    Can I make this without a food processor?

    It’s very difficult. A food processor or high-powered blender is really necessary to achieve the proper emulsion and texture. An immersion blender might work, but it is less reliable.

    Muthawama vs hummus?

    Muthawama is a garlic-heavy sauce made mainly from garlic and oil, with little or no chickpeas. Hummus is a chickpea-based dip blended with tahini, lemon juice, and garlic, making it thicker and milder in taste.

    Want more bold Lebanese sauces and dips?

    Labneh – Lebanese strained yogurt dip loaded with cucumber, fresh mint, garlic, and herbs. 

    Tahini Sauce – Creamy sesame sauce perfect for falafel and shawarma.

    Tarator – Tahini-based sauce with lemon and garlic.

    Dajaj Mishwi – Lebanese Grilled Chicken.

    Baba Ganoush – Smoky eggplant dip with tahini and garlic.

    Labneh – Thick strained yogurt, perfect as a cooling contrast to garlicky muthawama.

    Muhammara – Red pepper and walnut dip with pomegranate molasses.

    Muthawama Recipe

    Muthawama Recipe

    A creamy, intense garlic Lebanese sauce that’s easier to make than traditional toum. Made with garlic, oil, lemon, and egg white (or potato).
    Total Time 15 minutes
    Servings: 2.5 cups
    Calories: 130

    Ingredients
      

    • 1 cup fresh garlic cloves peeled (about 20-25 cloves)
    • 1 teaspoon salt
    • 1 egg white or use pasteurized egg white from carton
    • OR 1/2 cup smooth mashed potato cooled (1 small potato)
    • 2 cups neutral vegetable oil canola, sunflower, or safflower
    • 1/4 cup fresh lemon juice about 2 lemons
    • 2-4 tablespoons ice-cold water

    Method
     

    1. Peel the garlic and remove any green sprouts. If using potato, boil until very soft, mash smooth, and let cool. Measure all ingredients.
    2. Add garlic and salt to a food processor and blend for about 1 minute until a fine paste forms, scraping down the sides.
    3. Add the egg white (or mashed potato) and blend for 30–45 seconds until smooth and creamy.
    4. With the processor running, slowly add the oil in a thin stream, starting almost drop by drop, until the mixture begins to thicken and turn white.
    5. After adding about half the oil, drizzle in some lemon juice, then continue adding the remaining oil slowly, alternating with the rest of the lemon juice.
    6. Once fully combined, check the texture. If too thick, add ice-cold water a little at a time until smooth and spreadable.
    7. Taste and adjust with more salt or lemon juice if needed.
    8. Transfer to a container, chill for at least 30 minutes, then serve with meats, vegetables, or bread.

    Notes

    If your sauce breaks (separates into oil and garlic):
    1. Start fresh with a new egg white in a clean processor
    2. Process for a few seconds
    3. Very slowly drizzle in the broken mixture

    Equipment

    Nutrition (per 2 tablespoons):
    • Calories: 130
    • Fat: 14g
    • Carbohydrates: 2g
    • Protein: 0.5g
    • Contains heart-healthy garlic compounds
    • Rich in allicin 
     

  • Easy Labneh Recipe (Lebanese)

    Easy Labneh Recipe (Lebanese)

    Made with thick strained yogurt, fresh mint, cucumber, and a punch of garlic, this Lebanese mezze staple is perfect for scooping with warm pita bread or serving alongside your favorite Middle Eastern dishes. It is high in protein, low in fat, and works as a dip, spread, or even a sauce for grilled meats.

    easy Labneh Recipe

    What Is Labneh?

    Labneh (also spelled labne, labna, or lebni depending on where you are in the Middle East) is a silky-smooth, thick Middle Eastern strained yogurt that’s been enjoyed for centuries across Lebanon, Syria, Palestine, Jordan, and beyond. In the U.S., you might see it called kefir cheese or strained yogurt, though neither name quite captures its special character.

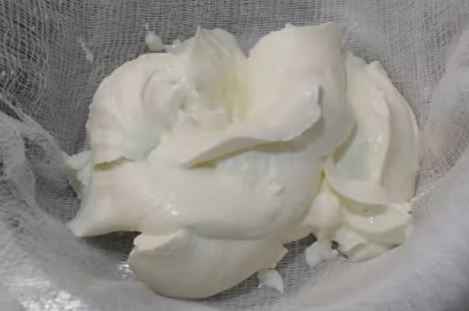
    The magic of labneh comes from a simple yet transformative process: regular plain yogurt is placed in a special cotton cloth bag or cheesecloth and left to drain overnight. As the whey slowly drips away, what remains is a thick, creamy, cheese-like spread with a velvety texture that’s richer than Greek yogurt but lighter than cream cheese.

    What makes labneh so beloved across the Middle East is its incredible versatility. You can eat it plain as a simple, protein-rich breakfast, drizzle it with olive oil and sprinkle it with herbs and spices, roll it into balls preserved in olive oil, or, like in this recipe, mix it with fresh ingredients to create a vibrant, refreshing dip.

    If you love this labneh with garlic and herbs, you’ll probably also enjoy Classic Hummus, Creamy Baba Ganoush (smoky eggplant dip), Muhammara (red pepper walnut dip), Tzatziki (Greek cucumber yogurt sauce), and of course, fresh Tabbouleh salad to round out your mezze table.

    Labneh Recipe Ingredients

    cheese

    Base

    2 cups labneh (strained yogurt) – This is your foundation. You can buy pre-made labneh at Middle Eastern grocery stores (Arz by Karoun Dairies is excellent and uses milk not treated with hormones or antibiotics), or make your own by straining plain whole-milk yogurt overnight in cheesecloth or a special cotton yogurt bag. The thickness should be similar to cream cheese but spreadable.

    Fresh Vegetables and Herbs

    1/2 cucumber, finely minced – Adds refreshing crunch and moisture. Persian or English cucumbers work best because they have fewer seeds and less water content. Make sure to mince it finely so it distributes evenly throughout the labneh.

    1/2 bunch fresh mint – Fresh mint is essential. It brings a bright, cooling flavor that pairs beautifully with the labneh and cucumber. Use the leaves only, finely chopped.

    Seasonings

    2 tablespoons dried mint powder – This might seem redundant with fresh mint, but dried mint adds a different, more concentrated herbal note. It’s traditional in Lebanese cooking to use both fresh and dried mint together for layered flavor.

    4 cloves garlic, crushed – Garlic is a must for that signature Lebanese punch. Four cloves might seem like a lot, but the cooling labneh and cucumber balance it perfectly. Crush it well so it distributes evenly and releases its flavor.

    1/4 teaspoon chili powder – Just a hint of warmth to wake up your taste buds. This isn’t meant to make the dip spicy, just to add subtle depth. You can use Aleppo pepper for a more authentic Lebanese touch.

    1/3 teaspoon salt – Enhances all the flavors and balances the tanginess of the labneh. Adjust to taste, especially if your labneh is already salted.

    For Serving

    Olive oil – For drizzling on top; use good-quality extra virgin olive oil for the best flavor.

    Additional dried mint – For garnish.

    Fresh mint leaves – For garnish.

    Warm pita bread – Essential for scooping.

    How to Make Labneh With Garlic and Herbs

    Step 1: Prep your vegetables and herbs

    Finely mince the 1/2 cucumber into very small pieces—you want them to blend into the labneh, not create big chunks. Finely chop the leaves from the 1/2 bunch of fresh mint, discarding the stems. Crush the 4 cloves of garlic using a garlic press, the back of your knife with some salt, or a mortar and pestle.

    Step 2: Combine all ingredients

    In a medium mixing bowl, add the 2 cups of labneh. Add all your prepared ingredients: the minced cucumber, chopped fresh mint, crushed garlic, 2 tablespoons dried mint powder, 1/4 teaspoon chili powder, and 1/3 teaspoon salt.

    Step 3: Mix thoroughly

    Using a fork or spoon, mix everything together really well, making sure all the ingredients are evenly distributed throughout the labneh. The mixture should be creamy and uniform with little flecks of green herbs throughout. Taste and adjust seasoning if needed—you might want a bit more salt or garlic depending on your preference.

    Step 4: Chill (optional but recommended)

    For the best flavor, cover the bowl and refrigerate for at least 30 minutes to allow the flavors to meld together. The garlic will mellow slightly, and the mint will infuse the labneh beautifully.

    Step 5: Plate and garnish

    Transfer the labneh mixture to a shallow serving plate or bowl. Using the back of a spoon, create a shallow well or swirl pattern in the center. Drizzle generously with olive oil, sprinkle with additional dried mint powder, and garnish with fresh mint leaves.

    Step 6: Serve

    Serve immediately with warm pita bread for dipping. You can also serve it alongside fresh vegetables like cucumber slices, cherry tomatoes, radishes, and carrot sticks.

    Additions and Substitutions

    Labneh substitute: If you can’t find labneh, make your own by straining plain whole-milk yogurt overnight in cheesecloth or a fine-mesh strainer lined with paper towels. Greek yogurt can work in a pinch but won’t be quite as thick or tangy.

    Fresh mint substitute: Fresh basil, dill, or cilantro all work well. You could also use a combination. If fresh herbs aren’t available, increase the dried mint to 3 tablespoons.

    Dried mint substitute: Italian seasoning, dried dill, or dried oregano can work, though the flavor will be different from traditional Lebanese labneh.

    Cucumber substitute: Finely diced tomatoes (seeds removed and drained) or finely diced radishes add crunch without the cucumber flavor.

    Garlic substitute: 1/2 teaspoon garlic powder works if you don’t have fresh, but fresh garlic is always better.

    Add-ins for variation: Finely chopped green onions or scallions, a squeeze of lemon juice, crumbled feta cheese, chopped Kalamata olives, sun-dried tomatoes, toasted pine nuts, or a pinch of sumac.

    Spice it up: Add a pinch of cayenne pepper, red pepper flakes, or use Aleppo pepper instead of regular chili powder for authentic Middle Eastern heat.

    Make it a sauce: Thin it out with a little water or olive oil to create a pourable sauce for grilled meats, shawarma, or roasted vegetables.

    Make it smoother: For an ultra-smooth dip, blend everything in a food processor instead of mixing by hand.

    Frequently Asked Questions

    What’s the difference between labneh and Greek yogurt?

    Labneh is more strained than Greek yogurt, making it thicker and tangier with a consistency closer to soft cream cheese. Greek yogurt is strained once or twice, while labneh is strained for 12-24 hours to remove most of the whey. Labneh also tends to be made with whole milk yogurt, giving it a richer, creamier texture.

    How to make labneh from scratch?

    Place 4 cups of plain whole-milk yogurt in a cheesecloth-lined strainer or a special cotton yogurt bag. Tie it up and hang it over a bowl, or place the strainer over a bowl. Let it drain at room temperature for the first 2-3 hours, then transfer to the refrigerator and let it drain overnight (12-24 hours). The longer you strain it, the thicker it becomes. What remains is labneh.

    How long does labneh last in the fridge?

    Plain labneh keeps for 7-10 days in an airtight container in the refrigerator. This recipe with fresh ingredients (cucumber, fresh herbs) should be consumed within 4-5 days for best quality and freshness.

    Can I freeze labneh?

    Plain labneh can be frozen for up to 2 months, though the texture may become slightly grainy when thawed. This recipe with cucumber shouldn’t be frozen as the cucumber will become watery. If you want to freeze labneh, make the plain version and add fresh ingredients after thawing.

    What can I do with leftover whey from making labneh?

    The whey is packed with protein and nutrients! Use it in smoothies, as the liquid in bread or pancake recipes, for cooking grains like rice or quinoa, or even as a facial toner (seriously—it’s great for skin!).

    Can I make this dairy-free?

    Yes! You can make dairy-free labneh using thick coconut yogurt or cashew yogurt. Strain it the same way you would regular yogurt. The flavor will be different but still delicious.

    Why is my labneh too runny?

    It wasn’t strained long enough. Labneh should be thick enough to hold its shape when scooped. If yours is too runny, place it back in the cheesecloth and let it drain for several more hours.

    What’s the difference between Turkish labneh and Lebanese labneh?

    They’re pretty similar! Both are thick strained yogurt, but Lebanese labneh is usually strained longer, so it’s thicker and has a stronger sour flavor, almost like cream cheese. It’s often rolled into balls and stored in olive oil with herbs. Turkish labneh (called süzme yoğurt) tends to be a bit softer and milder, more like a thick yogurt spread. Lebanese versions are typically saltier too.

    Want more delicious Lebanese dips and mezze?

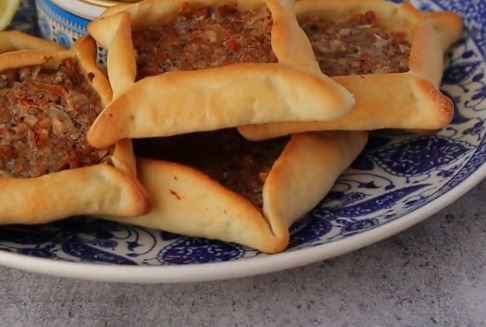
    Sfeeha (Lahm bi Ajeen): Lebanese Meat Pies

    Baba Ganoush – Smoky roasted eggplant dip with tahini.

    Dajaj Mishwi: Lebanese Grilled Chicken

    Moutabal – Another version of eggplant dip, creamier than baba ganoush.

    Tzatziki – Greek cucumber yogurt sauce, a cousin to this labneh recipe.

    Za’atar Labneh Balls – Labneh rolled into balls, coated in za’atar, and preserved in olive oil.

    easy Labneh Recipe

    Labneh Recipe

    A refreshing Lebanese strained yogurt dip loaded with cucumber, fresh mint, garlic, and herbs. This creamy, labneh is perfect for scooping with warm pita bread or serving as part of a mezze spread. 
    Total Time 30 minutes
    Servings: 4 servings
    Course: Appetizer, Breakfast, Main Course
    Cuisine: Middle Eastern
    Calories: 67

    Ingredients
      

    • 2 cups labneh strained yogurt
    • 1/2 cucumber finely minced
    • 1/2 bunch fresh mint finely chopped (leaves only)
    • 4 cloves garlic crushed
    • 2 tablespoons dried mint powder
    • 1/4 teaspoon chili powder
    • 1/3 teaspoon salt
    • Extra virgin olive oil for drizzling
    • Additional dried mint for garnish
    • Fresh mint leaves for garnish
    • Warm pita bread

    Method
     

    1. Finely mince the cucumber, chop the mint leaves (discard stems), and crush the garlic.
    2. In a bowl, add the labneh, then mix in the cucumber, mint, garlic, dried mint, chili powder, and salt.
    3. Stir well until everything is evenly combined. Taste and adjust seasoning if needed.
    4. Cover and refrigerate for about 30 minutes if you want a stronger flavor.
    5. Transfer to a serving plate, create a swirl, drizzle with olive oil, and sprinkle with dried mint and fresh mint leaves.
    6. Serve with warm pita or fresh vegetables like cucumber, tomatoes, and radishes.

    Notes

    Nutrition (per serving – 2 tablespoons):
    • Calories: 67
    • Fat: 1g
    • Carbohydrates: 5g
    • Fiber: 1g
    • Sugar: 4g
    • Protein: 11g
    • Calcium: 126mg
    • Vitamin A: 142 IU

  • Lebanese Dolma or Warak Enab (Stuffed Grape Leaves)

    Lebanese Dolma or Warak Enab (Stuffed Grape Leaves)

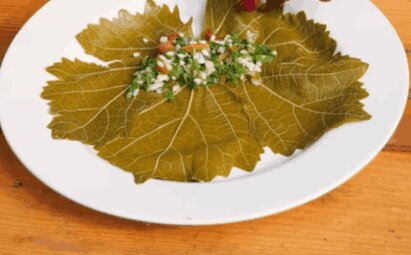
    Craving tender grape leaves stuffed with rice, fresh herbs, and cooked in a lemon sauce? Then you should try out this vegan stuffed grape leaves (warak enab) from Lebanon. The Lebanese dolma rolls are packed with rice, chickpeas, tomatoes, mint, and parsley, then rolled tight and simmered until perfectly tender.

    Lebanese Warak Enab

    What Are Stuffed Grape Leaves (Warak Enab)?

    Warak enab (also spelled warak inab or warak einab) literally means “grape leaves” in Arabic, and this dish of stuffed grape leaves is one of the most beloved preparations in Lebanese cuisine. These aren’t just any stuffed grape leaves – they’re tightly rolled bundles of tender grape leaves filled with a fragrant mixture of rice, herbs, tomatoes, and chickpeas, then simmered in a bright lemon sauce until everything is perfectly tender and infused with flavor.

    What makes the Lebanese vegan version (also called dolma yalanci or “false dolma” because it contains no meat) special is its focus on fresh herbs and bright flavors. Unlike the meat-stuffed versions or the tomato-based variations found in Lebanese cooking, this vegan version is all about the interplay of fresh mint, parsley, lemon, and olive oil, making it light, refreshing, and very healthy.

    In traditional Lebanese cuisine, there are at least three common versions of stuffed grape leaves: a meat and rice version (with ground lamb or beef), a version cooked in tomato sauce, and this vegan version cooked in a lemony sauce. Each has its place at the Lebanese table, but the vegan version is often served as part of a mezze spread or as a light main course, especially during Lent or when hosting vegetarian guests.

    The Lebanese style of rolling warak enab differs from Greek dolmades or other Middle Eastern variations – Lebanese rolls are typically thinner, more tightly rolled, and packed with fresh herbs. The addition of chickpea halves is distinctly Lebanese, adding protein and a nutty texture that makes these rolls more substantial.

    If you love this vegan stuffed grape leaves recipe, you’ll probably also enjoy Lebanese Rice Pilaf, Mujadara (lentils and rice), Tabbouleh (fresh herb salad), Fattoush, Hummus, and Baba Ganoush – all perfect dishes for a vegetarian mezze feast.

    Why You’ll Love This Warak Enab Recipe

    Bursting with fresh herb flavor – Mint, parsley, and lemon create bright, refreshing taste in every bite

    Healthy and satisfying – Low in calories and fat but high in fiber, vitamins, and plant-based protein from chickpeas

    Perfect for meal prep – Make a big batch and enjoy them all week, or freeze for future meals

    Warak Enab or Dolma Recipe Ingredients

    Grape Leaves

    Grape Leaves

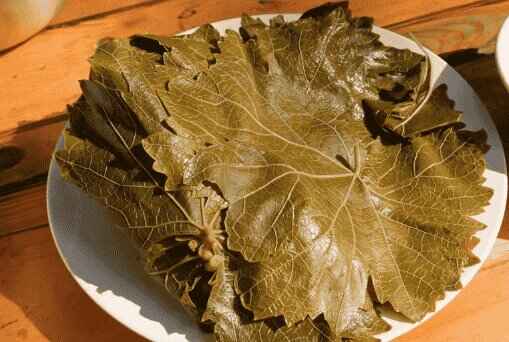
    90 grape leaves (fresh or canned/jarred) – These are the wrappers for your rolls. Canned or jarred grape leaves preserved in brine are the most convenient option and can be found at Middle Eastern stores or the international section of most supermarkets. If using fresh grape leaves, pick young, tender leaves that are light green in color—avoid tough, dark green mature leaves. You’ll need about 90 leaves to account for some tears and imperfect ones.

    Stuffing Ingredients

    1/2 cup dried rice – Short-grain or medium-grain white rice works best. The rice cooks inside the grape leaves, absorbing all the flavors from the filling and the lemony cooking liquid. Don’t use instant or pre-cooked rice.

    1/2 cup dried chickpeas, halves – Chickpeas add protein, texture, and a nutty flavor. Look for split chickpeas (chickpea halves) at Middle Eastern or Indian grocery stores. If you can’t find them, use whole dried chickpeas and crack them in half by applying pressure with the flat side of a knife or using a mortar and pestle. Don’t use canned chickpeas—they’re too soft and will turn mushy.

    2 tomatoes, finely chopped – Fresh tomatoes add moisture, sweetness, and a subtle acidity to the filling. Dice them very finely so they distribute evenly. Roma or plum tomatoes work well as they’re less watery.

    parsley for stuffed grape leaves

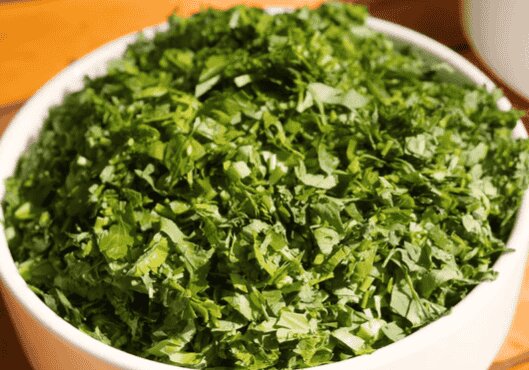
    1 bunch Italian parsley, finely chopped (stems discarded) – Fresh flat-leaf parsley is essential! It adds bright, peppery, herbaceous flavor. Chop it very finely—you want about 1 cup of minced parsley. Discard the thick stems.

    1 bunch fresh mint, finely chopped (stems discarded) – Fresh mint is absolutely essential in Lebanese warak enab! It adds a cooling, aromatic quality that makes these rolls distinctive. Use only the tender green leaves, finely minced. You’ll need about 3/4 cup minced mint.

    1 bunch green onions, finely chopped – The entire green onion – white and green parts – adds mild onion flavor and aroma without overpowering the herbs.

    2 teaspoons salt (divided) – Salt seasons the filling and the cooking liquid. You’ll use 1 teaspoon in the filling and 1 teaspoon in the cooking liquid.

    For the Base Ingredients

    1 onion, sliced into thin disks – These create a protective layer on the bottom of the pot to prevent the grape leaves from sticking and burning.

    1 tomato, sliced into thin disks – Along with the onion slices, this creates a flavorful base and prevents sticking.

    Cooking Liquid

    3/4 cup olive oil (divided) – Olive oil is essential for both the filling (1/4 cup) and the cooking liquid (1/2 cup). It adds richness and authentic Lebanese flavor.

    1 cup fresh lemon juice (divided) – You’ll need about 5-6 lemons. Use 1/4 cup in the filling and 3/4 cup in the cooking liquid. Fresh-squeezed is essential.

    2 cups water – Provides the liquid needed to cook the rice and chickpeas inside the grape leaves.

    How to Make Vegan Stuffed Grape Leaves (Warak Enab)

    Step 1: Prepare the herbs and vegetables

    Wash all the fresh herbs thoroughly. Remove and discard the stems from the mint and Italian parsley, keeping only the tender leaves. Finely mince the mint and parsley until almost paste-like—this is important for even distribution in the filling. Finely chop the 2 tomatoes and the bunch of green onions. Set everything aside.

    Step 2: Make the stuffing

    In a large bowl, combine the minced parsley, minced mint, chopped tomatoes, chopped green onions, 1/2 cup dried rice, 1/2 cup dried chickpea halves, 1 teaspoon salt, 1/4 cup olive oil, and 1/4 cup lemon juice. Mix everything together thoroughly with your hands or a spoon. The mixture should be well combined but still quite raw and uncooked. Set aside.

    Step 3: Prepare the grape leaves

    If using canned or jarred grape leaves, drain them and discard the brine. Soak the leaves in a bowl of hot water for 3-4 minutes to remove the preserving salt and make them more pliable. Rinse thoroughly with fresh water and drain.

    If using fresh grape leaves, make sure to pick young, tender leaves that are light green. Wash them well, then blanch them in boiling water on low heat for about 40 minutes to soften them. Drain and let cool.

    Once the leaves are ready, use scissors or a knife to cut off any remaining stems. Stack the prepared leaves on a cutting board or plate.

    Step 4: Prepare the pot base

    Slice the onion and tomato into thin disk-shaped rounds. Arrange them in a single layer across the bottom of a deep, heavy-bottomed cooking pot. This creates a protective layer that prevents the grape leaves from sticking to the pot bottom during cooking.

    Step 5: Roll the grape leaves

    This is where the magic happens. Here’s the technique:

    Place one grape leaf flat on your cutting board with the rough, veined side facing UP (the shiny side should be down). Position it so the stem end is closest to you.

    Place about 3/4 teaspoon of stuffing in a thin line along the bottom edge of the leaf (where the stem was), leaving about 1 cm (half an inch) empty on each side.

    warak enab with stuffing

    Roll the leaf tightly over the filling about one-third of the way up.

    Fold both the left and right sides of the leaf inward toward the center, tucking them over the filling.

    Continue rolling tightly all the way to the top of the leaf. The finished roll should be tight, slim (about 1/2 inch thick), and about 3 inches long. A tight roll is crucial—loose rolls will fall apart during cooking!

    Step 6: Pack the grape leaves in the pot

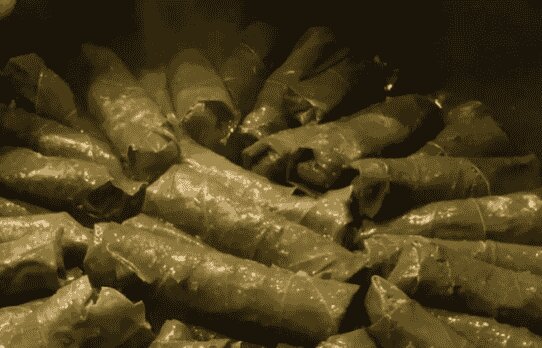
    As you finish rolling each grape leaf, place it seam-side down in the pot, arranging them tightly side by side in neat rows. When the first layer is complete, start a second layer directly on top, packing everything snugly. Depending on your pot size, you may have 2-4 layers. The tight packing prevents the rolls from unraveling during cooking.

    Step 7: Add the cooking liquid

    Sprinkle the remaining 1 teaspoon of salt over the packed grape leaves. Pour the remaining 3/4 cup lemon juice, remaining 1/2 cup olive oil, and 2 cups of water over everything. Gently tilt and rotate the pot from side to side to help the liquid seep through to the bottom. The liquid should just cover or almost cover the top layer of rolls. If it doesn’t, add a bit more water and lemon juice in equal parts.

    Step 8: Weight down the grape leaves

    Place a small, heatproof ceramic plate (or a heatproof dish that fits inside your pot) directly on top of the grape leaves. Press down firmly. This weights down the rolls and keeps them tightly packed and in place during cooking, preventing them from unraveling or floating up.

    Step 9: Cook the grape leaves

    Cover the pot with a lid. Bring to a boil over medium-high heat. Once boiling, reduce the heat to low and let simmer gently for 35-40 minutes. Every 10 minutes or so, carefully shake and gently swirl the pot to ensure the cooking liquid is evenly distributed and not pooling on one side.

    Step 10: Check for doneness

    After 35-40 minutes, carefully remove the lid and plate. The rice and chickpeas should be fully cooked and tender, and most of the liquid should be absorbed. The grape leaves should be very tender. If there’s still a lot of liquid and the rice isn’t tender, replace the plate and lid and cook for another 5-10 minutes.

    Step 11: Let it rest (optional but recommended)

    Turn off the heat and let the pot rest, uncovered, for 30 minutes to 1 hour. During this time, the rolls will absorb more of the flavorful sauce, and the flavors will intensify and meld together. This step also makes them easier to handle and serve.

    Step 12: Serve

    When ready to serve, place one gloved hand on the ceramic plate inside the pot to hold the rolls in place. Carefully pour off any remaining sauce into a separate container.

    Place your serving platter upside down over the top of the pot. Holding the platter firmly against the pot with one hand and supporting the bottom of the pot with your other hand, quickly and confidently flip everything upside down. The grape leaves should fall perfectly onto the platter with the onion and tomato slices on top.

    Serve warm or at room temperature with warm pita bread and a side of plain yogurt.

    Additions and Substitutions

    Grape leaves substitute: Fresh chard leaves, cabbage leaves, or even large spinach leaves can work, though the flavor will be different. Blanch them to soften before rolling.

    Rice substitute: Short-grain or medium-grain rice works best, but you could try bulgur wheat for a different texture (though not traditional).

    Chickpeas substitute: Dried lentils (whole, not split) can work, or you can omit them entirely and increase the rice slightly.

    Fresh herbs substitute: If fresh mint isn’t available, use 2 tablespoons dried mint (though fresh is far superior). Cilantro can partially replace parsley if needed.

    Lemon juice substitute: Use a combination of lemon and lime juice, or add a splash of white wine vinegar for tanginess.

    Add protein: For a non-vegan version, add 1/2 lb ground lamb or beef to the filling and reduce rice accordingly.

    Make it richer: Stir 1/4 cup pine nuts into the filling for extra richness and crunch.

    Spice it up: Add a pinch of cinnamon, allspice, or cumin to the filling for warmth.

    Make smaller rolls: For appetizer-sized portions, use less filling and make thinner rolls.

    Make it in advance: Rolled grape leaves can be assembled and refrigerated uncooked for up to 24 hours before cooking.

    How to Make Warak Enab or Lebanese Dolma at Home

    My first experience rolling grape leaves was at my friend’s Lebanese grandmother’s house. She had invited the whole family over for a “rolling party,” and I had no idea what I was getting into. When I arrived, there were literally hundreds of grape leaves spread across the kitchen table, bowls of fragrant herby rice filling, and at least a dozen women (and a few brave men) sitting around chatting and rolling.

    I was intimidated-everyone’s hands moved so quickly and confidently, producing perfect little rolls while carrying on conversations and sipping coffee. Mine, on the other hand, were fat, lumpy, and falling apart. The grandmother laughed kindly and came over to show me the technique: “Tight! Always tight! You roll like you’re making a baby swaddle, not a loose burrito!”

    It took me about twenty attempts before I got the hang of it-the right amount of filling, how to fold the sides in just so, how to roll tightly without tearing the delicate leaves. But once I found the rhythm, it became almost meditative. Roll, fold, pack. Roll, fold, pack. The kitchen filled with the scent of fresh mint and lemon, and before I knew it, we had filled three huge pots.

    What struck me most was how this dish embodies Lebanese hospitality and patience. No one makes just a dozen grape leaves-you make a hundred because you want enough to share with neighbors, send home with guests, and keep in the freezer for unexpected visitors. It’s a dish that requires time and care, but the result is something beautiful and deeply satisfying.

    When the grape leaves finally came off the stove after simmering in that fragrant lemon sauce, they were tender, tangy, and absolutely delicious. We ate them at room temperature with thick yogurt, and I understood why Lebanese families have been making these for generations-they’re worth every minute of the rolling process.

    Now when I make warak enab at home, I put on some music, pour myself something to drink, and embrace the slow, meditative process. Sometimes I rope friends or family into helping (promising them plenty of rolls to take home). The rolling might take an hour, but it’s an hour well spent.

    Vegan Stuffed Grape Leaves Recipe FAQs

    How do I prevent the grape leaves from tearing?

    Use tender, pliable leaves (not old, tough ones). If using jarred leaves, soak them in hot water to soften. Handle them gently, and don’t overfill-too much filling causes tears. If a leaf tears, you can patch it with a piece of another leaf or simply use two leaves together.

    Why do I need to roll them so tightly?

    Tight rolling prevents the grape leaves from unraveling during cooking and ensures the filling stays inside. Loose rolls often fall apart when simmered, creating a messy pot of rice and torn leaves.

    Can I use canned chickpeas instead of dried?

    It’s not recommended. Canned chickpeas are already soft and will turn to mush during the 35-40 minute cooking time. Dried chickpeas (especially halved ones) maintain their texture and cook perfectly along with the rice.

    How do I know when they’re done cooking?

    The rice and chickpeas should be fully tender when you bite into a roll, most of the cooking liquid should be absorbed, and the grape leaves should be very soft and tender. If the rice is still hard or crunchy, cook longer.

    Can I make these ahead of time?

    Yes! You can roll them up to 24 hours in advance and refrigerate before cooking. Cooked grape leaves keep well in the fridge for up to 5 days and actually taste better the next day as the flavors develop.

    Can I freeze stuffed grape leaves?

    Absolutely! Freeze them either uncooked (arrange in layers with parchment between each layer) or fully cooked. Both freeze well for up to 3 months. Cook frozen uncooked rolls straight from the freezer, adding 10-15 minutes to cooking time. Thaw cooked ones in the fridge overnight and reheat gently.

    What’s the difference between Lebanese warak enab and Greek dolmades?

    Lebanese warak enab are typically rolled thinner and tighter than Greek dolmades, use more fresh herbs (especially mint), and often include chickpeas. Greek dolmades may use dill instead of mint, have a looser roll, and sometimes include pine nuts and raisins.

    Want more delicious Lebanese vegetarian dishes?

    Mujadara – Lentils and rice with caramelized onions, perfect alongside warak enab.

    Lebanese Rice Pilaf – Fragrant rice with toasted vermicelli noodles.

    Tabbouleh – Fresh parsley salad with bulgur and lemon.

    Fattoush – Crispy bread salad with sumac dressing.

    Hummus – Classic chickpea dip, essential for any mezze spread.

    Baba Ganoush – Smoky eggplant dip with tahini.

    Spinach Fatayer – Savory pastries filled with spinach and sumac.

    What You Need

    • Large mixing bowl
    • Sharp knife or scissors
    • Cutting board
    • Deep, heavy-bottomed pot with lid
    • Small heatproof ceramic plate (to fit inside pot)
    Lebanese Warak Enab

    Warak Enab Recipe (Lebanese Stuffed Grape Leaves)

    Traditional Lebanese stuffed grape leaves filled with rice, chickpeas, tomatoes, fresh mint, and parsley, then simmered in lemon sauce. 
    Total Time 1 hour 50 minutes
    Servings: 6 people (90 small rolls)
    Course: Appetizer, Main Course
    Calories: 392

    Ingredients
      

    • 90 grape leaves fresh or jarred/canned
    • 1/2 cup dried rice short or medium grain
    • 1/2 cup dried chickpeas halves (or whole chickpeas cracked in half)
    • 2 tomatoes finely chopped
    • 1 bunch Italian parsley finely chopped (about 1 cup, stems discarded)
    • 1 bunch fresh mint finely chopped (about 3/4 cup, stems discarded)
    • 1 bunch green onions finely chopped
    • 1 teaspoon salt
    • 1/4 cup olive oil
    • 1/4 cup fresh lemon juice
    • 1 onion sliced into thin disks
    • 1 tomato sliced into thin disks
    • 1 teaspoon salt
    • 3/4 cup fresh lemon juice about 4-5 lemons
    • 1/2 cup olive oil
    • 2 cups water
    For Serving
    • Plain yogurt
    • Warm pita bread

    Method
     

    1. Finely chop parsley, mint, tomatoes, and green onions.
    2. Mix the herbs and vegetables with rice, chickpeas, salt, olive oil, and lemon juice to make the stuffing.
    3. Prepare grape leaves by rinsing jarred leaves or blanching fresh ones until soft, then remove stems.
    4. Line the bottom of a pot with sliced onions and tomatoes to prevent sticking.
    5. Place stuffing in each grape leaf, roll tightly, and fold in the sides like a wrap.
    6. Arrange the rolls seam-side down in tight layers inside the pot.
    7. Add salt, lemon juice, olive oil, and water until the rolls are just covered.
    8. Place a plate on top to keep them from unrolling, then simmer on low heat for 35–40 minutes, shaking the pot occasionally.
    9. Check that the rice and chickpeas are tender and most of the liquid is absorbed.
    10. Let rest for 30–60 minutes for better flavor.
    11. Flip onto a serving platter and serve warm or room temperature with pita bread and yogurt.

    Notes

    Nutrition (per serving – about 15 rolls):
    • Calories: 392
    • Fat: 29g
    • Carbohydrates: 32g
    • Fiber: 8g
    • Protein: 6g
    • Vitamin A: 13772 IU
    • Vitamin C: 44mg
    • Calcium: 206mg
    • Iron: 3mg
  • Dajaj Mishwi (Lebanese Grilled Chicken)

    Dajaj Mishwi (Lebanese Grilled Chicken)

    Craving juicy, garlicky, perfectly charred grilled chicken with real Lebanese flavors? Then you should try out this dajaj mishwi recipe. Made with a simple but intensely flavorful marinade of lemon, garlic, vinegar, and warm spices, this traditional Lebanese BBQ chicken is absolutely irresistible hot off the grill.

    Dajaj Mishwi recipe

    What Is Dajaj Mishwi?

    Dajaj mishwi (also spelled djej mishwe, djej mishweh, dajaj mashwi or dajaj meshwi) literally means “grilled chicken” in Arabic, and it’s one of the most beloved dishes in Lebanese cuisine. This isn’t just any grilled chicken – it’s chicken that’s been marinated for hours in a tangy, garlicky mixture of lemon juice, vinegar, olive oil, and aromatic spices, then grilled over charcoal until the skin is crispy and golden while the meat stays incredibly juicy.

    What makes Lebanese grilled chicken special is the marinade. It’s intensely acidic from the combination of fresh lemon juice and apple cider vinegar, which not only flavors the meat but also tenderizes it beautifully. The generous amount of garlic (we’re talking a whole head) gives it that signature Lebanese punch, while the blend of seven spices and cinnamon adds warmth and complexity without overpowering the bright citrus notes.

    The traditional way to serve dajaj mishwi is with generous dollops of toum (Lebanese garlic sauce), warm pita bread, and simple sides like grilled vegetables, fattoush salad, or French fries.

    What’s interesting about this recipe is how it bridges Lebanese and Portuguese flavors. If you’ve ever tried Nando’s peri-peri chicken, you’ll notice similarities-both have citrus-like marinades with garlic and grilling over high heat. The Lebanese version uses seven spices and cinnamon where Nando’s uses African bird’s eye chili, but the spirit is the same.

    If you love this dajaj mishwi recipe, you’ll probably also enjoy Chicken Shish Tawook (yogurt-marinated chicken skewers), Chicken Shawarma, Grilled Kafta (ground meat kebabs), Toum (to serve alongside), and Fattoush Salad to round out your Lebanese BBQ feast.

    Why You’ll Love This Dajaj Mishwi Recipe

    Incredibly flavorful marinade – The combination of lemon, vinegar, and garlic creates layers of delicious flavor that penetrate deep into the meat

    Simple but impressive – Just a handful of ingredients and basic grilling technique produces restaurant-quality results

    Perfect for gatherings – This is the kind of dish that brings people together around the grill

    Lebanese Grilled Chicken (or Dajaj Mashwi) Recipe Ingredients

    Chicken

    6 pieces chicken (breast or leg quarters with skin) – Keeping the skin on is crucial! It protects the meat from drying out and gets beautifully crispy on the grill. Leg quarters (thighs and drumsticks) are traditional and stay juicier than breasts, but chicken breasts work too if that’s your preference. You can also use a whole chicken cut into pieces. Bone-in, skin-on pieces are essential for the best texture and flavor.

    Marinade Ingredients

    1 head garlic, peeled – Yes, an entire head. This is about 10-12 cloves. Lebanese cooking doesn’t hold back on garlic, and that’s what makes this chicken so aromatic and flavorful. You’ll crush or mince all these cloves into the marinade.

    two full garlic

    1/2 cup fresh lemon juice – Freshly squeezed is best. You’ll need about 3-4 lemons. The lemon juice provides bright acidity that tenderizes the chicken and balances the richness of the olive oil. This is one of the signature flavors of Lebanese grilled chicken.

    1 cup apple cider vinegar (or red wine vinegar) – The vinegar does two things: it tenderizes the meat and makes it a little tart. Apple cider vinegar is milder and slightly sweet, while red wine vinegar is sharper. Either works beautifully. You’ll use half for an initial rinse and half in the marinade.

    3/4 cup extra virgin olive oil – Good quality olive oil adds richness, helps the marinade coat the chicken evenly, and prevents sticking on the grill. It also helps carry the fat-soluble flavors from the spices into the meat.

    Spices and Seasonings

    1/2 teaspoon Lebanese seven spices (baharat) – This is a traditional Lebanese spice blend typically containing black pepper, allspice, cinnamon, coriander, clove, nutmeg, and ginger. It adds warmth and complexity without being spicy-hot. You can find it at Middle Eastern stores or make your own blend.

    1/2 teaspoon ground cinnamon – Cinnamon is used in both the initial rub and often in the marinade. It adds subtle warmth and sweetness that complements the acidic marinade beautifully. Lebanese cooking frequently uses cinnamon in savory dishes.

    1 teaspoon salt – Essential for seasoning and helping the flavors penetrate the meat. Adjust to taste based on your preference.

    How to Make Dajaj Mishwi (Lebanese Grilled Chicken)

    Step 1: Prepare and clean the chicken

    Start by preparing your chicken pieces. In a large bowl, sprinkle and rub the 1/2 teaspoon ground cinnamon all over the raw chicken pieces. Then pour 1/2 cup of the vinegar over the chicken and rub it vigorously for a couple of minutes. This might seem unusual, but it’s a traditional Lebanese technique that helps remove any unpleasant smells from the chicken and begins the tenderizing process. Rinse the chicken well with cold water and pat dry with paper towels.

    Step 2: Score the chicken

    Using a sharp knife, make several deep cuts (slashes) in each chicken piece, cutting through the skin and about 1/2 inch into the meat. This is crucial! These cuts allow the marinade to penetrate deep into the chicken rather than just coating the surface. Make 3-4 cuts per piece, especially in the thicker parts.

    Step 3: Prepare the marinade

    Peel and crush or finely mince the entire head of garlic (10-12 cloves). In a large bowl or baking dish, combine the crushed garlic with the 1/2 cup lemon juice, the remaining 1/2 cup vinegar, 3/4 cup olive oil, 1 teaspoon salt, 1/2 teaspoon Lebanese seven spices, and an additional pinch of cinnamon if desired.

    Step 4: Marinate the chicken

    Add the prepared chicken pieces to the marinade. Using your hands (wear gloves if you prefer), rub the spices and salt thoroughly into the chicken, working them into the cuts you made. Make sure every piece is well coated. Then add the lemon juice and remaining vinegar, rubbing and massaging everything into the meat. Finally, add the olive oil and give it all one more thorough rub, ensuring the chicken is completely coated in marinade.

    Step 5: Refrigerate and wait

    Place the chicken and all the marinade in a sealed container or zip-top bag. Refrigerate for at least 4 hours, but overnight (8-12 hours) is even better for maximum flavor. Turn the chicken pieces occasionally if you remember, to ensure even marination.

    Step 6: Save the marinade

    When you’re ready to grill, remove the chicken from the refrigerator about 30 minutes before cooking to take the chill off. IMPORTANT: Save all the leftover marinade—you’ll use it to baste the chicken on the grill, which keeps it moist and adds incredible flavor.

    Step 7: Prepare your grill

    Preheat your grill to medium heat (around 375-400°F). If using charcoal, let the coals burn until they’re covered with gray ash. If you can hold your hand 5 inches above the grill grate for 5-6 seconds, the heat is perfect. For the most authentic flavor, use mesquite charcoal.

    Step 8: Grill the chicken

    Place the chicken pieces on the grill, skin-side up initially. This allows the fat to render and keeps the meat moist. Arrange the pieces strategically: put thighs, drumsticks, and wings (which are fattier and take longer) closer to the hottest part of the grill, and breasts (which cook faster) in slightly cooler zones.

    Step 9: Flip and baste

    Grill for about 12-15 minutes total, flipping the chicken pieces every 2-3 minutes for even cooking and to prevent burning. Each time you flip, baste the chicken generously with the reserved marinade using a brush or spoon. This keeps the chicken moist, adds layers of flavor, and helps prevent charring.

    Step 10: Check for doneness

    The chicken is done when the internal temperature reaches 165°F (use a meat thermometer inserted into the thickest part without touching bone), the juices run clear when pierced, and the skin is golden and crispy. The exterior should look beautifully charred in spots but not burnt. Be careful not to overcook or the chicken will dry out!

    Step 11: Serve

    Remove the chicken from the grill and let it rest for 5 minutes. This allows the juices to redistribute throughout the meat. Serve hot with generous amounts of toum (Lebanese garlic sauce), warm pita bread, and your favorite sides. Watch it disappear.

    Additions and Substitutions

    Chicken parts substitute: Use a whole chicken cut into 8 pieces, chicken thighs only (the juiciest!), drumsticks, or wings. Boneless chicken can work but won’t be as flavorful or traditional.

    Apple cider vinegar substitute: Red wine vinegar, white wine vinegar, or even regular white vinegar work. Each brings slightly different acidity and flavor.

    Lemon juice substitute: Lime juice works in a pinch, though the flavor will be different. Don’t use bottled lemon juice-fresh is essential for the best flavor.

    Lebanese seven spices substitute: Make your own by combining equal parts ground black pepper, allspice, cinnamon, coriander, cloves, nutmeg, and ginger. Or use a combination of allspice, black pepper, and extra cinnamon.

    Fresh garlic substitute: While fresh is always best, you could use 2-3 tablespoons of jarred minced garlic or garlic paste in a pinch.

    Add heat: Throw in 1/2 teaspoon cayenne pepper or red pepper flakes to the marinade if you like spicy food.

    Make it smoky: Add 1 teaspoon smoked paprika to the marinade for extra smokiness.

    Oven method: Don’t have a grill? Roast the marinated chicken on a baking sheet at 425°F for 35-45 minutes, flipping halfway through and basting occasionally.

    Air fryer method: Cook at 400°F for 25-30 minutes, flipping halfway and basting.

    Yogurt addition: Some cooks add 1/4 cup Greek yogurt to the marinade for extra tenderness and richness, though this isn’t traditional for dajaj mishwi.

    Frequently Asked Questions

    How long should I marinate the chicken?

    Minimum 4 hours, but overnight (8-12 hours) is ideal for maximum flavor and tenderness. The acidic marinade continues to tenderize the meat over time. You can marinate up to 24 hours, but beyond that, the acid can start to make the texture mushy.

    Do I need to boil the chicken before grilling?

    No! Definitely not. Boiling chicken before grilling is unnecessary and will actually make it less flavorful and juicy. The marinade and proper grilling technique are all you need for tender, juicy chicken.

    Should I oil the chicken before grilling?

    The marinade already contains olive oil, so the chicken will be well-coated. You don’t need additional oil. The oil in the marinade prevents sticking and helps achieve that crispy skin.

    What temperature should the grill be?

    Medium heat, around 375-400°F. If it’s too hot, the skin will burn before the inside cooks. If it’s too cool, the chicken will dry out without getting that nice char.

    How do I know when the chicken is done?

    Use a meat thermometer-the internal temperature should reach 165°F in the thickest part of the meat (not touching bone). The juices should run clear, not pink, and the skin should be golden and crispy.

    Can I make this without a grill?

    Yes! Roast in the oven at 425°F for 35-45 minutes, flipping halfway and basting occasionally. You can also use a grill pan on the stovetop, though you won’t get the same smoky flavor. An air fryer also works well at 400°F for 25-30 minutes.

    Why does the recipe require rinsing the chicken with vinegar and cinnamon?

    This is a traditional Lebanese technique to remove any unpleasant odors from the chicken and begin the tenderizing process. The cinnamon adds subtle flavor while the vinegar’s acidity cleans and starts to break down the proteins.

    Can I use boneless, skinless chicken?

    You can, but it won’t be traditional or as flavorful. The bones add flavor during grilling, and the skin protects the meat from drying out while getting beautifully crispy. If you must use boneless/skinless, reduce the cooking time to 8-10 minutes total and watch carefully to avoid drying it out.

    How do I prevent the chicken from sticking to the grill?

    Make sure your grill grates are clean and well-preheated. The oil in the marinade helps prevent sticking. Don’t try to flip the chicken too soon—it will release naturally when it’s ready.

    Want more delicious Lebanese grilled dishes?

    Chicken Shish Tawook – Yogurt-marinated chicken skewers with garlic and lemon.

    Toum (Lebanese Garlic Sauce) – Essential for serving with dajaj mishwi!

    Chicken Shawarma – Spiced, marinated chicken perfect for wraps.

    Grilled Kafta – Ground meat kebabs with parsley and onions.

    Fattoush Salad – Crispy bread salad with sumac dressing, perfect alongside grilled chicken.

    Lebanese Rice Pilaf – Fragrant rice with vermicelli noodles.

    Grilled Vegetables – Bell peppers, zucchini, and eggplant with olive oil and herbs.

    Dajaj Mishwi recipe

    Lebanese Grilled Chicken Recipe

    Traditional Lebanese grilled chicken marinated in a blend of lemon juice, apple cider vinegar, garlic, and warm spices, then grilled.
    Total Time 4 hours 35 minutes
    Servings: 6
    Course: Appetizer, Breakfast, Dessert, Snack
    Cuisine: lebanese
    Calories: 261

    Ingredients
      

    • 6 pieces chicken breast or leg quarters with skin on and bone in
    • 1 head garlic peeled (10-12 cloves)
    • 1/2 cup fresh lemon juice about 3-4 lemons
    • 1 cup apple cider vinegar or red wine vinegar divided: 1/2 cup for rinsing, 1/2 cup for marinade
    • 3/4 cup extra virgin olive oil
    • 1 teaspoon salt
    • 1/2 teaspoon Lebanese seven spices baharat
    • 1/2 teaspoon ground cinnamon plus extra for initial rub
    For Serving
    • Toum Lebanese garlic sauce
    • Warm pita bread
    • Lemon wedges

    Method
     

    1. Clean the chicken by rubbing with cinnamon and vinegar, then rinse and dry.
    2. Make deep cuts in each piece so the marinade soaks in better.
    3. Prepare a marinade with garlic, lemon juice, vinegar, olive oil, salt, Lebanese seven spices, and cinnamon.
    4. Coat the chicken thoroughly, making sure the marinade gets into the cuts.
    5. Refrigerate for at least 4 hours, ideally overnight.
    6. Before grilling, let chicken sit out for 30 minutes and preheat grill to medium heat.
    7. Grill chicken skin-side up first, placing fattier cuts closer to the heat.
    8. Flip every 2–3 minutes and baste often with leftover marinade to keep it juicy and flavorful.
    9. Cook until internal temperature reaches 165°F and skin is golden with light char.
    10. Leave it for 5 minutes, then serve with toum, pita bread, and lemon wedges.

    Notes

    Equipment

    • Large bowl or baking dish
    • Sharp knife for scoring
    • Grill (charcoal preferred, gas works too)
    • Basting brush
    • Meat thermometer
    Nutrition (per serving):
    • Calories: 261
    • Fat: 27g
    • Carbohydrates: 3g
    • Protein: 1g
    • Rich in protein when served with proper chicken portions
    • Contains beneficial garlic compounds
  • Lebanese Meat Pies: Sfeeha (Lahm bi Ajeen)

    Sfeeha (also spelled sfiha), or lahm bi ajeen (literally “meat with dough”), are Lebanese meat pies – thin, crispy flatbreads topped with a spiced ground meat mixture that’s tangy from pomegranate molasses, and laden with pine nuts and Lebanese spices.

    Lebanese Meat Pies Sfeeha

    What Are Sfeeha and Where Did They Come From?

    Sfeeha are open-faced meat pies that consist of a thin flatbread base topped with a seasoned ground meat mixture. Unlike closed pies or pastries, sfeeha are always open-faced, with the meat mixture spread generously across the entire surface of the dough. When baked at high heat, the dough becomes crispy on the bottom and edges while remaining slightly chewy in the center, and the meat topping caramelizes slightly, developing deep, complex flavors.

    The name “sfeeha” comes from the Arabic word for “flat” or “flattened,” which perfectly describes these thin, open-faced pies. They’re also commonly called “lahm bi ajeen,” which translates literally to “meat with dough” – a straightforward description that tells you exactly what you’re getting.

    Regional Variations and Names

    Sfeeha are popular throughout the Levant and Middle East, with each region having its own variation:

    Lebanese Sfeeha: Typically open-faced, relatively thin, and seasoned with pomegranate molasses, which gives them a distinctive tangy-sweet flavor. Lebanese versions often include pine nuts in the meat mixture and are served flat or folded.

    Syrian Sfeeha: Can be either open or closed into triangular parcels. The meat mixture is similar but sometimes spiced differently, with more emphasis on allspice and cinnamon.

    Turkish Lahmacun: The Turkish cousin of sfeeha, called lahmacun or lahmajun (derived from the Arabic “lahm ajeen”). Turkish versions are typically paper-thin, very crispy, and often rolled up with fresh herbs and a squeeze of lemon before eating.

    Jordanian and Palestinian variations: Often made slightly thicker and sometimes include tahini mixed into the meat or drizzled on top.

    The spelling variations you’ll encounter – lahmajun, lahmajin, lahm bi ajeen, lahm ajeen – all refer to the same basic concept, though the exact preparation may vary by region.

    The Saaj Tradition

    Traditionally, sfeeha and other Lebanese flatbreads were baked on a “saaj” – a dome-shaped metal griddle heated over wood or gas fire. The saaj is an ancient cooking method still used in many Lebanese villages and some traditional bakeries. The high, dry heat of the saaj creates an incredibly crispy bottom crust while the dome shape allows the top to cook from radiant heat.

    Today, most people (including me) use a conventional oven, which produces excellent results when heated to very high temperatures. The key is that high heat – you want your oven as hot as it will go to imitate the intense heat of a traditional saaj.

    Sfeeha (Lahm bi Ajeen) Ingredients

    This recipe has two main components: the dough and the meat topping. While you can certainly use store-bought pizza dough to save time, making the dough from scratch is surprisingly easy and yields superior results.

    Here’s everything you’ll need. For exact measurements, see the recipe card below.

    All-purpose flour for lebanese meatpie

    Meat Topping Ingredients

    Ground beef (1 lb, lean): Use lean ground beef (90% lean or higher) to prevent the pies from becoming greasy. The meat should have some fat for flavor, but too much will make the topping oily and cause the bread to become soggy. Ground lamb or a combination of beef and lamb also works beautifully and adds more traditional Middle Eastern flavor.

    Red onion (1 medium, finely chopped): Red onion is preferred for its slightly sweeter, less pungent flavor compared to yellow onions. The onion must be finely chopped – we’re talking very small pieces, almost minced. Large chunks of onion don’t distribute well and can make the topping watery.

    Tomato (1 medium, finely chopped): Fresh tomato adds moisture, acidity, and a subtle sweetness. It should be finely diced and, if the tomato is very juicy, you might want to squeeze out some of the excess liquid to prevent a watery topping. Use ripe but firm tomatoes – overly ripe, mushy tomatoes will make the mixture too wet.

    Pine nuts (¾ cup): Called snoubar in Arabic, pine nuts are traditional in Lebanese sfeeha. They add a buttery richness and delightful crunch. They’re expensive, so if budget is a concern, you can reduce the amount to ½ cup or substitute with chopped walnuts or almonds (though this is less traditional).

    Pomegranate molasses (2 tablespoons): This is the secret ingredient that makes Lebanese sfeeha distinctive. Pomegranate molasses (also called pomegranate syrup) is a thick, tangy-sweet reduction of pomegranate juice. It provides acidity, a fruity depth, and a subtle sweetness that balances the spices. You can find it at Middle Eastern markets or online. There’s no perfect substitute, but in a pinch, you could use a mixture of lemon juice and a touch of honey or grape molasses.

    Lemon juice (1 teaspoon, optional): Adds extra brightness and acidity. This is optional because the pomegranate molasses already provides tanginess, but a little lemon juice enhances it.

    Fresh parsley (½ cup, finely chopped, stems removed): Flat-leaf Italian parsley only. The fresh, bright flavor of parsley cuts through the richness of the meat and adds a pop of green color. Make sure it’s finely chopped and that you’ve removed the tough stems.

    Lebanese 7 spice (2 teaspoons): This aromatic spice blend typically contains allspice, black pepper, cinnamon, cloves, fenugreek, ginger, and nutmeg. It’s what gives Lebanese meat dishes their characteristic warm, complex flavor. You can buy it pre-made at Middle Eastern markets or make your own blend.

    Salt (1-2 teaspoons): Season to taste. The amount needed will depend on your beef and personal preference.

    Chili powder (½ teaspoon, or to taste): Adds a gentle heat. Traditional Lebanese sfeeha are mildly spicy, not fiery, so start conservative and add more if you like heat.

    Dough Ingredients

    All-purpose flour (6 cups): Standard all-purpose flour works perfectly. Bread flour would make a chewier crust, while all-purpose flour gives you a tender, crispy result.

    Active dry yeast (½ teaspoon): This seems like a small amount, but it’s intentional. Sfeeha dough doesn’t need to be as puffy and risen as bread dough – you want a thin, crispy base, not a thick, bready crust. The yeast is primarily for flavor development and a slight lift.

    Salt (1½ teaspoons): Essential for flavor in the dough.

    Sugar (⅛ teaspoon): Just a pinch to activate the yeast.

    Warm water (approximately 3-3½ cups): The exact amount may vary based on your flour and humidity. You want a smooth, pliable dough that’s not sticky.

    Optional: Olive oil (2-3 tablespoons): While not listed in the original recipe, adding a little olive oil to the dough makes it more pliable and creates a slightly richer, more tender crust.

    Shortcut to Save Time

    Pre-made pizza dough: If you’re short on time or intimidated by making dough, use store-bought pizza dough or thin-crust flatbread. Many grocery stores sell fresh pizza dough in the refrigerated section, and frozen naan or pita also work well. The flavor won’t be quite as authentic, but it’s a perfectly acceptable shortcut that still yields delicious results.

    How to Make Lebanese Meat Pies (Sfeeha)

    This recipe involves making the dough, preparing the meat topping, assembling, and baking. If you’re making the dough from scratch, set aside about 45 minutes total (though much of that is hands-off resting time). If using store-bought dough, you’ll cut the time in half.

    What You Need

    • Food processor with dough blade (or large mixing bowl for hand-kneading)
    • Rolling pin
    • Baking sheets
    • Parchment paper or silicone baking mats (optional)
    • Mixing bowls

    Making the Dough from Scratch

    Step 1: In a small bowl or measuring cup, combine ½ cup warm water (about 110°F/43°C – warm to the touch but not hot) with the tiny pinch of sugar (⅛ teaspoon). Sprinkle the yeast over the water and let it sit for about 5 minutes until it becomes foamy. This “proofs” the yeast, confirming it’s alive and active.

    Step 2: In a large food processor fitted with the dough blade (or in a large mixing bowl if making by hand), combine the flour and salt.

    Step 3: Once the yeast is foamy, add it to the flour along with enough additional warm water to form a dough – usually about 2½ to 3 cups more water. The exact amount will depend on your flour’s absorption.

    Step 4: If using a food processor, pulse and then run continuously until a ball of dough forms and pulls away from the sides of the bowl, about 2-3 minutes. If making by hand, stir with a wooden spoon until it comes together, then turn out onto a floured surface and knead for 8-10 minutes until smooth and elastic.

    tomatoes and onions

    Step 5: The dough should be smooth, soft, and just slightly tacky but not sticky. If it’s too sticky, add a tablespoon of flour at a time. If it’s too dry and won’t come together, add water a tablespoon at a time.

    Step 6: Form the dough into a ball and place it in a lightly oiled bowl. Cover with a damp towel or plastic wrap and let it rest in a warm place for 20-30 minutes. You’re not looking for a huge rise like you would with bread – just a little rest to relax the gluten and make the dough easier to roll.

    Why the short rise? Unlike pizza or bread, sfeeha dough is meant to be thin and crispy, not puffy and bready. A short rest is enough to make the dough workable without creating too much rise.

    Preparing the Meat Topping

    Step 7: While the dough rests, prepare the meat topping. This is the easy part – it’s essentially a no-cook mixture that comes together in minutes.

    Step 8: In a large mixing bowl, combine the ground beef, finely chopped red onion, finely chopped tomato, pine nuts, pomegranate molasses, lemon juice (if using), chopped parsley, Lebanese 7 spice, salt, and chili powder.

    Step 9: Use your hands to mix everything together thoroughly. Really work it with your hands to ensure all the ingredients are evenly distributed throughout the meat. The mixture should be cohesive but still loose – not formed into a solid mass like you would for meatballs.

    Step 10: Taste a tiny bit of the raw mixture (if you’re comfortable doing so) or cook a small piece in the microwave to check the seasoning. The mixture should taste well-seasoned, tangy from the pomegranate molasses, and aromatic from the spices. Adjust salt or spices as needed.

    Step 11: Cover the bowl and refrigerate the meat mixture while you work with the dough. This keeps it cold and food-safe.

    Important note: The meat topping goes on raw and cooks during baking. Don’t cook it beforehand – the high heat of the oven will cook it perfectly while also caramelizing the edges for maximum flavor.

    Preparing the Sfeeha

    Step 12: Preheat your oven to 500-520°F (260-271°C). This is crucial – you want your oven as hot as possible. If your oven has a convection setting, use it. The high heat mimics a traditional saaj and creates that characteristic crispy crust.

    Step 13: Divide the dough into portions. For large sfeeha (about 8 inches in diameter), divide into 10-12 pieces. For smaller ones, divide into 20-24 pieces. Roll each piece into a smooth ball.

    Step 14: On a lightly floured surface, use a rolling pin to roll each dough ball into a thin round about ⅓ inch thick (or thinner if you prefer extra-crispy crust). The shape doesn’t have to be perfectly circular – rustic, slightly irregular shapes are traditional.

    Step 15: Sprinkle a light dusting of flour on your baking sheets to prevent sticking. Alternatively, use parchment paper or a silicone baking mat. Place the rolled dough rounds on the baking sheets, leaving a little space between them (they won’t spread much).

    Step 16: Spoon 3-4 tablespoons of the meat mixture onto each dough round (adjust the amount based on the size of your rounds – you want the meat spread to almost the edges, leaving just a small border).

    Step 17: Use the back of a spoon to spread the meat mixture evenly across the surface of the dough, pressing it down gently and spreading it all the way to within about ½ inch of the edges. You want an even, thin layer that covers the entire surface.

    Step 18: The meat should be pressed down firmly but not so thin that you can see the dough through it. A good layer of meat ensures every bite is flavorful and that the moisture from the meat keeps the dough from drying out too much.

    Baking the Sfeeha

    Step 19: Place the baking sheet in the preheated oven. Bake for 10-13 minutes, until the dough has turned golden brown on the edges and the meat is cooked through with slightly caramelized, crispy edges.

    Step 20: For extra crispiness and color, you can finish under the broiler for 1-2 minutes. Watch carefully – the broiler works fast and things can burn quickly. You want the meat to develop some charred, caramelized spots and the edges to become deeply golden.

    Step 21: Remove from the oven and let cool for just a minute or two. Sfeeha are best served warm, not piping hot (you want to be able to taste all the flavors without burning your mouth).

    Step 22: Serve immediately. Traditional accompaniments include a squeeze of fresh lemon juice, a sprinkle of cayenne or Aleppo pepper for heat, or a cold yogurt drink like ayran (salted yogurt thinned with water and ice).

    How to Eat Sfeeha

    There’s a traditional way to eat sfeeha that maximizes the experience:

    For large sfeeha: Fold the pie in half like a taco and eat it while it’s still warm. This keeps all the toppings contained and gives you a perfect ratio of meat to bread in every bite.

    For medium sfeeha: Roll it up like a wrap, perhaps with some fresh herbs (parsley, mint) or a drizzle of tahini inside for extra richness.

    For mini sfeeha: Pop them in your mouth whole or in two bites as part of a mezze spread.

    The squeeze: Many Lebanese people squeeze fresh lemon juice over their sfeeha just before eating. The acidity brightens all the flavors and cuts through any richness.

    The Importance of High Heat

    One of the most common mistakes when making sfeeha at home is not using high enough heat. The oven needs to be extremely hot for several reasons:

    Crispy crust: High heat crisps the bottom and edges of the dough before the inside becomes tough or dry.

    Caramelization: The meat topping needs high heat to brown and caramelize, developing complex, slightly charred flavors.

    Quick cooking: At lower temperatures, the meat releases more moisture, making the bread soggy. High heat cooks everything quickly before too much moisture can accumulate.

    Mimicking the saaj: Traditional saaj ovens operate at very high temperatures. A hot home oven is the best way to replicate those conditions.

    Don’t be afraid to crank your oven up to 520°F or even higher if it will go there. Just make sure to watch the pies carefully – at these temperatures, they go from perfect to burnt quickly.

    Variations and Related Dishes

    Spinach sfeeha (Sabanekh): Instead of meat, use a mixture of chopped spinach, onions, lemon juice, sumac, and pine nuts.

    Cheese sfeeha: Top with a mixture of akkawi cheese, mozzarella, and nigella seeds.

    Za’atar manakish: Replace the meat with za’atar (wild thyme mixture) mixed with olive oil – a Lebanese breakfast classic.

    Closed sfeeha: Instead of open-faced, fold the edges up to create triangular parcels with the meat enclosed.

    Yogurt topping: Some variations include tahini or yogurt mixed into the meat or drizzled on top after baking.

    Frequently Asked Questions

    Can I use ground lamb instead of beef?

    Absolutely! Ground lamb is traditional and delicious. You can use 100% lamb or a mixture of lamb and beef (50/50 or 70/30 beef to lamb). Lamb has more fat, so choose lean ground lamb to prevent greasiness.

    Do I need to cook the meat before putting it on the dough?

    No! The meat goes on raw and cooks perfectly in the hot oven. Pre-cooking would make it dry and change the texture completely.

    Can I make these vegetarian?

    Yes! Traditional spinach sfeeha (sabanekh) are delicious. Use chopped spinach, onions, lemon juice, sumac, walnuts or pine nuts, and olive oil. You can also make them with za’atar and cheese.

    Why did my dough turn out tough?

    This usually happens from over-kneading, too much flour, or over-baking. The dough should be soft and pliable, rolled thin, and baked just until golden. Also, make sure your oven is hot enough – lower temperatures require longer baking, which toughens the dough.

    Can I use a different type of molasses?

    Pomegranate molasses is pretty unique in flavor – it’s both tart and fruity. Regular molasses (like blackstrap) is completely different and won’t work. Tamarind paste thinned with a little water is the closest substitute, or use extra lemon juice with a touch of honey or grape molasses.

    Why is my meat topping watery?

    This usually comes from very juicy tomatoes or not draining excess liquid. If your tomatoes are very juicy, squeeze out some liquid before adding them to the meat mixture. Also, make sure you’re using lean ground beef – fatty beef releases more liquid during cooking.

    Can I make these on a pizza stone?

    Yes. A preheated pizza stone gives excellent results. Preheat the stone in your hot oven for at least 30 minutes, then carefully transfer the assembled sfeeha onto the hot stone. They’ll cook even faster and get extra crispy.

    Lebanese Meat Pies Sfeeha

    Sfeeha (Lahm bi Ajeen) Recipe

    Traditional Lebanese meat pies featuring thin, crispy flatbread topped with spiced ground beef, pomegranate molasses, pine nuts, and fresh herbs.
    Total Time 30 minutes
    Servings: 10 pies
    Calories: 944

    Ingredients
      

    For the dough (or use 2 lbs store-bought pizza dough)
    • 6 cups all-purpose flour
    • ½ teaspoon active dry yeast
    • teaspoons salt
    • teaspoon sugar
    • 3 –3½ cups warm water about 110°F/43°C
    • 2 –3 tablespoons olive oil optional
    For the meat topping
    • 1 lb lean ground beef
    • 1 medium red onion very finely chopped
    • 1 medium tomato finely chopped (excess liquid removed)
    • ¾ cup pine nuts
    • 2 tablespoons pomegranate molasses
    • 1 teaspoon fresh lemon juice optional
    • ½ cup fresh parsley finely chopped
    • 2 teaspoons Lebanese 7 spice
    • 1 –2 teaspoons salt to taste
    • ½ teaspoon chili powder to taste
    For serving (optional)
    • Lemon wedges
    • Cayenne or Aleppo pepper
    • Fresh herbs parsley, mint
    • Ayran or plain yogurt

    Method
     

    1. Mix ½ cup warm water with sugar, sprinkle in yeast, and let sit for 5 minutes until foamy.
    2. In a bowl, combine flour and salt, then add the yeast mixture and enough warm water to form a soft dough. Add olive oil if using.
    3. Knead until smooth and elastic (2–3 minutes in a processor or 8–10 minutes by hand). The dough should be soft and slightly tacky.
    4. Form into a ball, place in an oiled bowl, cover, and let rest in a warm place for 20–30 minutes.
    5. In another bowl, mix ground beef, onion, tomato (excess liquid removed), pine nuts, pomegranate molasses, lemon juice, parsley, spices, and salt until well combined.
    6. Taste a small cooked portion and adjust seasoning if needed, then cover and refrigerate.
    7. Preheat oven to 500–520°F (260–271°C).
    8. Divide dough into portions, roll into balls, then flatten into thin rounds.
    9. Spread the meat mixture evenly over each round, leaving a small border.
    10. Bake for 10–13 minutes until edges are golden and meat is cooked, broiling briefly if desired.
    11. Let cool slightly, then serve warm with lemon, herbs, or yogurt if desired.

    Notes

    Storage: Store baked sfeeha in an airtight container in the refrigerator for up to 3 days. Reheat in a 400°F oven for 5-7 minutes until crispy.
    Freezing Unbaked: Assemble completely, freeze on baking sheets, then transfer to freezer bags. Bake from frozen, adding 2-3 minutes to cooking time.
    Freezing Baked: Cool completely, freeze in airtight containers for up to 3 months. Reheat from frozen at 400°F for 5-7 minutes.
    Serving Tradition: Fold large sfeeha in half like a taco, or roll up with fresh herbs inside. Squeeze fresh lemon juice over the top before eating.
    Make It a Meal: Serve with ayran (yogurt drink made by blending plain yogurt with cold water, salt, and ice), fresh vegetables, olives, and labneh for a traditional Lebanese breakfast.
    Mini Party Pies: Make 2-3 inch diameter sfeeha to serve as part of a mezze spread or as appetizers.
  • Lebanese Almond Rice (Fragrant Rice Pilaf with Toasted Almonds)

    Lebanese Almond Rice (Fragrant Rice Pilaf with Toasted Almonds)

    The Lebanese Almond Rice is a traditional roz bil lauz made with simple ingredients and a perfect side dish for grilled meats, stews, and everything in between.

    Lebanese Almond Rice

    What Is Lebanese Almond Rice?

    Lebanese almond rice (roz bil lauz) is a popular side dish and part of the broader family of Lebanese rice pilaf (roz bi sh’arieh), where rice is cooked with toasted vermicelli noodles in butter or oil. But this version takes it further with the addition of toasted almonds that add both visual appeal and delicious nutty crunch.

    What makes Lebanese rice distinctive from plain steamed rice is the technique of toasting vermicelli noodles (thin pasta broken into small pieces) in butter until golden brown before adding the rice.

    The almonds in this recipe serve multiple purposes. They add visual appeal (making this suitable for special occasions), improves texture by making it crunchy, and contribute a rich, buttery flavor that complements the toasted vermicelli. Some cooks toast the almonds with the vermicelli, while others toast them separately and scatter them on top as garnish – both methods work well.

    If you love this Lebanese almond rice recipe, you’ll probably also enjoy Lebanese Vermicelli Rice (the simpler version without almonds), Hashweh (spiced rice with ground meat and nuts), Mujadara (lentils and rice with caramelized onions), Makloubeh (upside-down rice with vegetables and meat), and of course, serving it alongside Grilled Chicken, Chicken Shawarma, or Kafta Kebabs.

    Why You’ll Love This Lebanese Almond Rice Recipe

    Simple but impressive – Easy enough for weeknight dinners but elegant enough for special occasions

    Perfect texture every time – The technique creates fluffy, separate grains with a beautiful golden color from the toasted vermicelli

    Incredibly versatile – Pairs beautifully with other sources of protein, from grilled meats to vegetarian stews

    Lebanese Almond Rice Ingredients

    Here’s what you will need to make this recipe:

    Rice

    2 cups long-grain white rice – Basmati rice is ideal for Lebanese rice pilaf because it stays fluffy with separate grains. Regular long-grain white rice also works beautifully. Avoid short-grain or sticky rice varieties—you want rice that stays light and fluffy, not clumpy. The rice should be rinsed thoroughly before cooking to remove excess starch.

    Vermicelli

    1/2 cup vermicelli noodles (broken into small pieces) – These thin pasta strands are essential to authentic Lebanese rice. You’ll break them into roughly 1/2 to 1-inch pieces. Look for the thinnest vermicelli you can find (sometimes labeled as angel hair pasta in Western stores). The vermicelli toasts to golden brown in butter, adding beautiful color, toasted flavor, and textural variety to the rice.

    Fat

    4 tablespoons butter (or ghee) – Butter is traditional and adds rich flavor. Some Lebanese cooks use ghee (clarified butter) or a combination of butter and olive oil. The butter is what toasts the vermicelli and almonds to golden perfection and coats each grain of rice with silky richness.

    Almonds

    1/2 cup sliced or slivered almonds – These can be added in two ways: toasted with the vermicelli for integrated flavor throughout, or toasted separately and sprinkled on top as garnish. Sliced almonds are traditional, but you can also use slivered or even whole almonds that you’ve roughly chopped. Make sure they’re unsalted!

    Liquid

    3 cups water or chicken broth – The general ratio is 1.5 cups liquid to 1 cup rice when using the absorption method. Water works perfectly fine, but chicken broth (or vegetable broth) adds extra depth and savory flavor. Some cooks use a combination of both.

    Seasoning

    1 teaspoon salt (or to taste) – Essential for bringing out all the flavors. If using salted broth, reduce the added salt accordingly. Start with less and adjust after tasting.

    Optional additions

    1/4 teaspoon ground cinnamon – A tiny pinch adds warmth and subtle sweetness that complements the almonds beautifully. Very traditional in some Lebanese households.

    1 bay leaf – Adds aromatic depth while the rice cooks. Remove before serving.

    2 tablespoons pine nuts – Some cooks add pine nuts along with (or instead of) almonds for extra richness.

    Additions and Substitutions

    Rice substitute: Jasmine rice works well, as does any long-grain white rice. Brown rice can be used but will require more liquid (4 cups) and longer cooking time (40-45 minutes).

    Vermicelli substitute: You can use angel hair pasta broken into small pieces, or thin spaghetti broken up. Orzo (rice-shaped pasta) can work, but will look different. In a pinch, you can make the rice without vermicelli, though it won’t be traditional.

    Butter substitute: Ghee (clarified butter) is wonderful and very traditional. Olive oil can be used for a dairy-free version, or use a combination of olive oil and butter for the best of both worlds.

    Almonds substitute: Pine nuts are the most traditional alternative (often used in hashweh rice). Cashews, pistachios, or walnuts can also work. Omit nuts entirely for plain vermicelli rice.

    Broth substitute: Water is perfectly fine! For vegetarian/vegan, use vegetable broth. For extra richness, use half broth and half water.

    Add vegetables: Some cooks add frozen peas in the last 5 minutes of cooking for color and nutrition. Diced carrots can be sautéed with the vermicelli.

    Make it fancy (hashweh-style): Add 1/2 lb ground lamb or beef browned with the vermicelli, plus warm spices like cinnamon, allspice, and black pepper.

    Add aromatics: A small diced onion sautéed with the vermicelli adds sweetness and depth.

    Saffron rice: Add a pinch of saffron threads soaked in 2 tablespoons of warm water to the cooking liquid for a beautiful golden color and luxurious flavor.

    Extra crispy topping: Toast extra almonds and vermicelli separately until very crispy and use as garnish on top for added crunch.

    How to Make Lebanese Almond Rice (Roz bil Lauz)

    I learned to make proper Lebanese rice from my friend’s mother during a visit to their family home. I’d been making rice for years—how hard could it be? But when I watched her transform simple rice into something magical by toasting vermicelli in butter until golden brown, I realized I’d been missing out.

    The first lesson was patience. She stressed that the vermicelli needed to be toasted to a deep golden brown, not just lightly colored. “This is where the flavor comes from,” she explained, stirring constantly and watching like a hawk. “Too light and it tastes bland. Too dark and it’s bitter. Just right, and the whole rice becomes fragrant.”

    The second lesson was the importance of good ingredients. She used real butter (not margarine), quality basmati rice that she rinsed three times, and whole almonds she sliced herself that morning. “Cooking is simple,” she said, “but simple means you can’t hide behind complexity. The ingredients have to be good.”

    The third lesson was the technique. Once the liquid was added and brought to a boil, the lid went on and didn’t come off. No peeking, no stirring, no checking. “The steam must stay inside,” she insisted. “Every time you lift the lid, you let out steam and the rice won’t cook evenly.”

    When we finally opened the pot after the resting period, the rice was absolutely perfect—fluffy, with each grain separate, golden vermicelli scattered throughout like little treasures, and toasted almonds adding pops of crunch. We served it alongside grilled kafta kebabs, and I understood why Lebanese rice is never just plain rice.

    Now when I make Lebanese almond rice at home, I hear her voice reminding me to toast until deeply golden, to resist the urge to peek, and to use good butter. These small details make all the difference between ordinary rice and rice that people actually talk about.

    I’ve served this rice at dinner parties where people have asked for the recipe (it’s always a surprise when they learn how simple it is), packed it in lunch boxes where it holds up beautifully even cold, and made it countless times as a weeknight side dish that makes even simple grilled chicken feel special.

    Frequently Asked Questions

    What type of rice is best for Lebanese rice?

    Long-grain rice like basmati or regular long-grain white rice works best. These varieties stay fluffy with separate grains rather than sticky. Basmati is preferred for its aromatic quality and perfect texture, but any quality long-grain rice will work beautifully.

    Do I have to use vermicelli?

    Vermicelli is traditional and essential to authentic Lebanese rice pilaf. It adds toasted flavor, visual appeal, and textural variety. However, if you can’t find vermicelli, you can use broken angel hair pasta or thin spaghetti. You can also make rice without it, though it won’t be traditional roz bi sh’arieh.

    Can I use brown rice?

    Yes, but you’ll need to adjust the liquid and cooking time. Use 4 cups liquid instead of 3, and cook for 40-45 minutes instead of 15-18 minutes. The texture and flavor will be different from traditional Lebanese rice, but it’s a healthy alternative.

    Why do you toast the vermicelli and almonds first?

    Toasting in butter creates deep, nutty, caramelized flavors that simple boiling can’t achieve. It also gives the vermicelli that beautiful golden color that makes Lebanese rice so distinctive. This step is crucial and shouldn’t be skipped!

    Can I make this ahead of time?

    Yes! You can make it several hours ahead and keep it warm in the covered pot on the lowest heat setting. You can also make it a day ahead, refrigerate, and reheat in the microwave or on the stovetop with a splash of water. It freezes well for up to 3 months.

    Why is my rice sticky or mushy?

    This usually means the rice wasn’t rinsed enough (excess starch makes rice sticky), too much liquid was used, or the rice cooked too long. Make sure to rinse until the water runs clear, use the proper 1.5:1 liquid-to-rice ratio, and don’t overcook.

    Can I make this in a rice cooker?

    Yes! Toast the vermicelli, almonds, and rice in butter on the stovetop first, then transfer everything to your rice cooker. Add the liquid and cook on the white rice setting. It works beautifully.

    What should I serve with Lebanese almond rice?

    This rice is incredibly versatile! It pairs beautifully with grilled meats (chicken, lamb, beef kebabs), stews (bazella, fasolia, okra stew), roasted vegetables, or even just with yogurt and a simple salad. It’s the perfect side dish for Middle Eastern meals.

    Can I make this vegan?

    Absolutely! Replace the butter with olive oil or vegan butter, and use vegetable broth instead of chicken broth. It will still be delicious, though the flavor will be slightly different from the traditional butter-based version.

    How do I prevent burning the vermicelli?

    Use medium heat (not high), stir constantly, and watch carefully. The vermicelli can go from golden to burnt very quickly. If it’s browning too fast, reduce the heat. Don’t multitask during this step—give it your full attention for those 3-5 minutes.

    Want more delicious Lebanese rice dishes and sides?

    Lebanese Vermicelli Rice (Roz bi Sh’arieh) – The simpler version without almonds, equally delicious.

    Hashweh – Spiced rice with ground meat, pine nuts, and almonds.

    Mujadara – Lentils and rice with crispy caramelized onions.

    Makloubeh – Upside-down rice with eggplant, cauliflower, and meat.

    Lebanese Rice Pudding – Creamy rice dessert with orange blossom water.

    Fattoush Salad – Crispy bread salad perfect alongside rice.

    Grilled Kafta – Ground meat kebabs that pair perfectly with this rice.

    Lebanese Almond Rice

    Lebanese Almond Rice Recipe

    Fragrant Lebanese rice pilaf with toasted vermicelli noodles and golden almonds. This roz bil lauz is fluffy, buttery, and nutty – the perfect side dish for grilled meats, stews, and special occasions.
    Total Time 30 minutes
    Servings: 6 servings
    Calories: 310

    Ingredients
      

    Main Ingredients
    • 2 cups long-grain white rice preferably basmati
    • 1/2 cup vermicelli noodles broken into small pieces (1/2 to 1-inch pieces)
    • 1/2 cup sliced or slivered almonds unsalted
    • 4 tablespoons butter or ghee
    • 3 cups water or chicken broth
    • 1 teaspoon salt adjust if using salted broth
    Optional Additions
    • 1/4 teaspoon ground cinnamon
    • 1 bay leaf
    • 2 tablespoons pine nuts in addition to or instead of almonds

    Method
     

    1. Rinse the rice under cold water until clear, then drain and set aside.
    2. Break the vermicelli into small pieces and set aside.
    3. Melt the butter in a pot over medium heat, then add the vermicelli and almonds. Stir until golden and fragrant, about 3–5 minutes.
    4. Add the rice and stir to coat well. Cook for 1–2 minutes.
    5. Pour in the water or broth, add salt and any optional spices, and stir once.
    6. Bring to a full boil over medium-high heat.
    7. Reduce heat to low, cover, and cook for 15–18 minutes without lifting the lid.
    8. Turn off the heat and let it sit, covered, for 5 minutes.
    9. Remove the lid, discard the bay leaf if used, and fluff with a fork.
    10. Serve warm, topped with extra almonds if desired.
  • Lebanese Oregano Salad (Salatet Zaatar Akhdar)

    Some dishes don’t need much to be special. Just a few fresh ingredients, mixed together the right way, and that’s enough. Salatet zaatar akhdar, a Lebanese oregano salad, is one of those dishes.

    It’s very simple. Fresh wild oregano leaves are tossed with sliced onions, a little sumac, lemon juice, and good olive oil. That’s it.

    In many Lebanese homes, no one measures anything. Still, giving measurements can help if you’re making it for the first time.

    When wild oregano is in season, especially in spring, this salad is a favorite. It’s quick, healthy, and full of flavor.

    Lebanese Oregano Salad

    What is Zaatar Akhdar and Where Does it Come From?

    Zaatar akhdar translates literally to “green zaatar” or “fresh zaatar,” and it refers specifically to the fresh leaves of wild oregano, botanically known as Origanum syriacum. This is the wild cousin of the Mediterranean oregano you might be familiar with, but with a more peppery, slightly bitter taste and a more pungent, complex aroma.

    This bushy perennial herb is native to the Levant – Lebanon, Syria, Jordan, Palestine, and parts of Turkey – where it grows wild throughout the rocky hillsides. In Lebanon, it appears at the beginning of spring, carpeting the hills with its aromatic presence. For centuries, Lebanese people have foraged wild oregano from these hills, using it both fresh in salads and dried to make the famous zaatar spice blend.

    What Kind of “Zaatar” to Use

    The word “zaatar” causes considerable confusion, particularly in the West, because it refers to multiple things:

    Zaatar akhdar (fresh wild oregano): The fresh, leafy herb itself – Origanum syriacum. This is what we’re using in this salad.

    Zaatar spice blend: The dried seasoning mixture made from ground dried oregano (Origanum syriacum), sumac, sesame seeds, and salt. This is what you mix with olive oil and spread on flatbread to make manakish.

    Zaatar (the plant name): In Arabic, “zaatar” can refer to any number of aromatic herbs in the oregano/thyme family, though most commonly it means Origanum syriacum.

    To make it simple, fresh zaatar akhdar (wild oregano) is a major component in making the zaatar spice blend that has gone truly global. The fresh herb is dried, ground into a powder, then combined with sumac and sesame seeds to create the blend. Though the blend varies from country to country and family to family, these are the standard ingredients.

    For this salad, we’re using the fresh herb, zaatar akhdar.

    Wild Oregano vs. Common Oregano for Zaatar Akhdar

    It’s important to distinguish between wild oregano (Origanum syriacum) and the common oregano you find in most supermarkets (Origanum vulgare):

    Flavor: Wild oregano has a more complex, peppery, slightly bitter taste with pronounced aromatic qualities. Common oregano is milder and sweeter.

    Appearance: Wild oregano has larger, more substantial leaves and grows in bushier, more upright clumps. Common oregano has smaller leaves and tends to creep along the ground.

    Growing region: Wild oregano is native to the Levant and prefers hot, dry, rocky conditions. Common oregano is native to the Mediterranean and grows in a wider range of conditions.

    Culinary use: In Lebanon, wild oregano is eaten both fresh (in salads) and dried (in spice blends and as a general seasoning). Common oregano is almost always used dried.

    For this salad, you really want Origanum syriacum if you can find it. Some Middle Eastern markets sell it fresh in spring, or you can grow it yourself. If you absolutely can’t find it, use the freshest, most flavorful oregano you can source, preferably a Greek or Syrian variety, but know that the flavor will be different.

    Lebanese Oregano Salad  Ingredients

    This salad is very simple to make, and you need only a few ingredients. That means each one really matters. When the ingredients are fresh and of good quality, the salad tastes better.

    Here’s what you’ll need.

    Wild Oregano (Zaatar Akhdar)

    Wild oregano – about 4 bunches (around 400g with stems, giving about 4 cups leaves once picked)

    This is the heart of the salad. Look for bunches with bright green leaves that smell fresh and strong. The top stems should be soft and tender. If the stems are thick and woody, the plant is older, and the leaves may taste more bitter.

    Spring is the best time to use wild oregano. Before the plant flowers, the leaves are softer and less bitter. After flowering, they become stronger and tougher — still edible, just more intense.

    Where to find it:

    • Middle Eastern grocery stores in spring
    • Some farmers’ markets in warm climates
    • Or grow it yourself — Origanum syriacum grows well in pots or gardens with plenty of sun and good drainage

    If you can’t find wild oregano:

    • Fresh Greek oregano
    • Fresh Syrian oregano
    • Regular supermarket oregano (milder, but works)
    • Fresh thyme (different taste, but still nice)

    The Onion

    1 large onion, very finely chopped

    Try to chop it small so it blends into the salad instead of standing out in big pieces.

    Sweeter onions work beautifully:

    • Vidalia
    • Walla Walla
    • Red onion

    Some people prefer white or yellow onions for a sharper bite. It’s really up to you.

    If the onion tastes too strong, soak the chopped pieces in ice water for about 10 minutes. Then drain well before using.

    The Dressing

    Sumac – 1½ teaspoons

    Sumac is a deep red spice made from dried berries. It tastes tangy and slightly earthy. It gives the salad a gentle lemony kick and makes all the flavors pop.

    It’s hard to replace. If you absolutely can’t find it, you can add a little extra lemon zest, but it won’t taste exactly the same.

    Fresh Lemon Juice – ¼ cup

    Always use fresh lemon. Bottled juice tastes flat and won’t give you the same nice flavor.

    Extra Virgin Olive Oil – ⅓ cup

    Use good olive oil here. You’ll taste it. A fruity, slightly peppery oil works best. Lebanese, Palestinian, Greek, or Italian olive oils are all great choices.

    This is not the place for bland or low-quality oil. The olive oil blends with the oregano and helps carry all the flavor.

    Salt – to taste

    Start with a little and adjust. Salt balances the slight bitterness of the oregano and brings everything together.

    Lebanese Oregano Salad ingredients

    How to Make Salatet Zaatar Akhdar Step-By-Step

    The whole process for making the salad takes about 20 minutes. Most of that time is just removing the leaves from the oregano.

    Step 1: Remove the Oregano Leaves

    This is the longest part, but it’s easy once you get the hang of it.

    Wild oregano has small leaves and firm stems. Instead of picking off each leaf one by one, do this:

    • Hold the top of a sprig in one hand.
    • With your other hand, gently pinch the leaves between your fingers.
    • Slide your fingers down the stem in one smooth motion.

    The leaves will fall off quickly, and you’ll be left with a bare stem. Repeat until you have about 4 cups of leaves.

    Throw away the stems, or keep them to dry for tea. They still have aroma, even if they’re too tough to eat.

    This same method works for other herbs like thyme or rosemary.

    Step 2: Wash the Leaves Well

    Wild herbs can carry dirt or tiny insects, so wash them carefully.

    • Put the leaves in a large bowl.
    • Fill with cold water and gently move them around.
    • Lift the leaves out of the water into another bowl. Don’t pour them through a strainer — the dirt will just fall back on them.
    • Repeat this 2 or 3 times until the water looks clean.

    Step 3: Dry the Leaves

    After the last rinse:

    • Take a handful of leaves and gently squeeze them between your palms to remove extra water.
    • Don’t press too hard. You don’t want to crush them.
    • Place them in a large salad bowl.

    They should feel slightly damp, but not dripping. If they’re too wet, the dressing won’t stick properly.

    Step 4: Add the Onion

    Add your finely chopped onion to the bowl with the oregano. Make sure it’s chopped small, so it spreads evenly through the salad.

    Step 5: Add the Flavor

    Now build the dressing directly in the bowl:

    • Sprinkle the sumac over the leaves and onion.
    • Pour the fresh lemon juice evenly over the top.
    • Drizzle the olive oil across the surface, not all in one spot.
    • Add a small pinch of salt to start.

    Step 6: Toss Gently

    Using your hands (the traditional way) or salad tongs:

    • Toss everything gently but well.
    • If using your hands, lightly massage the leaves so they absorb the dressing.

    The oregano should be coated evenly, and the onion and sumac should be mixed throughout.

    Step 7: Taste and Adjust

    Taste it a little.

    Does it need:

    • More salt?
    • More lemon?
    • A little more sumac?

    Adjust slowly until you’re ok with it.

    Step 8: Serve

    You can serve it right away while it’s still fresh. Or, you can let it sit for 5–10 minutes if you like the leaves slightly softened and the flavors more blended together.

    You can serve alone or with pita bread, a sandwich, eggs, grilled meat, etc.

    Frequently Asked Questions

    What if I can’t find wild oregano (Origanum syriacum)?

    Look for it at Middle Eastern markets in spring, or try growing it yourself. If unavailable, substitute with the freshest Greek or Syrian oregano you can find. Common supermarket oregano will work, but will be milder. Fresh thyme is also a different but pleasant alternative.

    Can I reduce the onion?

    Absolutely! Adjust to your preference. Some people use less onion or even omit it entirely.

    Is this the same as the zaatar spice used on manakish?

    No. This salad uses fresh wild oregano leaves. The zaatar spice blend is made from dried, ground oregano mixed with sumac, sesame seeds, and salt. They both come from the same plant, but they’re prepared differently.

    My oregano seems tough. What should I do?

    Use only the most tender leaves from the growing tips. If the whole plant seems tough, it may be too mature or past its prime. Younger plants in early spring are most tender. You can also massage the dressed salad more vigorously to help break down the leaves slightly.

    How much is “4 bunches”?

    About 400g (14 oz) with stems, which yields approximately 4 cups of de-stemmed leaves. The exact amount isn’t critical – adjust the other ingredients proportionally if you have more or less oregano.

    Can I use dried oregano?

    No, this recipe requires fresh oregano. Dried oregano has a completely different texture and flavor profile and wouldn’t work in a salad.

    Lebanese Oregano Salad

    Lebanese Oregano Salad Recipe (Zaatar Akhdar)

    A traditional Lebanese salad made from fresh wild oregano leaves (Origanum syriacum) dressed simply with sumac, lemon juice, olive oil, and onions.
    Total Time 20 minutes
    Servings: 4
    Course: Appetizer

    Ingredients
      

    • 4 bunches wild oregano leaves only
    • 1 large onion finely chopped
    • tsp sumac
    • ¼ cup lemon juice
    • cup olive oil
    • Salt to taste
    • Optional: pita bread, feta, or halloumi

    Method
     

    1. Remove leaves from stems and wash well. Drain and gently squeeze out excess water.
    2. Place oregano in a bowl. Add onion and sumac.
    3. Pour in lemon juice and olive oil. Add salt.
    4. Mix well (use your hands if possible) until everything is coated.
    5. Adjust seasoning if needed. Serve immediately.

    Notes

    • Use fresh lemon juice and good olive oil for best flavor.
    • If you can’t find wild oregano, use fresh oregano or thyme.
    • Best eaten fresh, but can be kept in the fridge for a day.